

Projects:
GTO
My
67 Pontiac GTO
Trunk Body Work
-Trunk pans
-Wheel wells
Body Work Part 1
-Rear Quarters
-Rear Door Jambs
-Window Reveals
Body Work Part 2
-Cowl
-Pillar
-Rocker
Body Work Part 3
-Windshield channel
-Doors
-Fenders
GTO Paint
-Filler work
-Priming
-Blocking
GTO Frame Work
GTO Convertible Top Pt 1
-Top Frame
GTO Convertible Top Pt 2
-Top Trim
GTO Drivetrain
-Engine
-Quadrajet Rebuild
-Exhaust
-Axle
Muncie
Rebuild
popular
Auto to Manual Swap
1967
Ram Air GTO
story
Wheelhouse Filler template PDF
Willys CJ3A
CJ3A Intro
Engine and REBUILD
Drivetrain
BodyWork 1
BodyWork 2
BodyWork 3
BodyWork 4
Paintwork 1
Paintwork 2
Final Assembly
Final Assembly 2
Electrical System
Other Rods
TJ Wrangler Rubicon
CJ7
CJ8
Triumph TR4
Decrepid Dakota
Powerdyne Minibike
Allis Chalmers B engine rebuild Part 1
Allis Chalmers B engine rebuild Part 2
Allis Chalmers Generator to Alternator conversion
Gizmos
Stereo camera
rig
Stereo mic preamp
About:

Feeds

Markup
Allis Chalmers B Alternator Conversion
There are at least a few compelling reasons for converting an old car or tractor to an alternator system:
- Alternators are pretty good at charging at low speeds
- Alternators, at least the modern ones (like the Delco 10si) have integrated voltage regulators
- You can convert from 6V to 12V.
Another big reason, at least to me, was that we didn't have the original generator system for this old tractor. It had undergone an alternator conversion sometime in the past where a one wire Delco alternator was used. As far as I know, it never worked right, and the battery would need jumps after a little while of use. I never diagnosed the system and instead just ripped it apart when the tractor was dissasembled.
The 1 wire Delco alternator is sometimes preferred as some folks think that's as simple as it gets...a one wire hookup. I decided to use the classic 3 wire Delco 10si for one reason: I could incorporate a charging light on the little "instrument" panel on the tractor.
There is scads of info on alternator conversions on the internet. You could spend hours reading about it. So rather than re-hash all that stuff, I'll just hightlight our conversion.
Mounting the Alternator
As mentioned above, there was no generator on the engine when we got to it, so I don't know what existing brackets are original or not. The exisiting alternator was not installed very well, and was barely able to maintain tension on the belt. I re-used the bottom pivot bracket with spacers, but made all the top brackets from scratch.
I made the top brackets out of steel plate material.
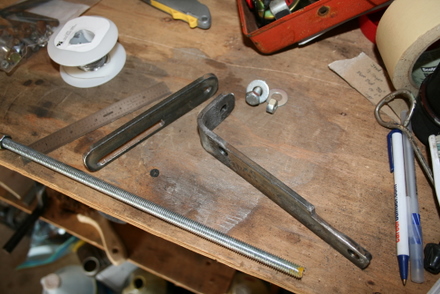
Here's the alternator "hung" off the lower bracket. I think this is the original strap used on the generator.
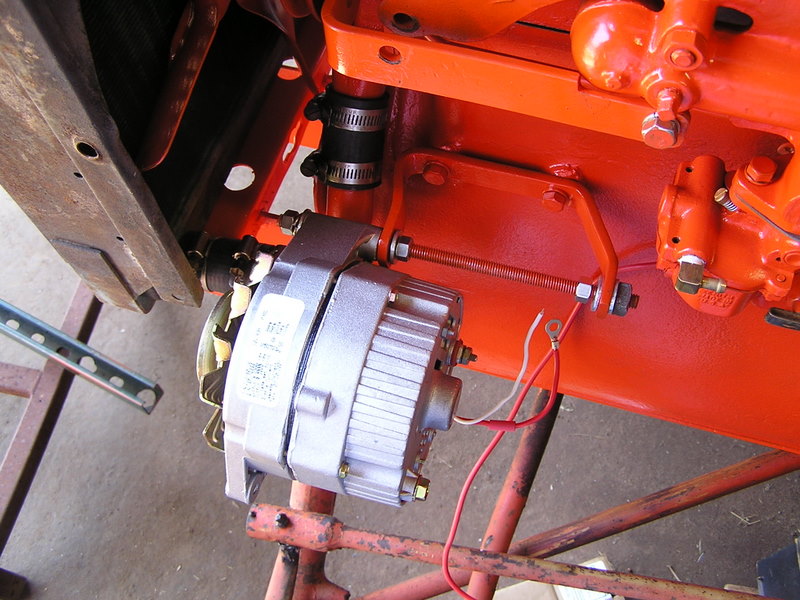
The top pieces were more tricky to figure out. The fore/aft piece bolts onto the manifold in two spots. The forward hole uses a spacer between the bracket and manifold.
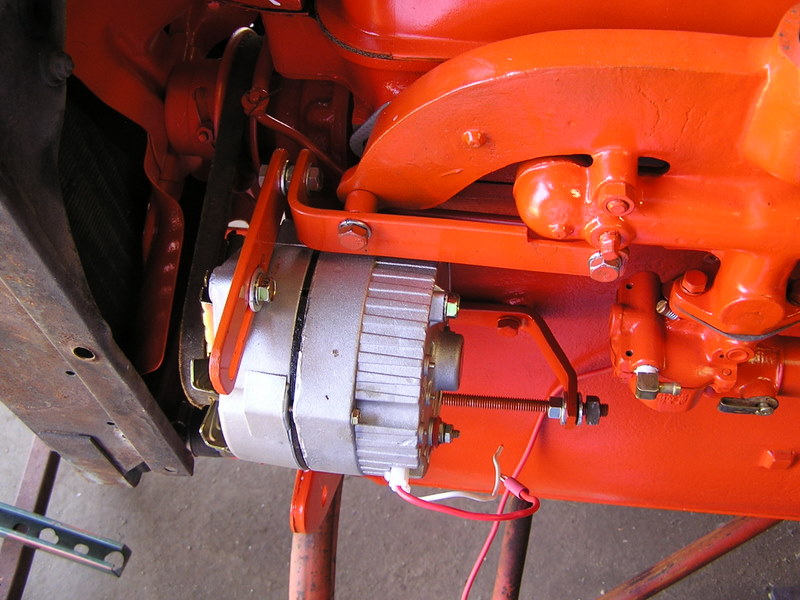
The above arrangement worked great, except it was a bit wobbly even when all tightened up. I triangulated the set up above by making a strap from the far end of the slot to the back bolt hole on the fore/aft strap.

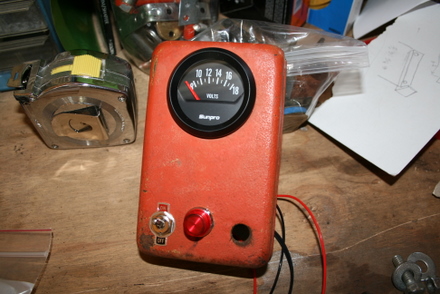
Instrument Box
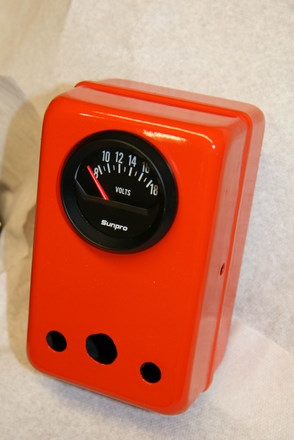
The tractor features a tiny little instrument panel/box. It originally had a amp gauge, but I decided to put in a voltmeter. Also a "charge" light for the alternator, and an ignition on/off switch.
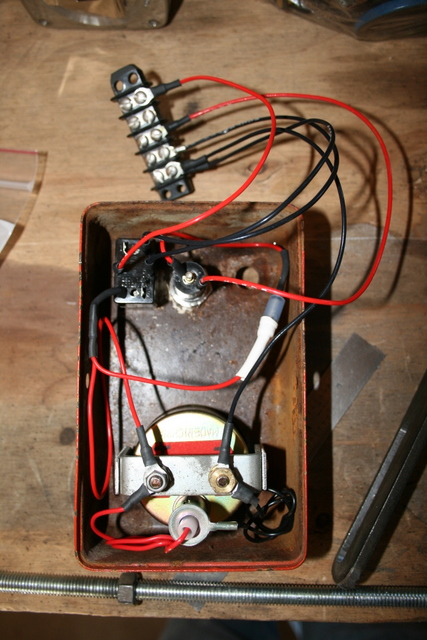
The inside of the box isn't too busy, but I still used a junction block to make things a bit more organized and modular/removable.
I felt bad for the ugly little box and shined 'er up with a new coat of paint. Heck, I wired up the gauge light too.
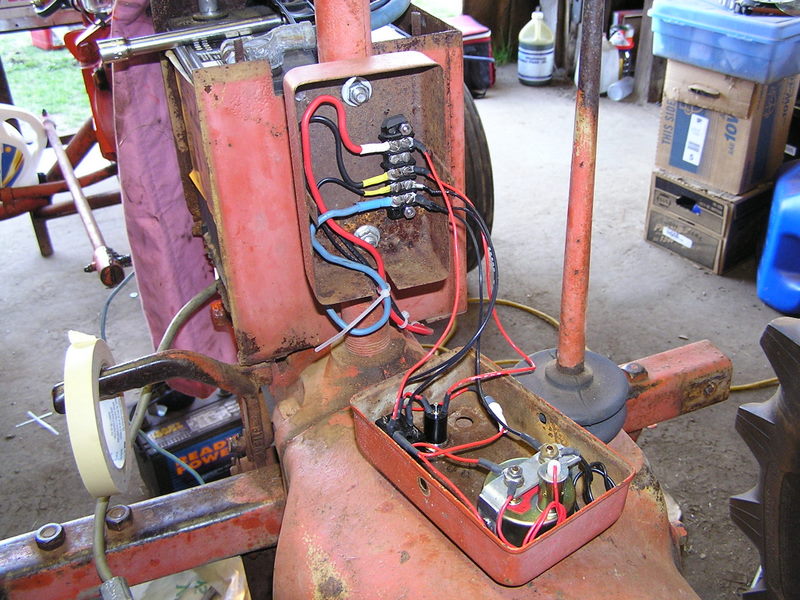
All the wiring was replaced on the tractor. Looking at the picture below, starting at the top left of the junction block: red 10 gauge wire goes to the starter post positive stud. This supplies the instrument panel with +12VDC. The next wire down is the alternator field wire (alt terminal #1) of which the idiot light is wired in series. The next wire down goes to the magneto grounding stud. When the switch is in "off" position, it'll send ground to the magneto stud. Lastly, is a big fat ground. I wired it to the battery box bolt behind the instrument box. Now I'm wondering if I should put in a fuse for the alternator circuit. See schematic below for a better idea of the wiring.
The alternator needs a two wire connector to wire to. You can buy a nice pigtailed connector at any auto parts joint. Here's the pigtail installed on the alternator:
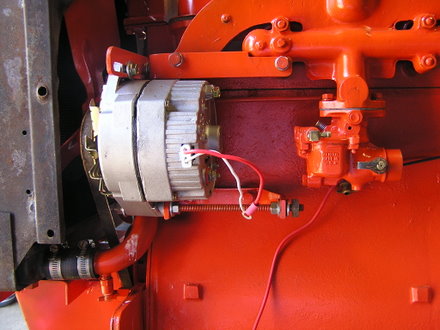
The white wire above is Terminal 1, the "field" wire that runs to an "idiot" light wired in series to the switched +V terminal inside the instrument box. When operational, the light is should not be lit; that means there is no voltage bias across the bulb. So the alt should be charging. When there is a voltage bias across the bulb, the bulb is lit and the alternator is NOT charging. This tractor idles pretty low, so the revs must be brought up a bit initially to get the light to blink out. Once it's out, the revs can be brought down and it keeps charging at 14.4V or so, and all is good. A smaller alternator pulley would probably eliminate this problem, but it's not a big deal, so we're letting it be.
The red wire seen above on the connector is Terminal 2, the "sensing" wire. In our simple wiring case, it is simply looped around and connected to the battery stud on the back of the alternator (you can see I've already put a eye-ring on it). Some folks run it further to a more distant battery post.
Here's a schematic of the complete tractor wiring:
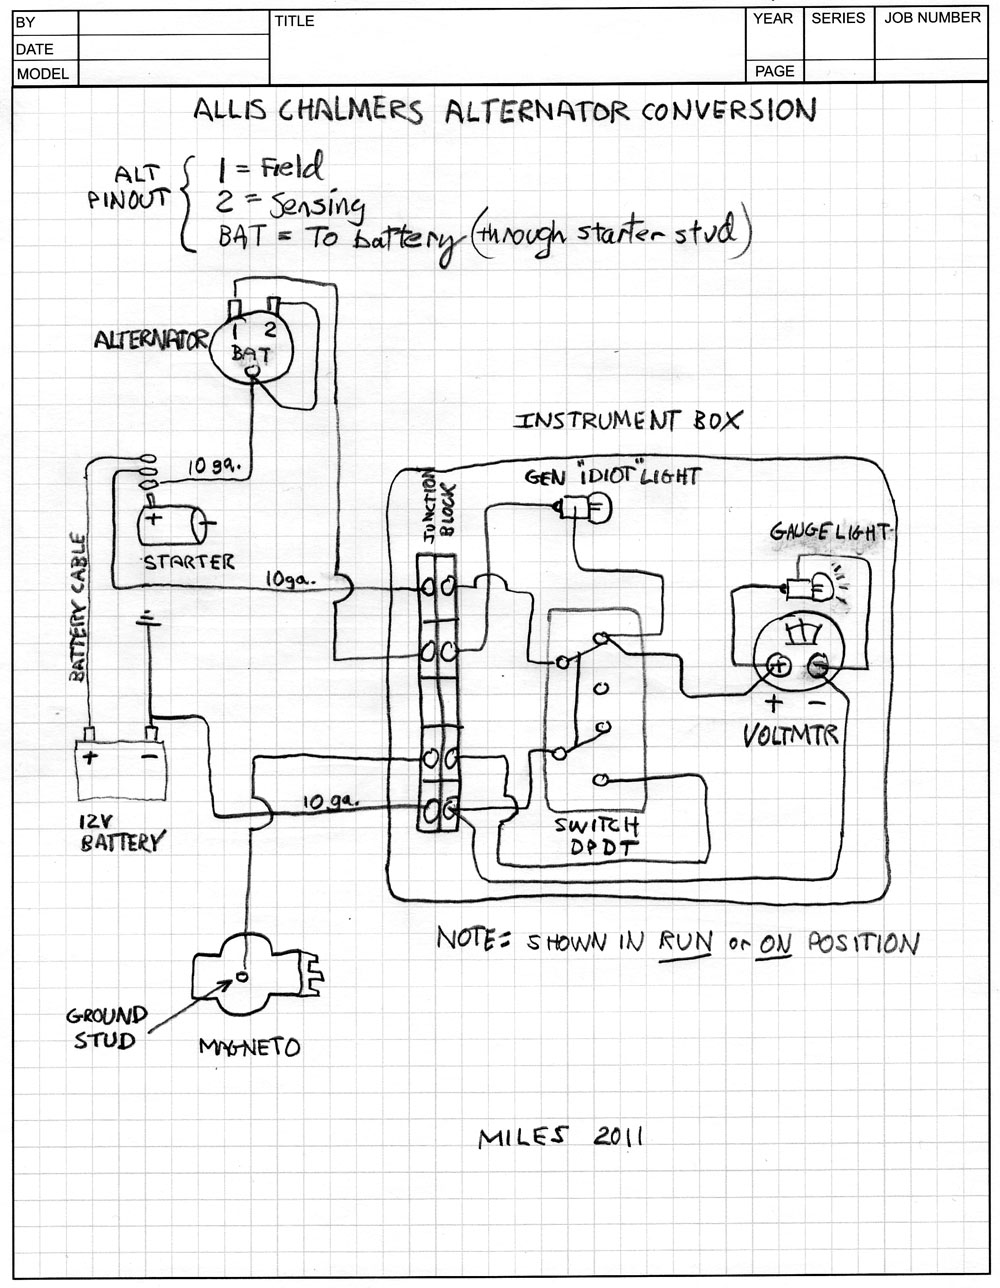
Be careful to note the wires merely passing over others in my crude drawing. Also note that the DPDT switch is shown with the tractor in RUN position. When switched off, it lets the magneto stud go to ground, thus killing ignition. Turning to OFF also removes +V power to the voltmeter, the voltmeter gauge light, and also removes power to the field of the alternator. The battery should have no draw at all in the OFF position.
Another note about the starter. It's a 6V starter but we run 12V through it. Apparently there's some room engineered into the starters, but we are still careful about not running it for long periods. It's not a problem since the tractor fires up on the first go around.
I hope to wire in lights for the tractor this summer. I may also put in a taillight too. For this I believe I'll wire in a relay so I'm not running a load of amps inside the instrument box. More to come soon I hope!
SFS
Links:
Willys Jeep CJ3A Forum
There exists a nice set of webpages for CJ3A's. It's got a forum too that caters to both '3A's and CJ3B's. It's a great resource, and frequented by very knowledgible folks.
1967 GTO Original Owner
These two videos feature an original owner GTO. This car was featured in Hemmings Muscle Cars magazine a couple years ago. Part 2 has inside and outside shots of the owner driving the car. Very nicely done.
Blues Maker
"Mississippi" Fred McDowell. One of the great Bluesman. This is a documentary made in 1969.
Pinstripes
Pinstriping the ol' fashioned way. Pretty nice.
MGB Racecar
I've always liked MG's. Watch this MGB lift it's inside tire a few inches off the tarmac when going "'round the bend". Awesome.
Pepsi Throwback

Pepsi has put out a "limited edition Throwback" version of Pepsi with REAL sugar, instead of high fructose corn syrup which has been used since the 80's. Holy cow there IS a difference; it's WAY better. Find some quick!