
Projects:
GTO
My
67 Pontiac GTO
Trunk Body Work
-Trunk pans
-Wheel wells
Body Work Part 1
-Rear Quarters
-Rear Door Jambs
-Window Reveals
Body Work Part 2
-Cowl
-Pillar
-Rocker
Body Work Part 3
-Windshield channel
-Doors
-Fenders
GTO Paint
-Filler work
-Priming
-Blocking
GTO Frame Work
GTO Convertible Top Pt 1
-Top Frame
GTO Convertible Top Pt 2
-Top Trim
GTO Drivetrain
-Engine
-Quadrajet Rebuild
-Exhaust
-Axle
Muncie
Rebuild
popular
Auto to Manual Swap
1967
Ram Air GTO
story
Wheelhouse Filler template PDF
Willys CJ3A
CJ3A Intro
Engine and REBUILD
Drivetrain
BodyWork 1
BodyWork 2
BodyWork 3
BodyWork 4
Paintwork 1
Paintwork 2
Final Assembly
Final Assembly 2
Electrical System
Other Rods
TJ Wrangler Rubicon
CJ7
CJ8
Decrepid Dakota
Powerdyne Minibike
Allis Chalmers B engine rebuild Part 1
Allis Chalmers B engine rebuild Part 2
Allis Chalmers Generator to Alternator conversion
Gizmos
Stereo camera
rig
Stereo mic preamp
About:

Feeds

Markup
CJ3A Paintwork Part 2
This is the second part of a re-paint of a 1950 Willys Jeep CJ3A. Scoll down for latest updates.
October 2018
In the CJ3A Paintwork Part 1 entry, I finished up the filler and primer work, and the tub was ready for paint. This job turned out to be quite difficult and I had to do quite a bit of rework. Read on to see the details.
Single Stage Painting
I decided to purchase my finish paint from Summit Racing. Their line of urethanes is made by Kirker (at least at the time of my purchases) and I had used some of their stuff in the past. To my dismay however, when I placed an order for a gallon of their "Merlot", I could only get the low VOC stuff to my address.
My last experience with single stage paints was with Kirker "Hot Rod Black" for many parts of my GTO restoration and I was very happy with it. For this new low VOC stuff, the data sheet baseline recommendation was to simply mix the color and hardener and spray, so that's what I tried first.
I sprayed the entire tub one afternoon, and I had a hard time with it. It seemed to spray really dry, and didn't flow out well at all. Another thing that threw me was how fast this stuff dries. I couldn't believe it. I struggled with the inside surfaces because it's tricky to spray one area and keep the overspray from other nooks and crannies nearby. Still, it was nice to finally see color.

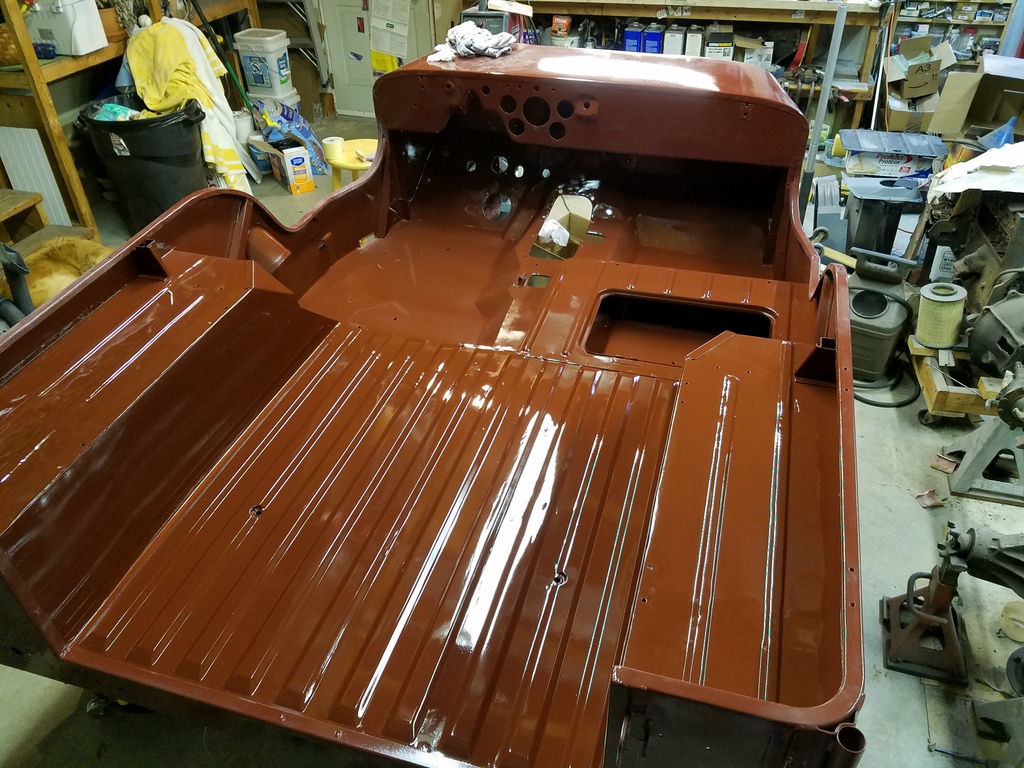
I had intended to paint everything but I stopped with the tub and underside of the fenders. I read the data sheet and it said if I really must, I can add reducer. So next day I added reducer, and it made a huge difference. Not amazing, but much better. The paint flowed out so much nicer. I painted the hood, outside fender surfaces, tailgate and windshield.
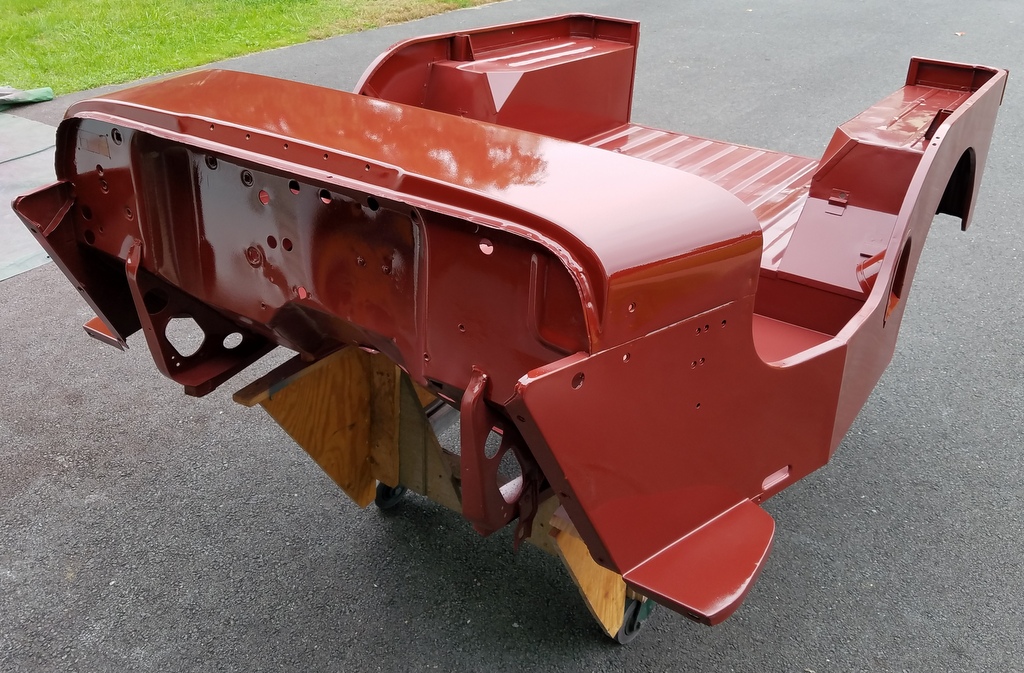
I felt much better about all the paintwork done with reducer. But this left me with the tub, which was pretty "dry" looking. I decided to sand down the entire inside of the tub and repaint it. The Summit Urethane dries HARD, and it was a bear to sand down.
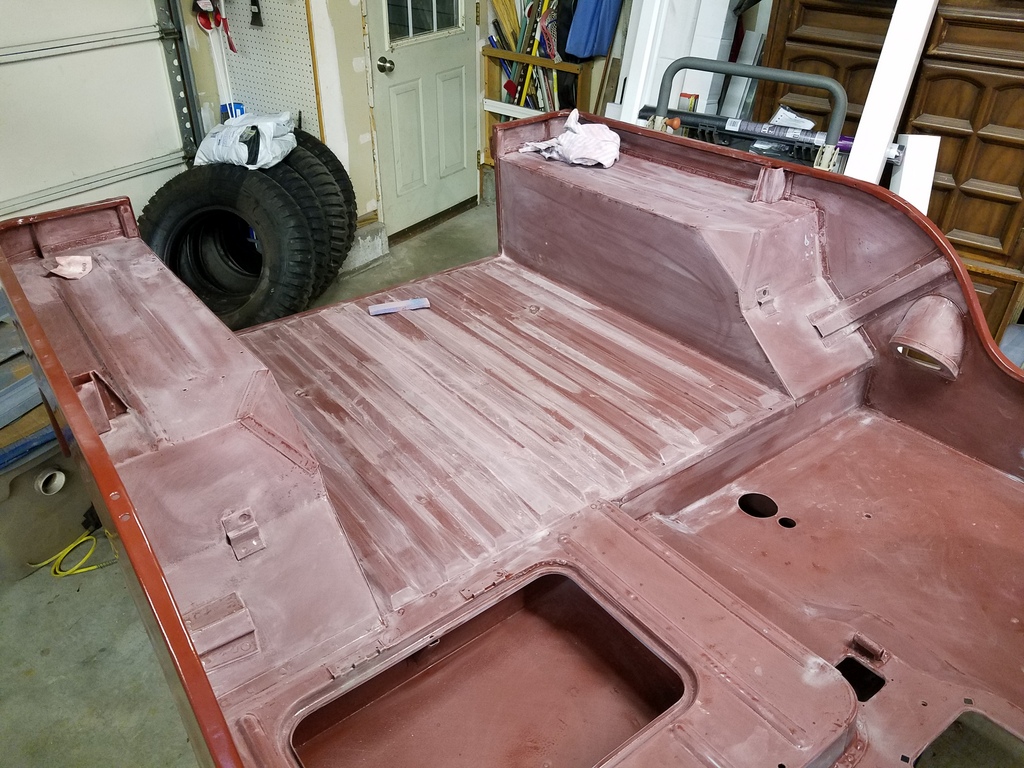
The repaint looked much better. As an aside, please note that my cell phone camera CANNOT capture the true red hue of this paint in fluorescent light!
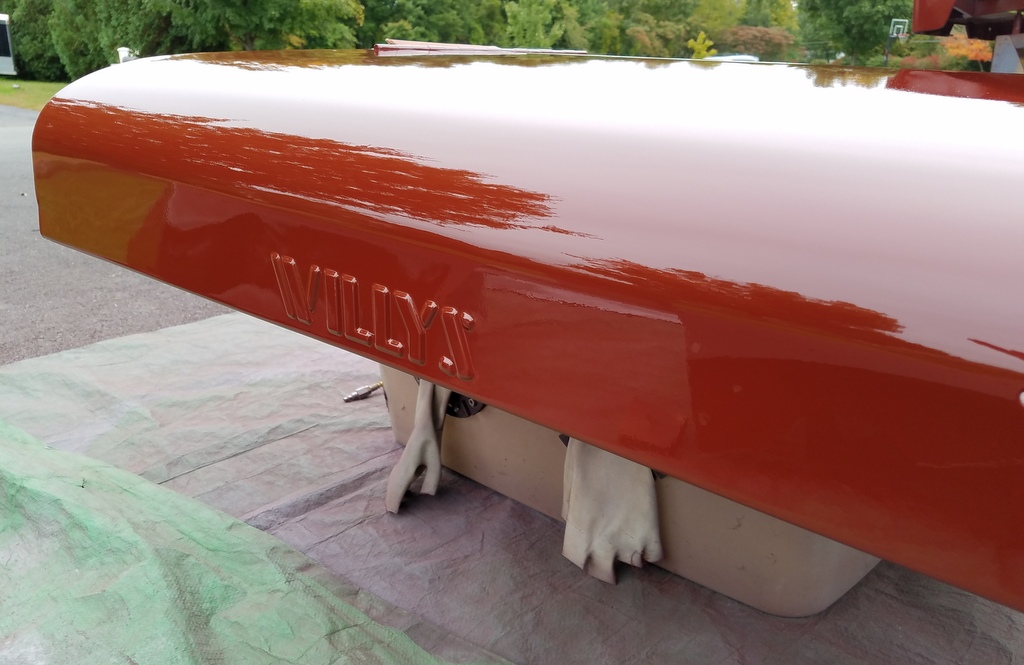
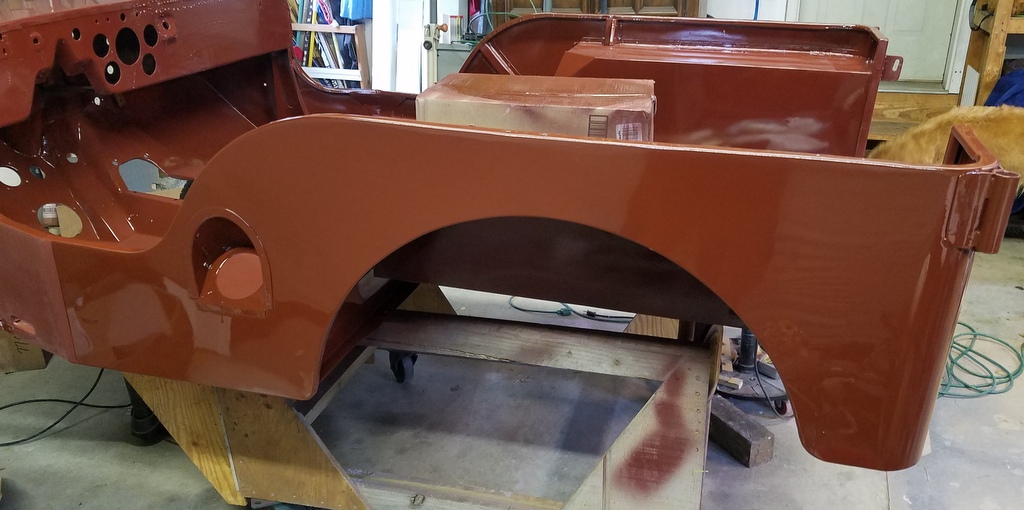
The exterior surfaces had a good film thickness, so I thought it would require just a cut and buff. Here's the driver side after some initial wetsanding.

I did have a few runs, and when I wet-sanded these runs flat, I found them to have tiny voids like bubbles. Ugh. I ended up sanding the paint off in these areas and repainting several sections. This is the repainted driver side.
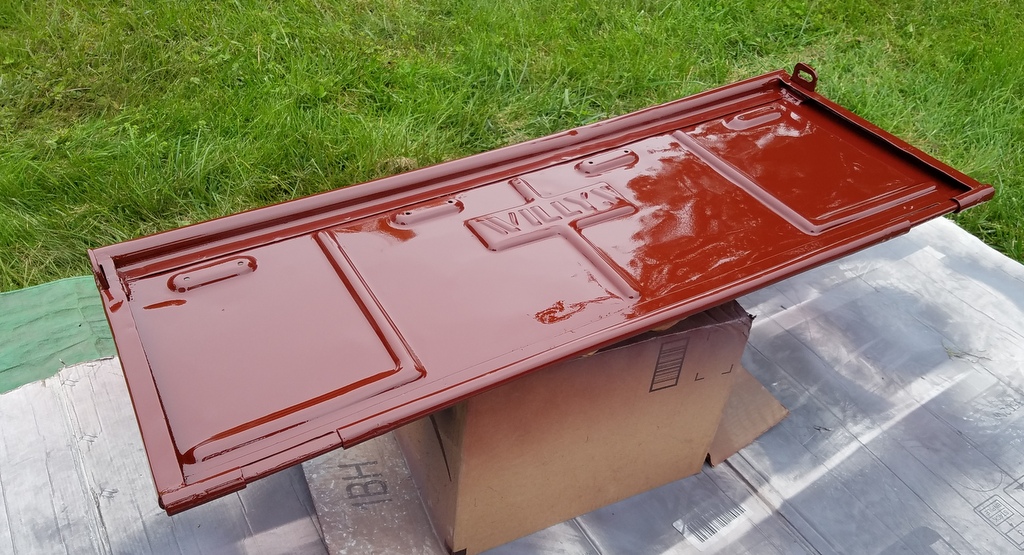
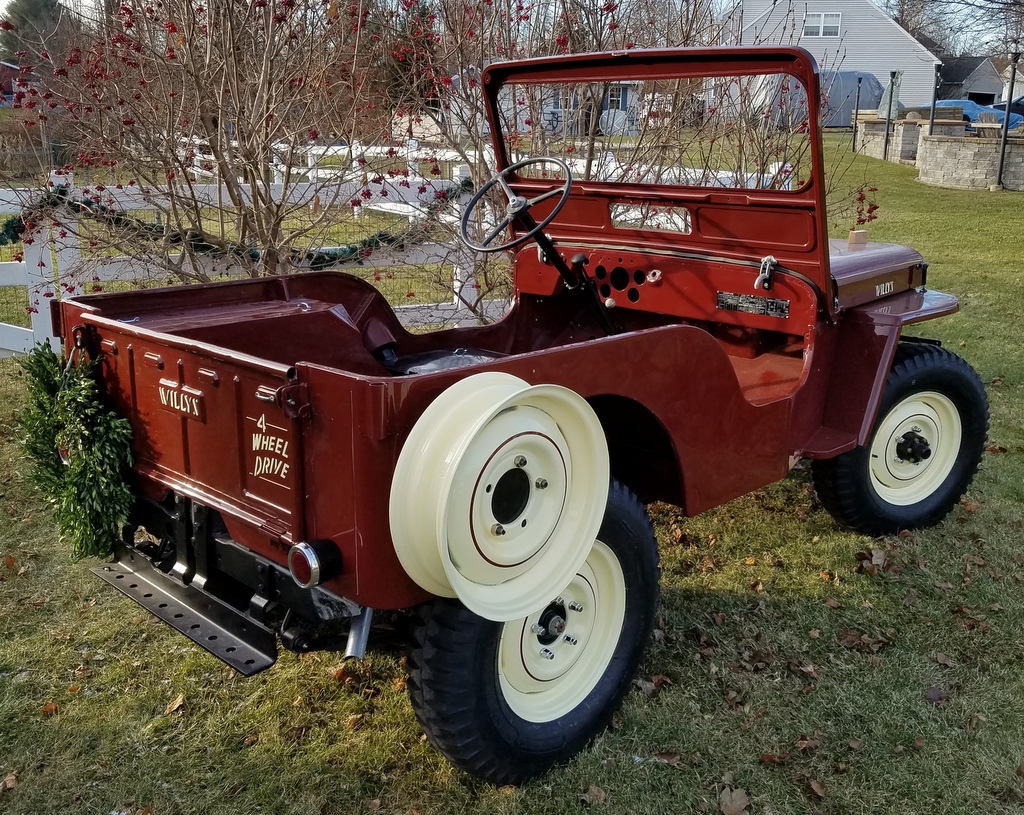
WIllys Stencils
Once the tub painting crisis had passed, I took a breather to do a fun part of the project: The "artwork".
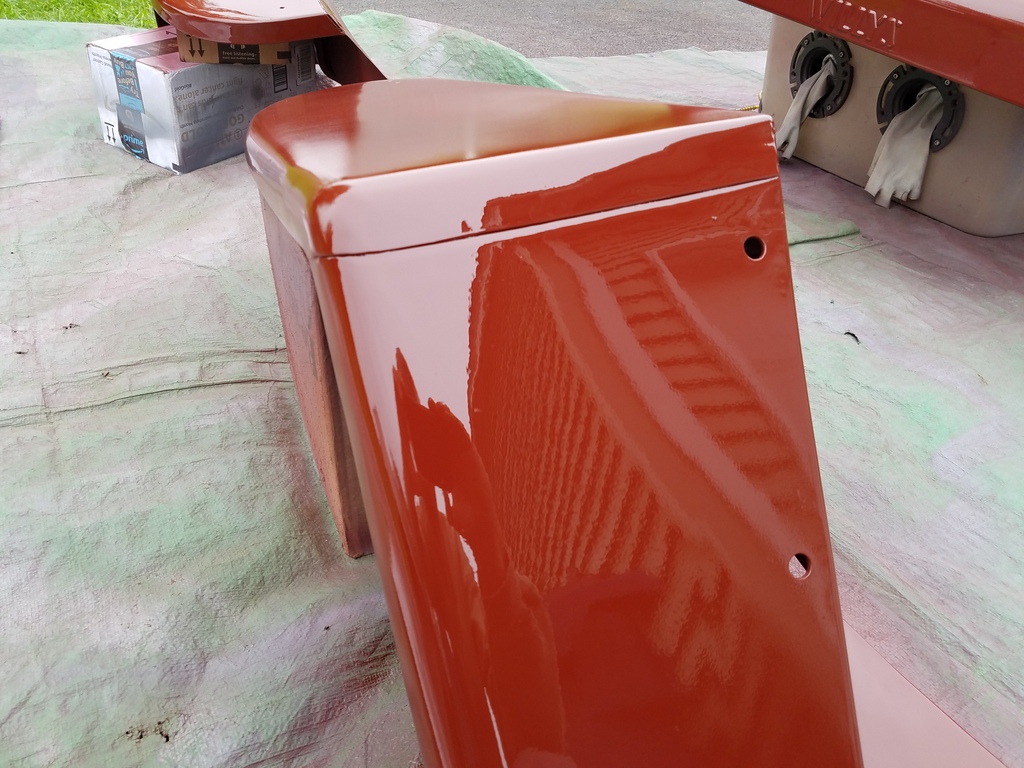
Willys painted the CJ3A embossed hood and tailgate logos with a color that contrasted with the body color. A cool stylized "4 Wheel Drive" stencil was also painted on the right side of the tailgate. By 1950 Willys was using a nice cream color as a contrast against their Luzon Red. I think it may have been their "Wake Ivory" color. I found a small sample of the cream color on the backside of one of my wheels. (The wheels and stencil color were usually the same.) I went through a bunch of paint chips at a local NAPA paint store and found a great match for the cream and bought a quart.
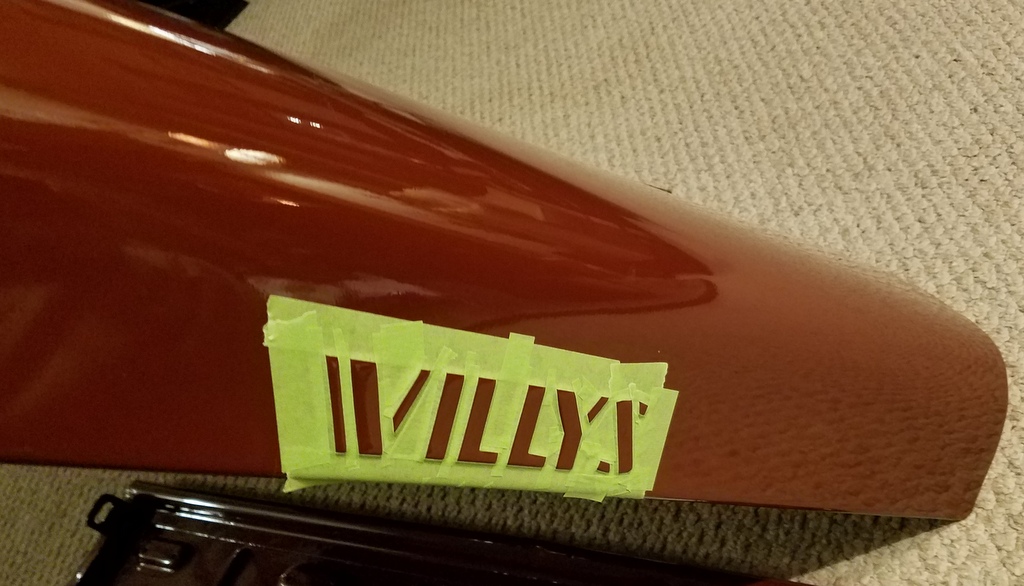
The embossed letters on the hood and tailgate do not have sharp raised edges so, for me, the only way to get crisp edges was to mask them. Rather than buy stencils, I employed the brute force method of simply masking off each letter by hand. I cut thin strips of the green 3M masking tape and carefully laid out each letter and burnished the edges as best I could.
Free-hand masking the "4 WHEEL DRIVE" on the flat surface of the tailgate would be an amazing feat indeed, so rather than climb that mountain, I made a masking stencil with contact paper. It's a simple matter of laying a printout of your logo onto the contact paper, cutting the pattern out and then adhering the contact sheet onto the panel. The adhesive in the contact paper is enough to burnish down and keep the paint from bleeding through.
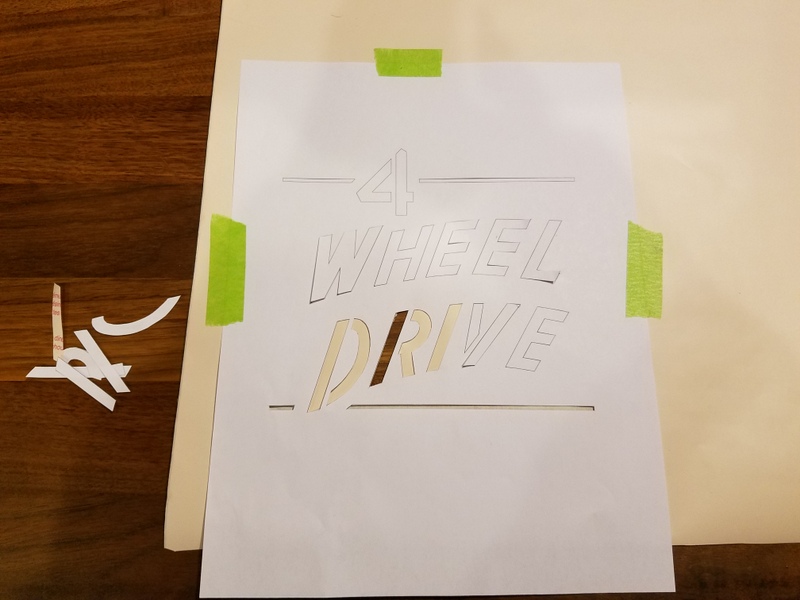
I made the logo file myself some years ago based on my original stencil as well as the original Willys blueprint found on the internet. (Incidentally, I sent this file to the webmasters of the CJ2A, CJ3A and CJ3B websites and I believe it can be downloaded from those sites, as well as here [coming soon].)
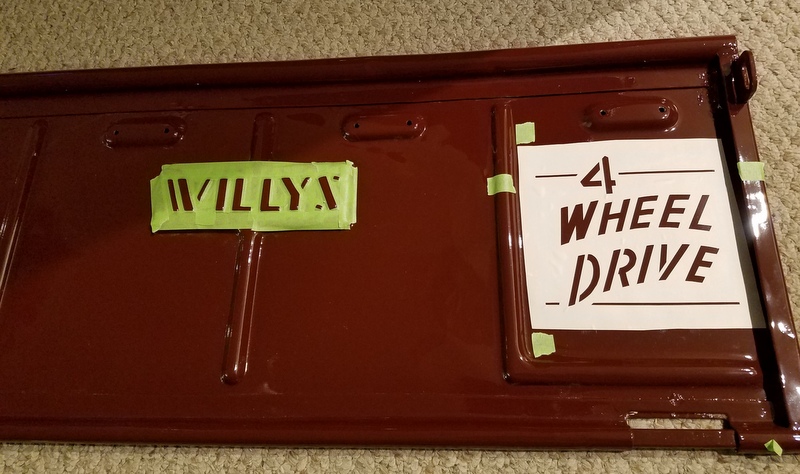
Here's the tailgate with all the masking complete, and I'm ready to cover the rest with paper.
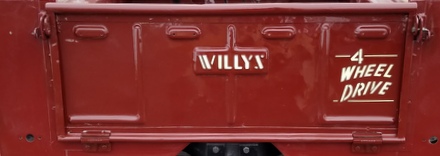
I shot 3 coats of the cream paint with a detail spray gun. The spec sheet for this paint required reducer in their mixing instructions (not optional like the Summit stuff) and boy it sprayed so much nicer than the Summit urethane. On the other hand, it did take much longer to cure so I had to be careful. I pulled all the masking off immediately after spraying so that touchups could be done easily as required. There were a few bleed-throughs but some lacquer thinner and shaved Q tips took care of that.
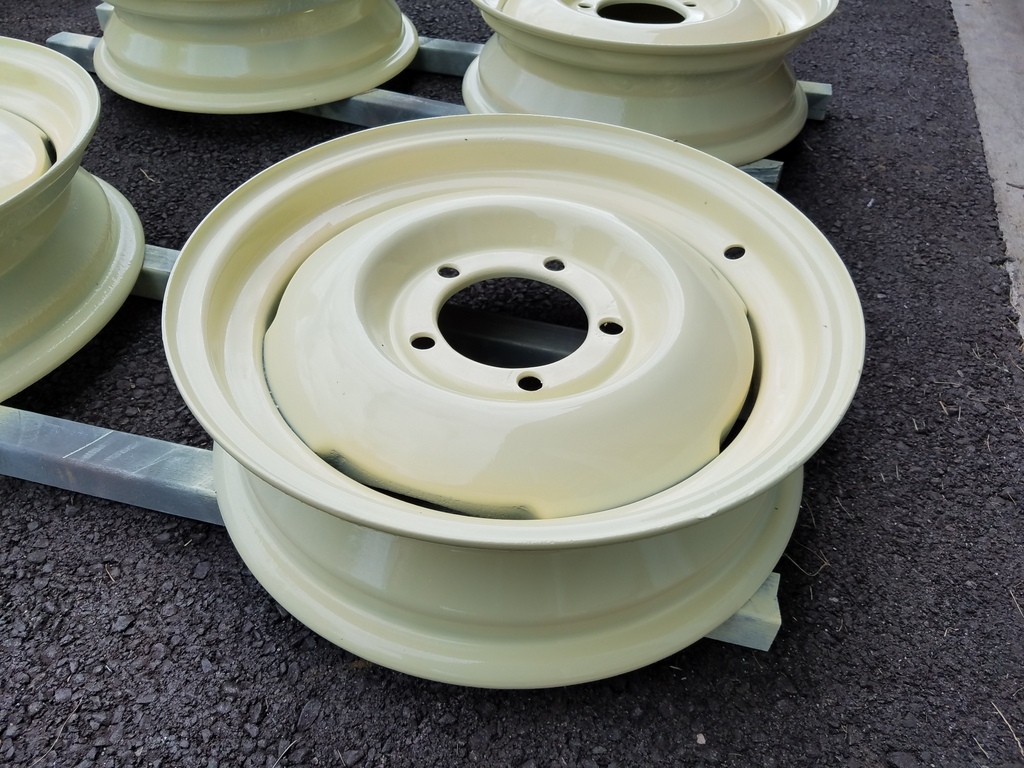
Wheels
Another fun diversion was wheel painting. The wheel surfaces were painted in shifts; backside/insides first, cure, then they were flipped over for the fronts. Here they are done.
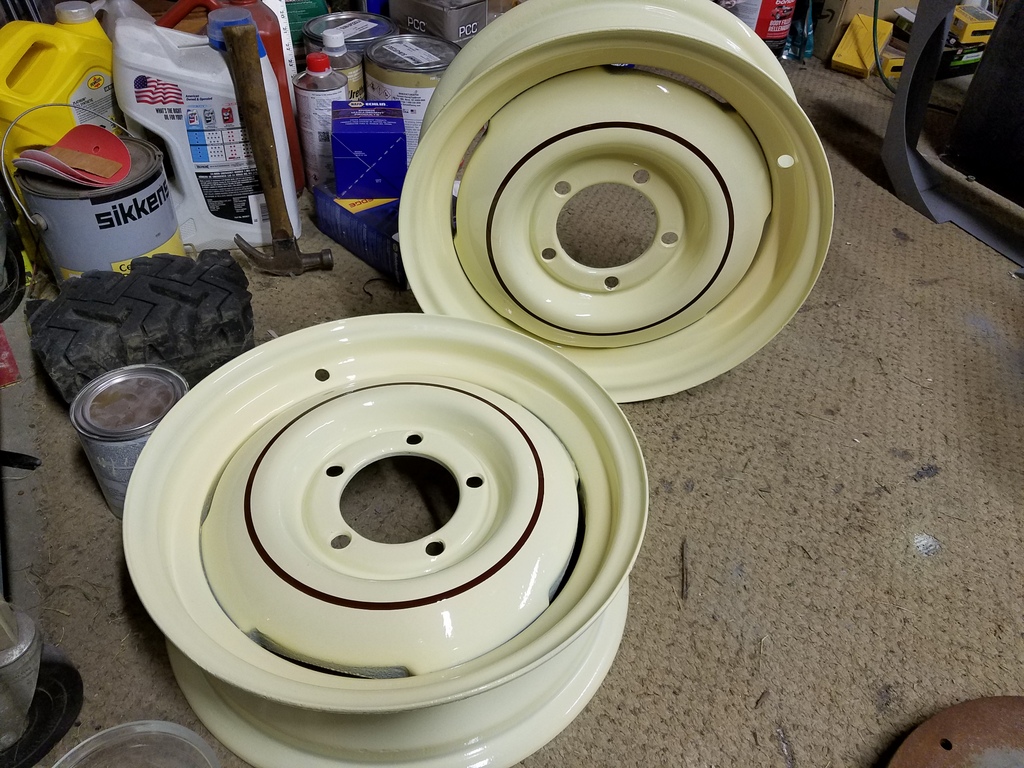
I have a Beugler striping tool, so I used that to add the pinstripe to my wheels. As noted before, I measured the original stripes so I could duplicate them as close as possible. For striping paint, I mixed a wee bit of my Merlot red and added a LOT of reducer to thin it down. My tool does not have a wheel to get the 3/16" width I needed, so I made two passes next to each other to get the desired width. I made a spring loaded fixture to hold the tool against the wheel, and used my old axle to mount the wheel and rotate it while applying the stripe. In the picture below, I'm on the first pass.
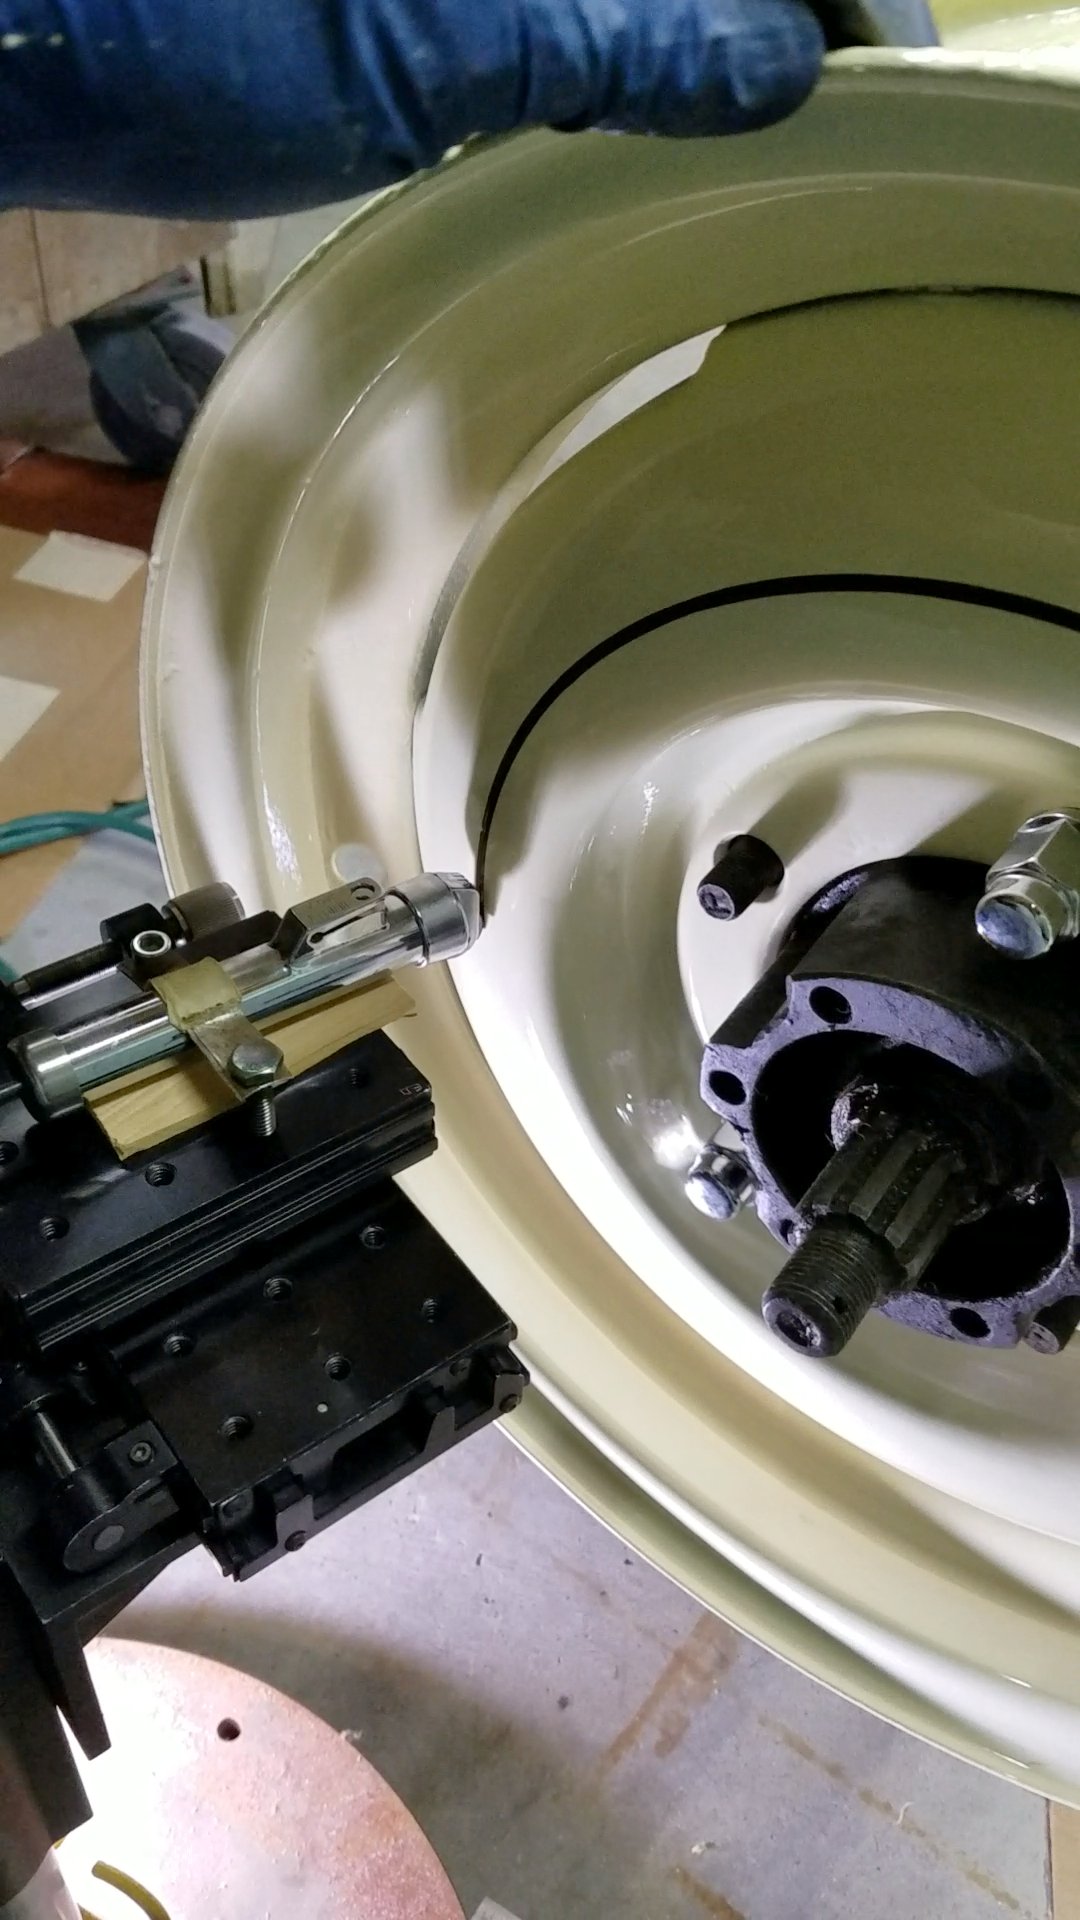
If I do say so myself, the stripes came out perfectly.
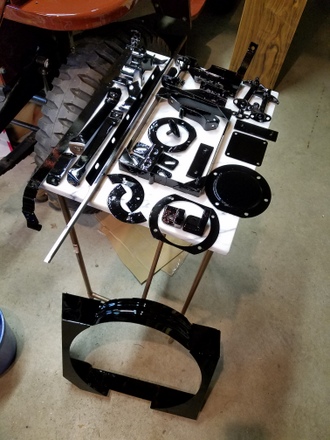
When I bought the cream paint from NAPA, I also bought some gloss black. The big items to be painted gloss black are the fan shroud and trans cover, but there were dozens of little parts like the hood latches, cover plates, etc. This paint was from the same paint family and it also sprayed really nicely.
The original data plate on the dash was quite eroded, and I found that the new ones offered aren't that nice. So I fixed up the one I had. The nice thing about the original is that the images and text are embossed.
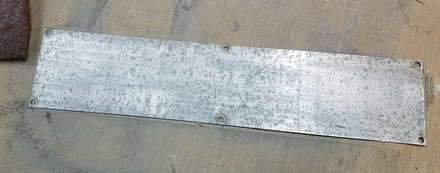
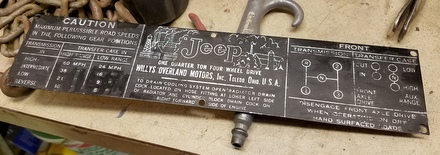
I sprayed it black and carefully sanded it to reveal the text and images. There was still some areas that got unintentionally sanded, so I touched them up. You can see this in the lower left of the plate.
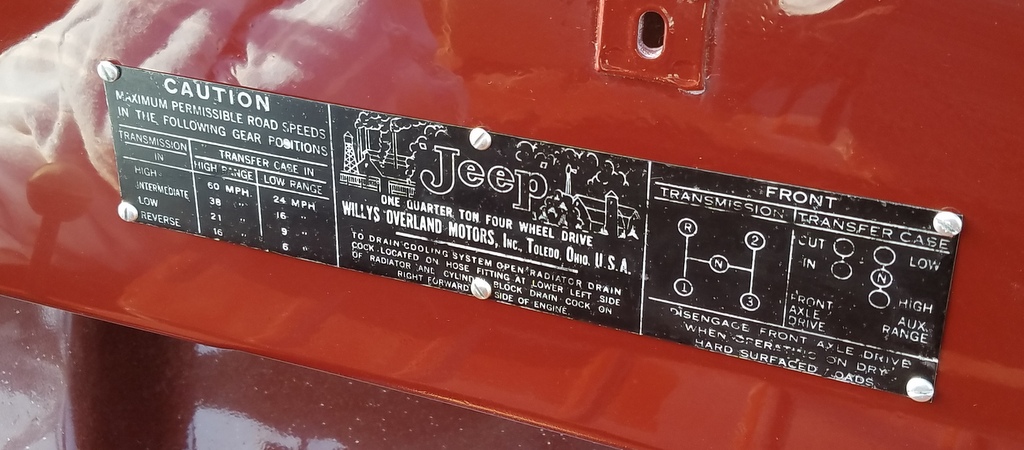
To hide the touchups, I sprayed the whole thing with matte clear. This also will serve to protect it. It looks waaay better. I will probably do this treatment to my VIN plate too.
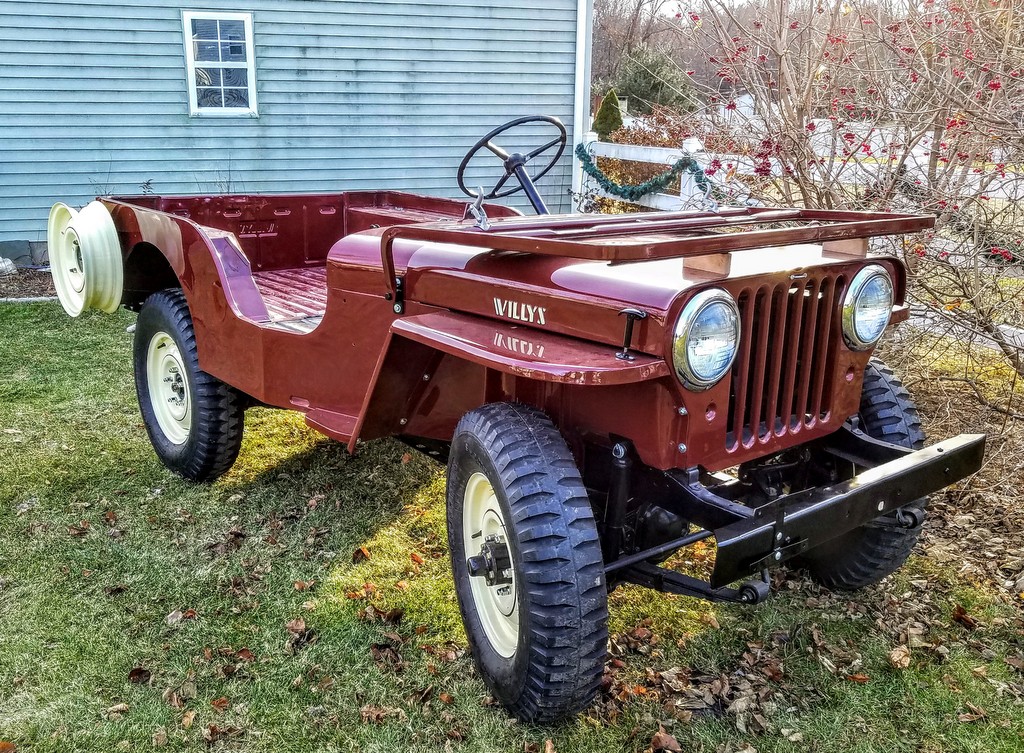
There's a bit more paint work to do, but it'll be the same routine to get it done. I'm hitting peak assembly mode on the Jeep now, so I'll be making a new page soon highlighting the finished product. Here's a teaser shot:
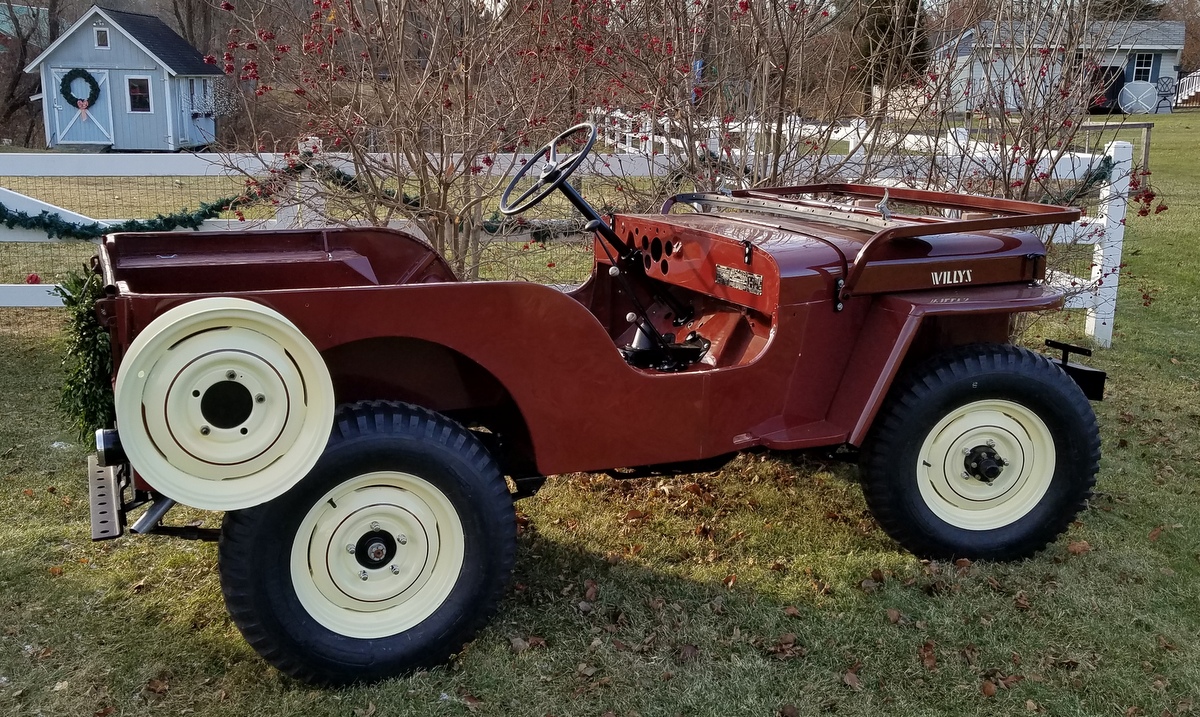
May 2019
In the last update, I had gotten the paint finish good enough to start assembly. I got it assembled enough so I could push it around for a few pictures. It was exciting to see what this Jeep looked like when new.
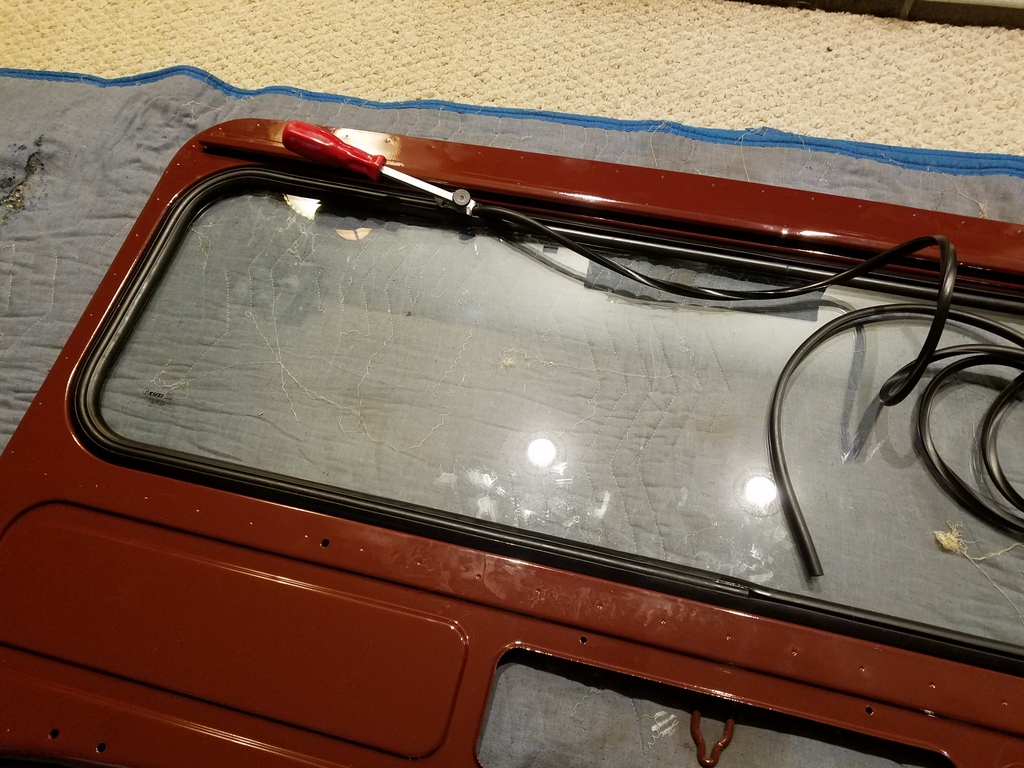
One final nit I had was with the windshield finish; there were a few flaws from poor prep so I sanded it down, smoothed the flaws, and repainted it.

I don't have a full picture of the windshield frame in finished paint, but it did come out waaay nicer. I do have a picture of the glass installation. I got the glass from eBay of all places. It was $115 to my door. Quite happy with it. I got a gasket from OMIX ADA and also a locking strip tool from Amazon.
Finally, I wet sanded the hood down and polished it. Here it is after some wet sanding. This basically gets rid of all the orange peel. I used Maguiers 205 and 105 compound.

So that's it for the tub paint. I still have some piece-part painting with gloss black, but I'll show that in the CJ3A Assembly Page.
SFS
Links:
Willys Jeep CJ3A Forum
There exists a nice set of webpages for CJ3A's. It's got a forum too that caters to both '3A's and CJ3B's. It's a great resource, and frequented by very knowledgible folks.
1967 GTO Original Owner
These two videos feature an original owner GTO. This car was featured in Hemmings Muscle Cars magazine a couple years ago. Part 2 has inside and outside shots of the owner driving the car. Very nicely done.
Blues Maker
"Mississippi" Fred McDowell. One of the great Bluesman. This is a documentary made in 1969.
Pinstripes
Pinstriping the ol' fashioned way. Pretty nice.
MGB Racecar
I've always liked MG's. Watch this MGB lift it's inside tire a few inches off the tarmac when going "'round the bend". Awesome.
Pepsi Throwback
Pepsi has put out a "limited edition Throwback" version of Pepsi with REAL sugar, instead of high fructose corn syrup which has been used since the 80's. Holy cow there IS a difference; it's WAY better. Find some quick!