
Projects:
GTO
My
67 Pontiac GTO
Trunk Body Work
-Trunk pans
-Wheel wells
Body Work Part 1
-Rear Quarters
-Rear Door Jambs
-Window Reveals
Body Work Part 2
-Cowl
-Pillar
-Rocker
Body Work Part 3
-Windshield channel
-Doors
-Fenders
GTO Paint
-Filler work
-Priming
-Blocking
GTO Frame Work
GTO Convertible Top Pt 1
-Top Frame
GTO Convertible Top Pt 2
-Top Trim
GTO Drivetrain
-Engine
-Quadrajet Rebuild
-Exhaust
-Axle
Muncie
Rebuild
popular
Auto to Manual Swap
1967
Ram Air GTO
story
Wheelhouse Filler template PDF
Willys CJ3A
CJ3A Intro
Engine and REBUILD
Drivetrain
BodyWork 1
BodyWork 2
BodyWork 3
BodyWork 4
Paintwork 1
Paintwork 2
Final Assembly
Final Assembly 2
Electrical System
Other Rods
TJ Wrangler Rubicon
CJ7
CJ8
Triumph TR4
Decrepid Dakota
Powerdyne Minibike
Allis Chalmers B engine rebuild Part 1
Allis Chalmers B engine rebuild Part 2
Allis Chalmers Generator to Alternator conversion
Gizmos
Stereo camera
rig
Stereo mic preamp
About:

Feeds

Markup
GTO Paint Work
This page deals with preparing the GTO for a base coat / clear coat paint job.
Preparing for Paint
June 30, 2012
First thing was to finish up all the details that I just never completed. Like priming and painting every surface inside the cavities of the rear quarters, inside the doors, the inside various other repaired areas. The undersides and firewall of the car had been painted with a Limco semigloss black before the body was placed back on the frame. (See GTO bodywork Page 2 for how that came out.)
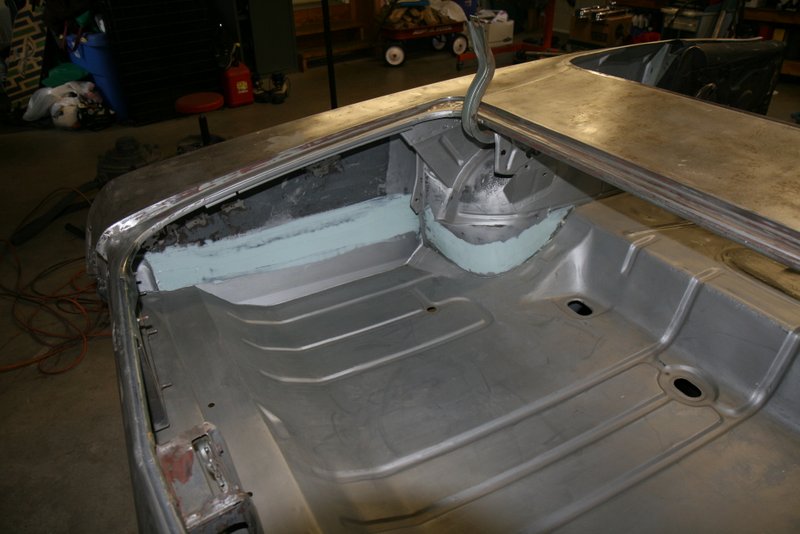
The inside facing welds of the rear quarter patch panels were detailed at this time: The seams can be seen from the trunk, so this required grinding and then filler work. It looks pretty good. Here it is with the filler freshly applied.
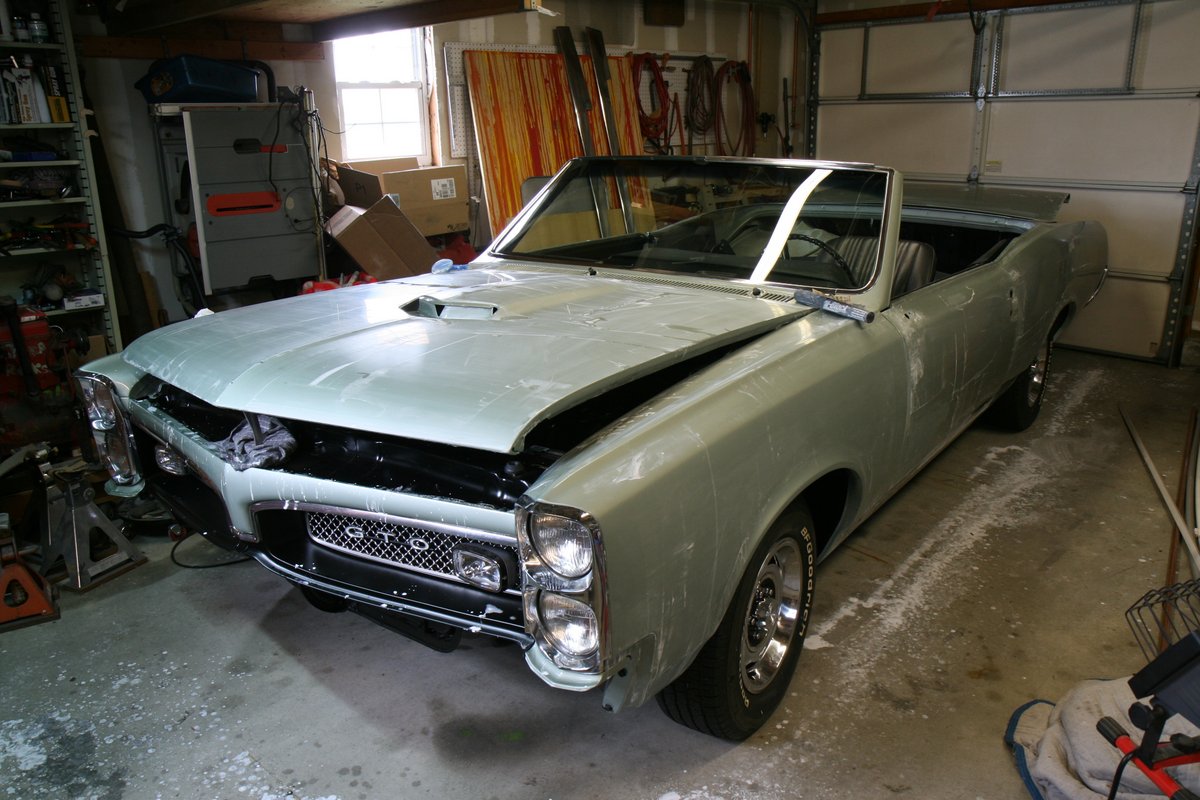
After these final punch list items were taken care of, the car was stripped down to metal. This was a dreary job as there was alot of paint from the second paint job that had to come off, and it was tough stuff.
I had enough RM EP epoxy primer left to seal the whole car. All subsequent filler work would be done on top of this epoxy layer.
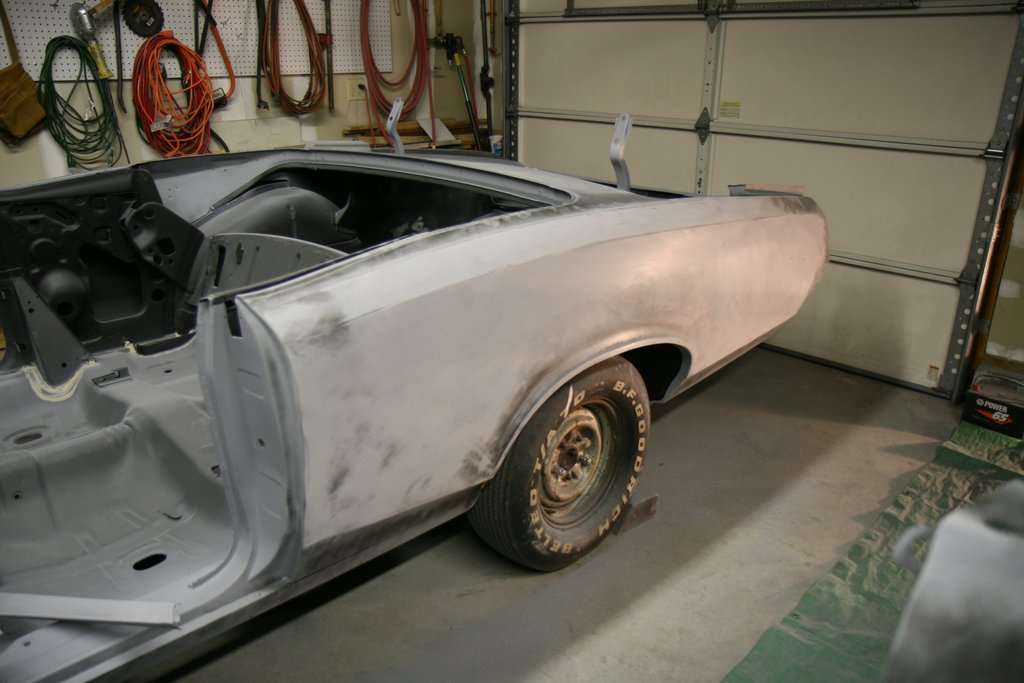
I started in on the rear quarters. I used Evercoat Rage Extreme as my filler of choice. Here's a picture early in the process. I probably had three major applications of filler on the quarters, and quite a few skims here and there as I got more detailed in getting it all straight.

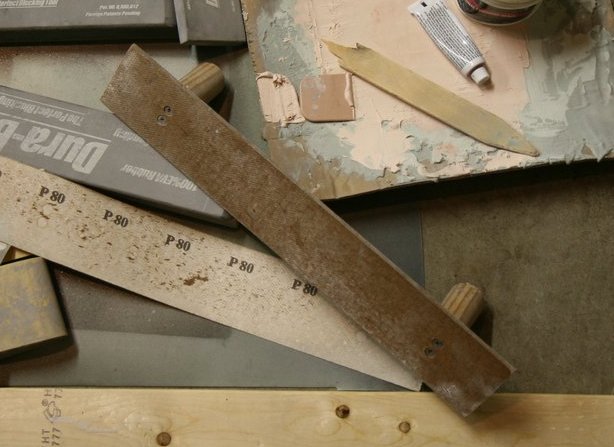
Most of the filler applied ended up on the floor as it was sanded off. I bought a set of Durablock sanding blocks to use. These blocks worked out great. I used 2.75" width pressure sensitive sandpaper that comes in rolls. You can peel off the length you need and stick it to the sanding blocks. I used 80 grit to start the whole filler shaping process. It cuts pretty good once you get through the sticky layer left after the filler cures. I used a rag dampened with lacquer thinner to scrub off the stickiness. This helps reduce the initial gumming up of the sandpaper.
I ended up making one board myself with some masonite. I glued and screwed on some handles. This came in handy when I was shaping the rear quarters. It can bend quite nicely so I used it vertically against the quarters. The quarters, of course, have a heavy curve from top to bottom. The Durablocks are actually quite stiff and since they are thick, the sandpaper kinks and wrinkles if you try to bend the durablocks too much. The masonite curves, but since there is no real thickness, the sandpaper doesn't have to stretch or compress as the surface bends.
Many evenings were spent shaping and sanding. In addition to all the filler work, there were a couple areas that were high, and showed up when sanding. These spots had to be tapped down. The cheapie body pick I have came in perfect for this job. The body pick hammers are fantastic for getting high spots down. Just peck away and keep going with just a little effort and the metal moves. Moving the hammer around helps balance it all out and the bumps get smoothed down. A shot with 80 grit on the electric DA smooths out the teeny tiny dimples. The key is to finesse it, never smack the metal. Liiiiight tapping.

These quarters were in rough condition. They required a lot of smoothing.

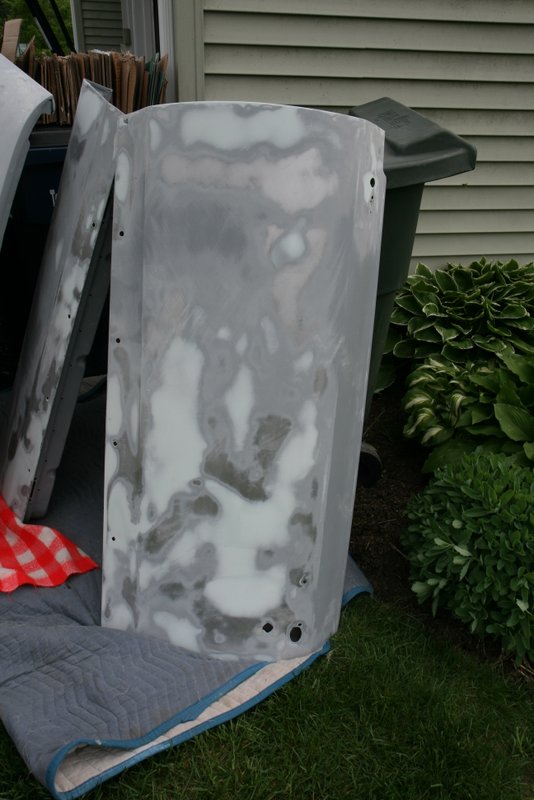
The driver door was a bit wavy too, I guess it saw some "action" in it's day.
After the filler work was pretty much done, I sealed the car again (over the filler and bare metal spots) with epoxy primer. By this time I ran out of the expensive BASF (RM) stuff, so I purchased some Southern Polyurethanes (SPI) epoxy primer. It's Less than half the cost and enjoys a good reputation.
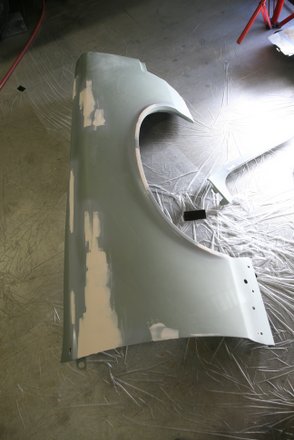
After a day of curing, I put on 3 coats of SPI "2K" primer. This is a primer that uses a hardener, hence the name "2K"--it means "2 part" mix. This is primer that is meant to be sanded to get the final smoothing of the bodywork.

At this point, I started the "blocking" sanding process. I fogged on a layer of "guide coat", basically some black lacquer from a spray can, and then used the 180 grit with the various blocks. I sanded in "X" patterns all over. The guide coat sands off fast on the smooth areas, and the "lows" show up quickly.
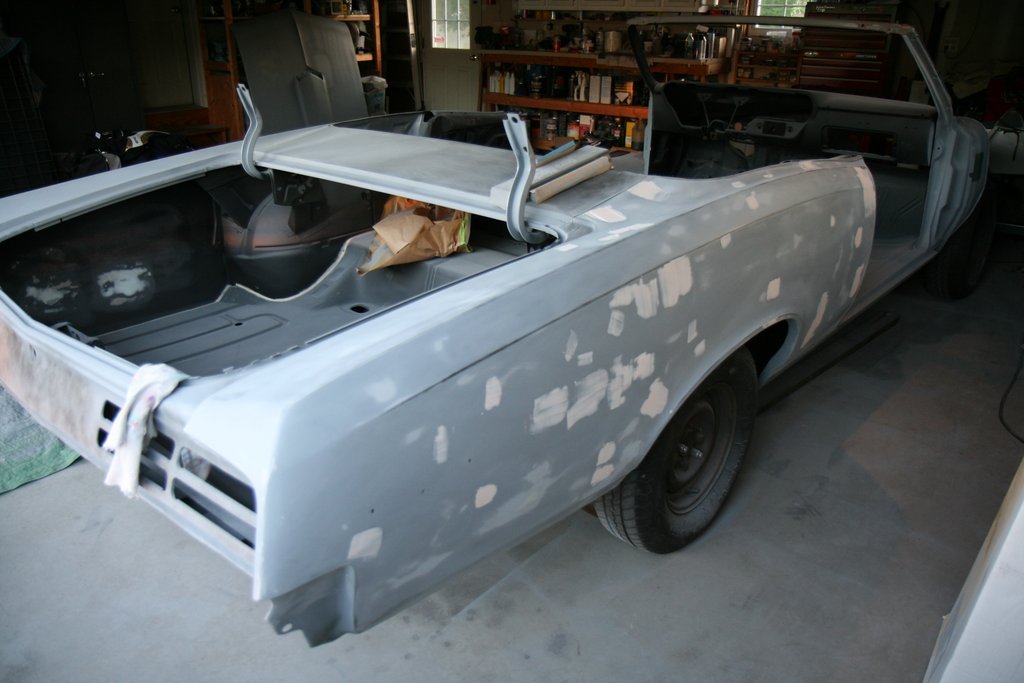
Here is the car after starting the blocking process. Clicking on the picture will show a closeup of the area where I broke through to the filler underneath. The lighter gray is the epoxy primer. This area was simply spot primed after again in preparation for the second round of block sanding.
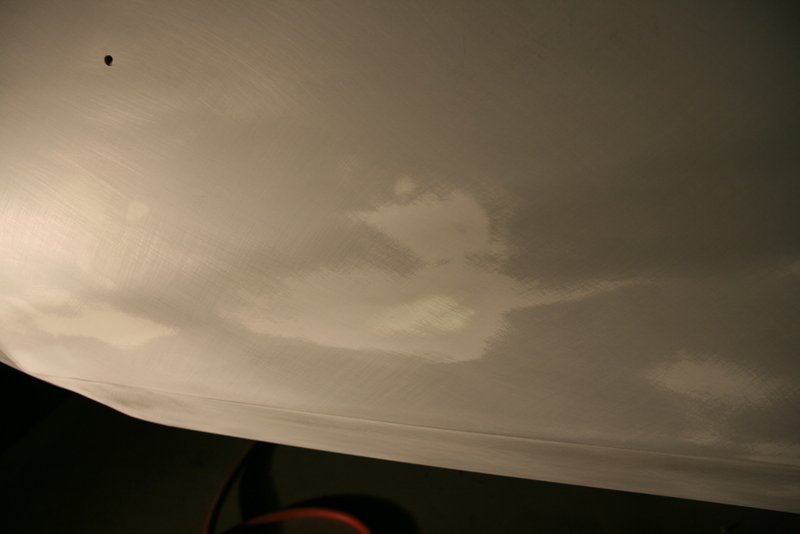
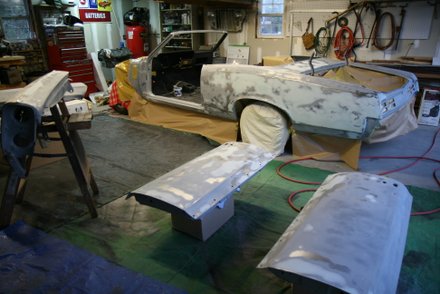
The shot below of the driver side shows some of the "guide coat" still on the primer.
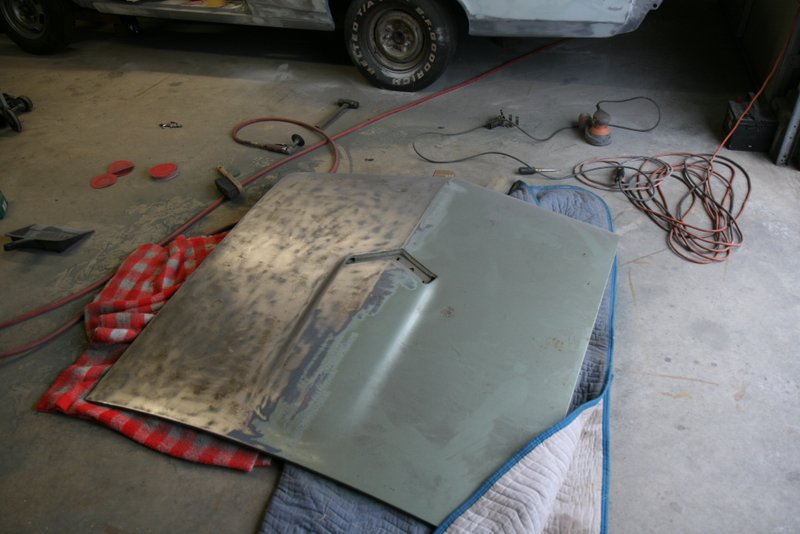
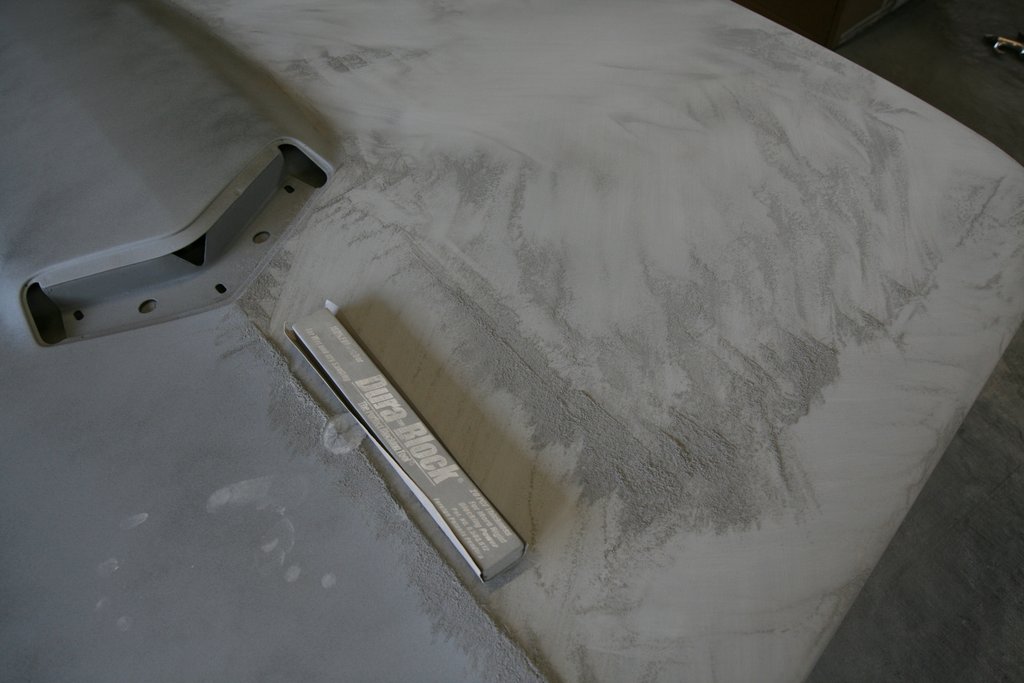
Here's a shot of the hood undergoing blocking. I'm using the small width block here, and that little block was a jewel. It was excellent for working around sharp contours.
Some areas were blocked, primed and re-blocked a few times, depending on how wavy the areas were.
As things were getting pretty straight, I got some 2 part "glaze" to fix minor flaws like the pinholes and scratches.
I was getting pretty tired of constantly mixing up little batches of 2K primer and then sanding most of it off, but that's what it's all about I guess. Here's the car all done and ready to paint.

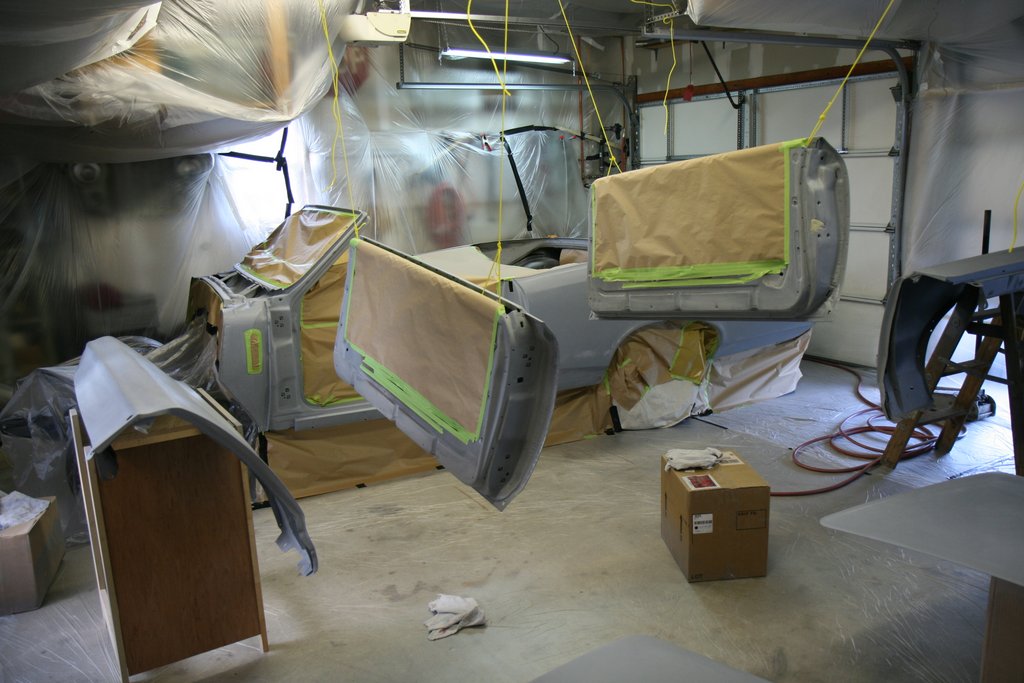
Building a Booth
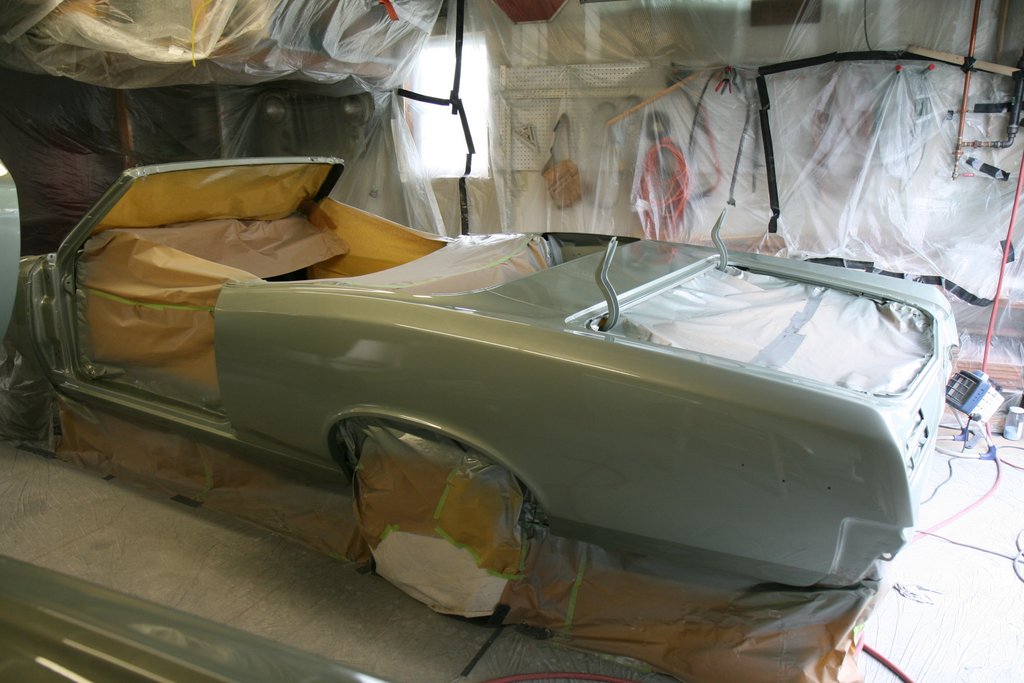
I decided to paint the car all apart. I thought it would be easier to just use my 2 car garage and paint everything without having to worry about masking jambs and spray around bolts and hinges.
So to paint with the car apart, I sheet-plastic-ed the whole garage. I put up a few 2x4's for support, and spent a day cleaning and putting up all this plastic. It was a ton of work.
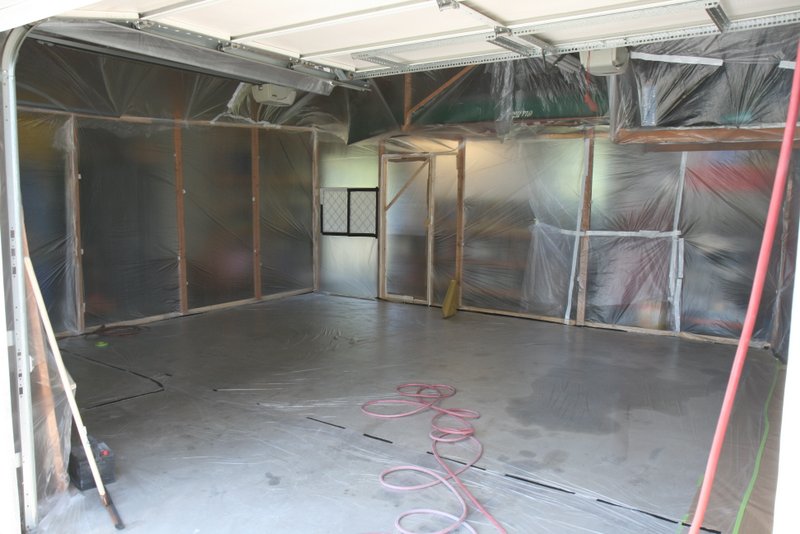
I used two fans to exhaust the "booth" at one of the garage doors. I had two furnace filters on the other side for air intakes.
The car was pushed in and I set up the fenders, hood, trunk on makeshift tables or boxes, and the doors were hung up with rope.
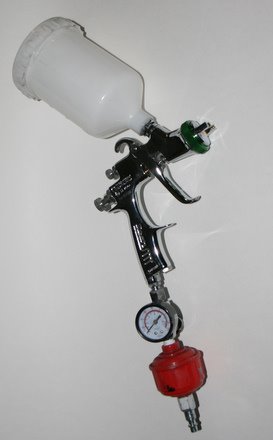
The Gun
To shoot this stuff, I purchased an Astro Pneumatic 4014 LVLP gun. I researched quite a bit and chose this gun because it is about the lowest air consumption unit that sprays decently.
(By the way, a few years ago I purchased a cheapo 60 gallon 240V Husky (Cambell Hausfield) compressor from Home Depot. Back then, those compressors were 2 cylinder, but still single stage. When I got mine, the motor died right after the "break-in" procedure. But it was repaired (at my home) for free and it's been rock solid since then.)
But back to this spray gun: After a few spraying sessions, I will say I've been pleased with it. I don't have experience with other guns to compare, but it has been very consistent and responds predictablly when adjusting it. I have found it best to turn in the flow knob about a half turn (from full open) on thick paints and with clear, but I turned the flow knob in about 2 turns for the base coat which is thin viscosity stuff. For the 2K primer, I used the 1.8 tip, but I still got the best results for epoxy primer with the 1.4 tip. Base and clear were shot with the 1.4 tip also. A big deal is to make sure the pressure at the gauge is at least above 20 PSI. I had to remove the restrictive fittings at the regulator and turn the pressure up to 100 PSI at the regulator to get that kind of PSI at the gun. I think even higher pressure at the gun would result in better atomization.
I think compared to true HVLP guns, this thing does not flow alot of paint, but I just didn't have the compressor power to run a true HVLP.
Painting the GTO
The car was clean and ready to go. The booth was clean and ready to go. It was a Saturday night, and I figured I'd shoot the car with some reduced epoxy (as a sealer) then shoot color and clear the next day.
I used SPI epoxy paint and reduced it according to the recommendations on the SPI website. After shooting it, I found I had a few spots with "fisheyes". Only a couple spots, but it was enough for me to stop everything. I spent the next day wet-sanding the whole thing down with 600 grit. At that point I decided to paint it in its wet-sanded state.
I took a day off and shot the car on a Tuesday. I really was antsy to get it done as soon as possible because I was really wanting to avoid bug season. In mid June, there still aren't a ton of bugs around yet, but the bug times were coming fast.
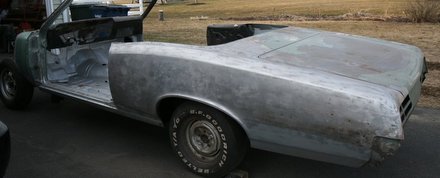
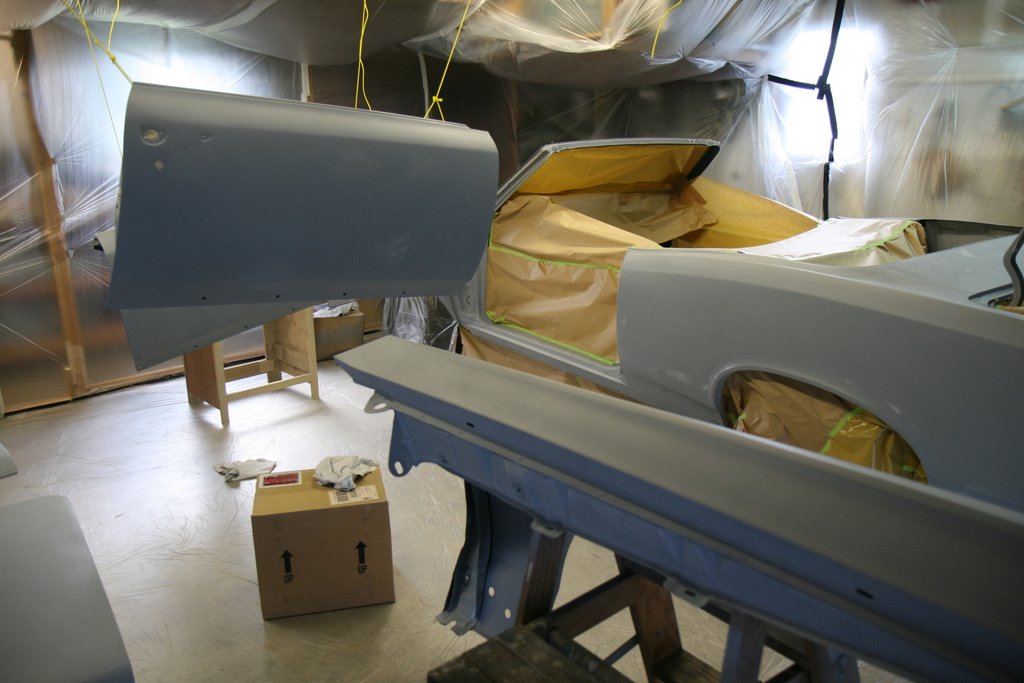
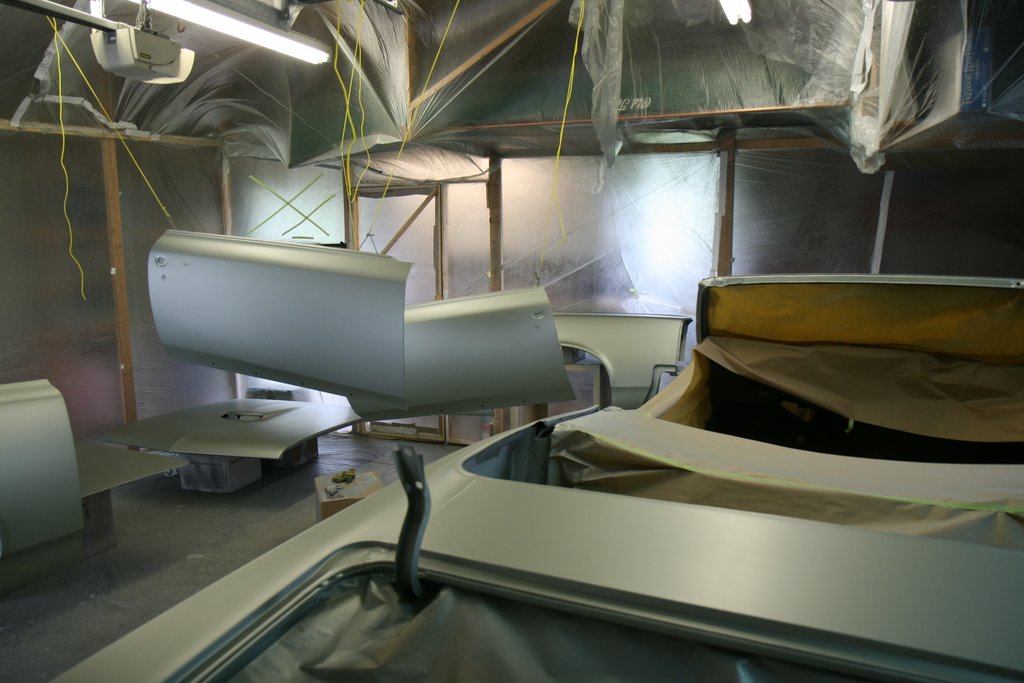
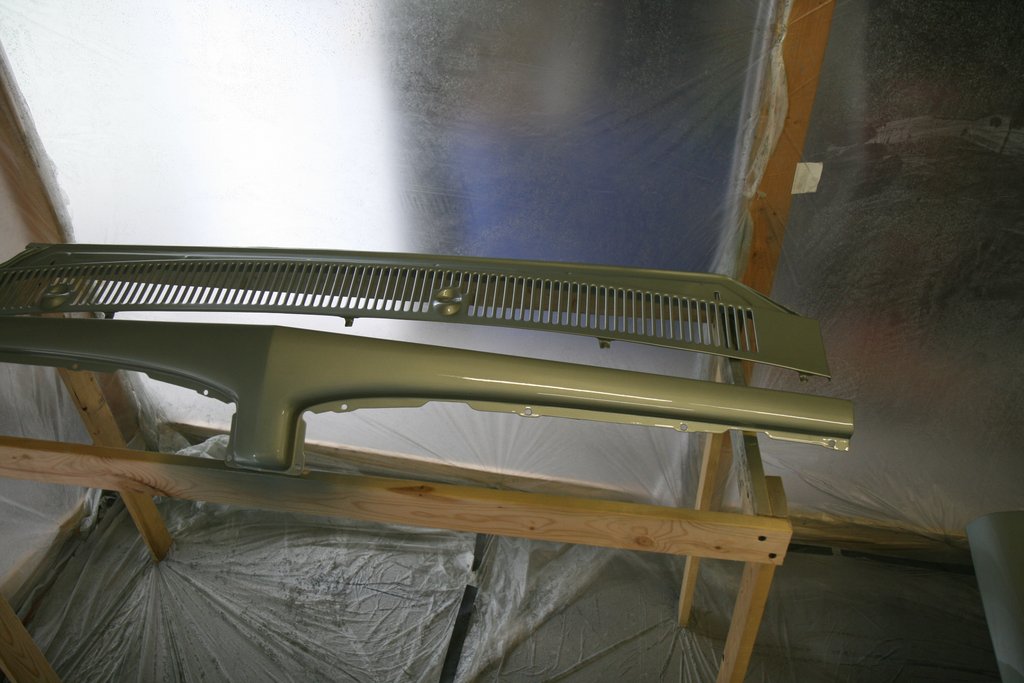
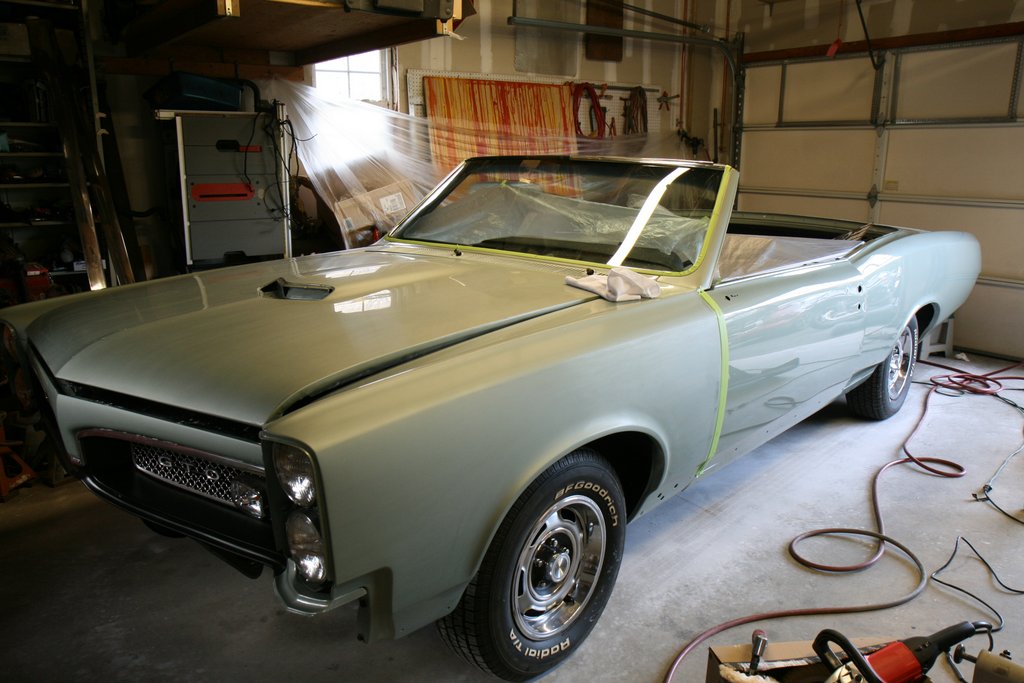
So in one afternoon I shot 3 coats of base on the entire car, waited a hour and then shot 3 coats of clear. Here's the car after shooting the base.
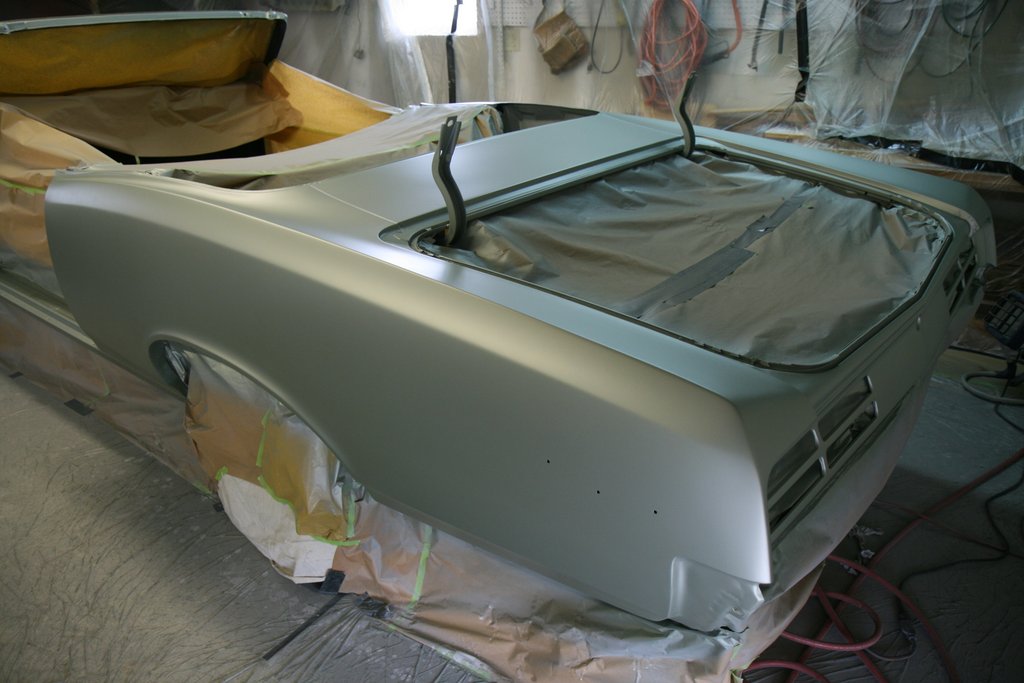
The base I used is RM Diamont, and the clear was the RM DC-5100. I had the base mixed from the GM code for Linden Green, which is the "H" code color for GM that year. Chevy called it Mountain Green.
The base went on like a dream. What a pleasure to spray that stuff. The clear definitely takes way more concentration to spray, but overall it wasn't too bad to shoot. I did have problems with dust. Nothing major, but still way more than I thought I'd have. There was some orange-peel too, as I was afraid of getting runs.
With the dust such as it was, I thought I would wet-sand the whole car and then do a couple more coats of clear the next day. I thought I'd also clean the garage one more time too.
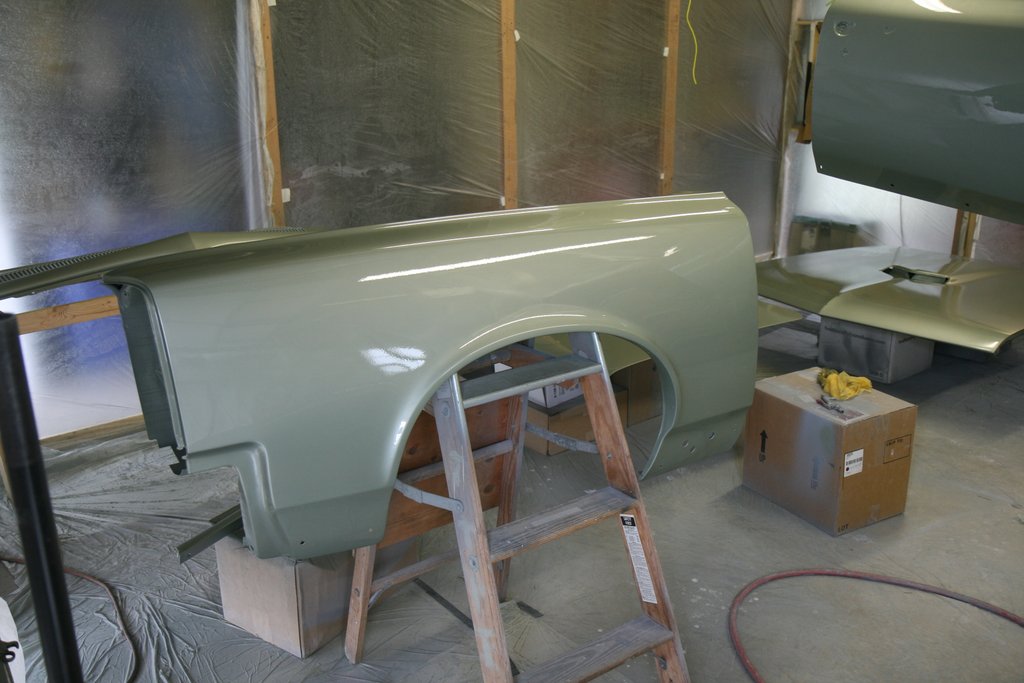
This is where mother nature intervened and knocked over my passenger fender into the driveway. I had placed it on the ladder outside (as seen above). There was a freak 5 minute wind-storm that whipped through when I happened to be in the house cleaning out the air regulator. I didn't notice the wind while I was inside. The fender got dented and scratched up. It required some hammer and dolly work, and luckily only some glaze work.
At this point I was worried I did not have enough base to re-do the fender, so I bought some more, and mixed it with my remaining base. Unfortunately, it was still not quite the perfect match (post-script...now, some years later, I cannot see any difference....)
Another small disaster occurred when I re-sprayed the clear and I got a cloud of mosquitos into my hood and trunk. I don't know how they got into my seemingly perfectly sealed "booth", but they did and the damage was done. I had to re-base those parts too.
So, there are some variations in panels. In some light, you can't see the difference, but in other types of light (particularly florescent) you can detect a mis-match. There is also some tiger-striping on a couple areas.
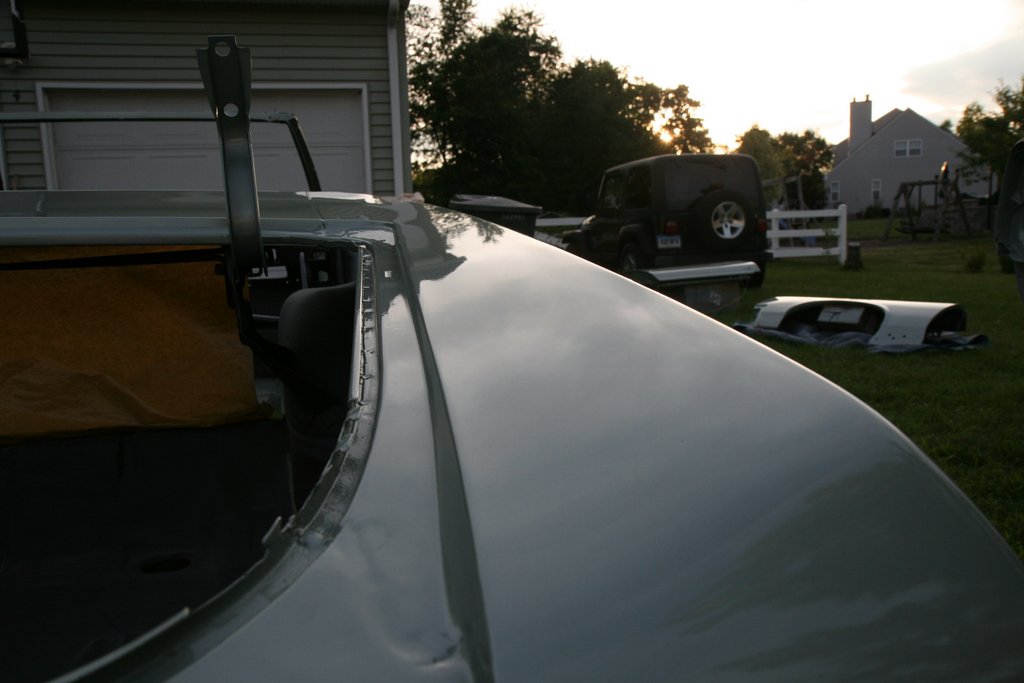
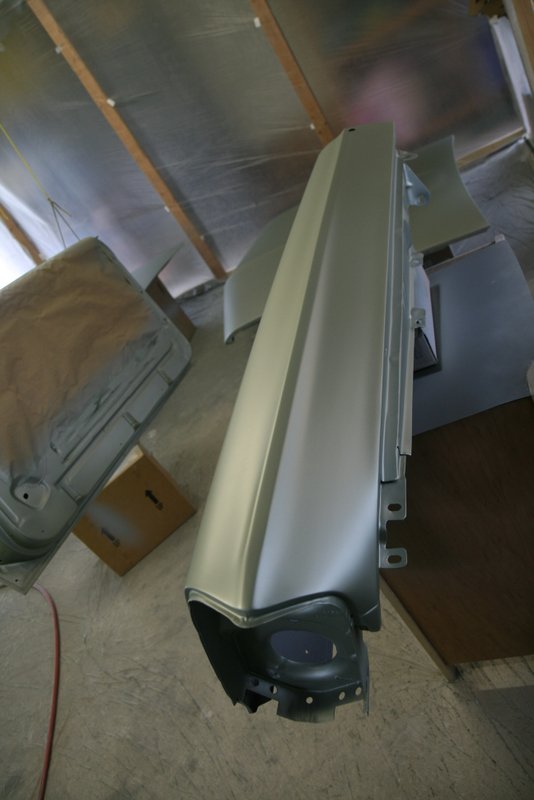
Here's a last shot for this entry. Mind the bugs on the lens of the camera.
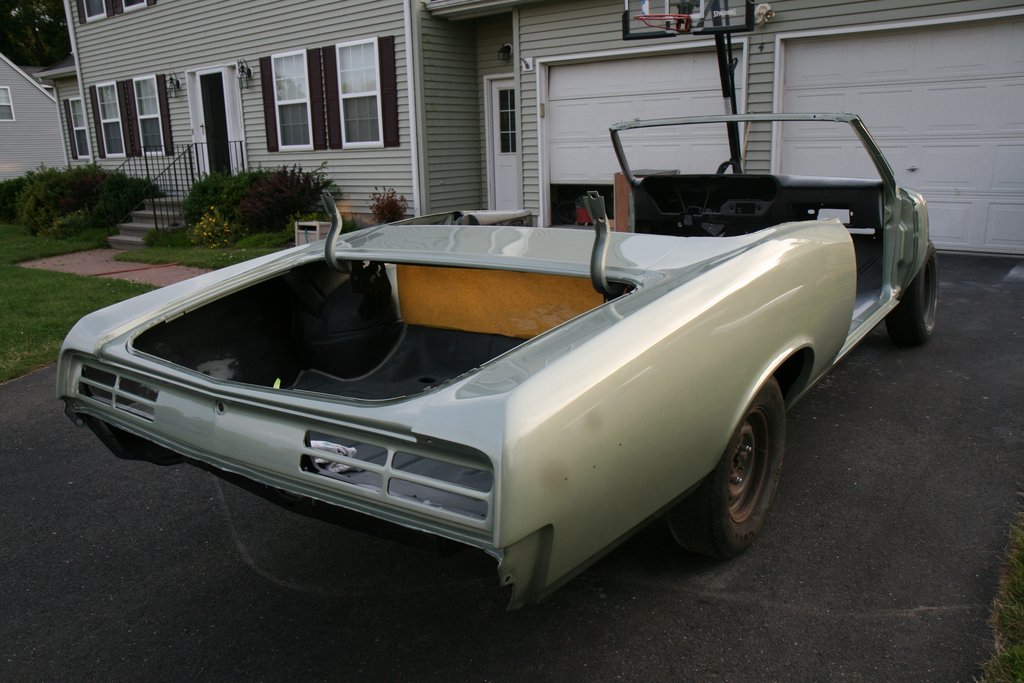
Overall, I'm fairly happy with the job. I learned:
- You should really lay on a last "light" fog of base to avoid tiger-striping.
- You should paint only in the middle of the day when the bugs are not hanging around.
- You should not put body parts in the driveway when windstorms come whipping through and knock stuff over.
- Buy more paint than you think you need even if some customer-guy at the paint store who says he's painted hundreds of cars insists you only need 2 quarts of base.
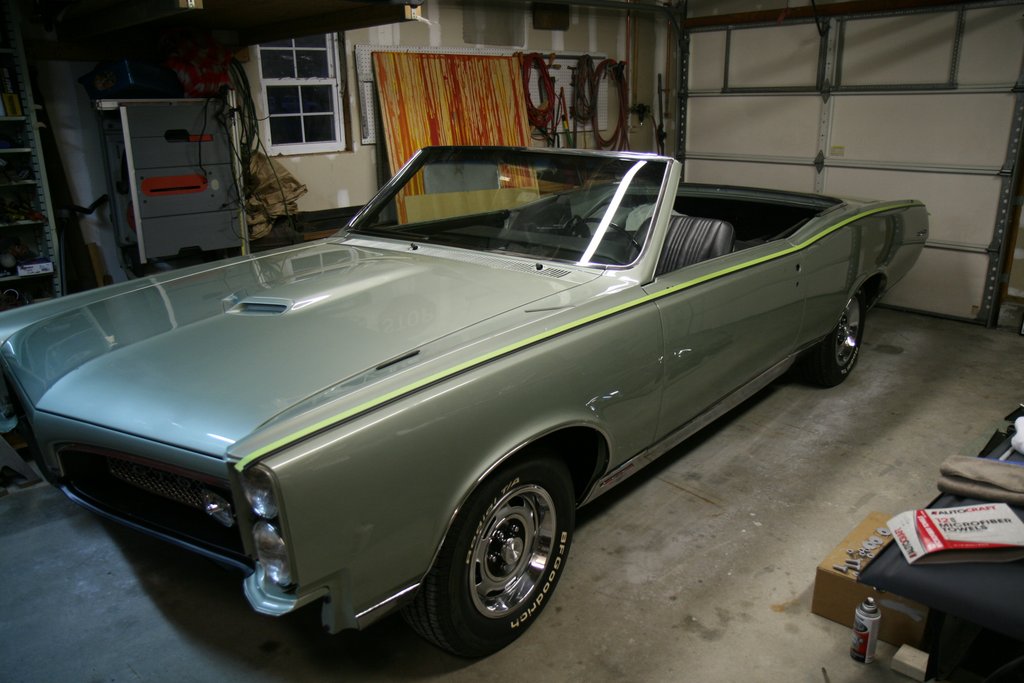
Cut and Buff
After nearly a year, I managed to do the clear coat "cut and buff". There is loads of info on how to cut and buff base/clear paint jobs on the internet, so I won't go into details, but here's basically what I did: Hand wet-sanded the clear coat with 1500, 2000 and 2500 grit paper (I used 3M paper and rubber squeegie pads), then buffed it all with a wool pad and Maguiars M205 and M105 buffing compounds. I sourced an ATD (cheap) rotary variable speed buffer from Amazon. The buffer tool worked flawlessly, and I was quite pleased with it.
The clear was very hard (after curing for a year) and I still have many scratches from the wet sanding even after compounding. Later this year I hope to give it another round of rotary buffing. However, it still looks so much better after getting rid of the runs, trash and orange peel. Overall, it's still a home paint job. There are flaws all over. The base is not laid down very good. But I'm happy with it and it's decent enough for a driver. It sure was cost effective.
Pinstripe
GTO's came standard with a double line pinstripe. In the spirit of maniacal DIY mentality, I went and bought a Beugler striper and a couple cans of enamal striping paint to do this myself. I used their magnet to serve as a guide for the tool. First thing was to use tape to lay out the stripe. I took my time and did a load of measurements and re-laying of the tape. I used the Pontiac blueprint as a guide to get the stripes in the right location.

Using tape is much easier to lay out the stripe, but it still takes many tries, and many adjustments to get it right. You must account for some offset distance the guide arm will take. In this case, the tape is 1.25" away from the true location of the stripes, . Once the tape was placed, I butted the magnet against the tape edge.The paint tool has a mount for an adjustable guide arm that follows the groove in the magnet. If I had time, I would have made some sort of roller bearing to ride in the groove. The arm does not travel smooth enough for my liking in the groove.
The Beugler paint tool is very simple, but nicely constructed. I bought a kit that has a few different heads to accomodate different width stripes. You can buy dual stripe heads, but I simply used the thick wheel head for the bottom stripe and the thinner head wheel for the top stripe. Using it is simple enough, but I found it a bit hard to drag the tool along the guide and keep it straight.
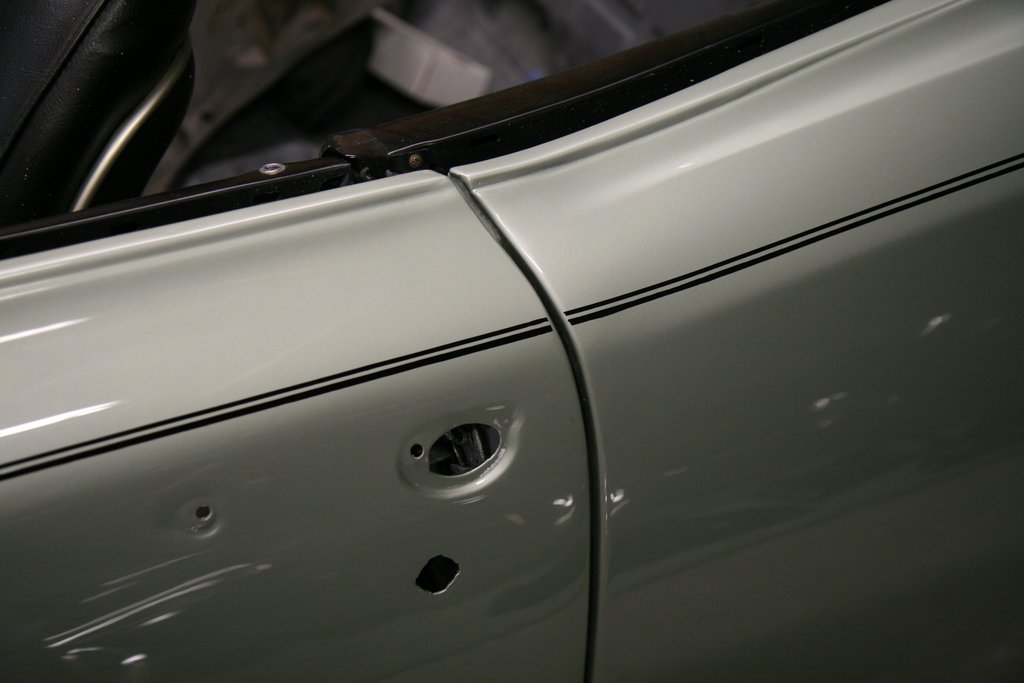
The stripes are not perfect. But in a way it does mimic the imperfect stripes I've seen on original cars. I may sand the stripe paint down just a bit and buff it to get them a bit flatter.
I went with black at the last minute. I was going to go with white, as the 67 brochure shows a Linden Green convertible with black interior with white stripes. But my peeps talked me into black.
Any comments please email me:
SFS
Links:
Willys Jeep CJ3A Forum
There exists a nice set of webpages for CJ3A's. It's got a forum too that caters to both '3A's and CJ3B's. It's a great resource, and frequented by very knowledgible folks.
1967 GTO Original Owner
These two videos feature an original owner GTO. This car was featured in Hemmings Muscle Cars magazine a couple years ago. Part 2 has inside and outside shots of the owner driving the car. Very nicely done.
Blues Maker
"Mississippi" Fred McDowell. One of the great Bluesman. This is a documentary made in 1969.
Pinstripes
Pinstriping the ol' fashioned way. Pretty nice.
MGB Racecar
I've always liked MG's. Watch this MGB lift it's inside tire a few inches off the tarmac when going "'round the bend". Awesome.
Pepsi Throwback
Pepsi has put out a "limited edition Throwback" version of Pepsi with REAL sugar, instead of high fructose corn syrup which has been used since the 80's. Holy cow there IS a difference; it's WAY better. Find some quick!