
Projects:
GTO
My
67 Pontiac GTO
Trunk Body Work
-Trunk pans
-Wheel wells
Body Work Part 1
-Rear Quarters
-Rear Door Jambs
-Window Reveals
Body Work Part 2
-Cowl
-Pillar
-Rocker
Body Work Part 3
-Windshield channel
-Doors
-Fenders
GTO Paint
-Filler work
-Priming
-Blocking
GTO Frame Work
GTO Convertible Top Pt 1
-Top Frame
GTO Convertible Top Pt 2
-Top Trim
GTO Drivetrain
-Engine
-Quadrajet Rebuild
-Exhaust
-Axle
Muncie
Rebuild
popular
Auto to Manual Swap
1967
Ram Air GTO
story
Wheelhouse Filler template PDF
Willys CJ3A
CJ3A Intro
Engine and REBUILD
Drivetrain
BodyWork 1
BodyWork 2
BodyWork 3
BodyWork 4
Paintwork 1
Paintwork 2
Final Assembly
Final Assembly 2
Electrical System
Other Rods
TJ Wrangler Rubicon
CJ7
CJ8
Triumph TR4
Decrepid Dakota
Powerdyne Minibike
Allis Chalmers B engine rebuild Part 1
Allis Chalmers B engine rebuild Part 2
Allis Chalmers Generator to Alternator conversion
Gizmos
Stereo camera
rig
Stereo mic preamp
About:

Feeds

Markup
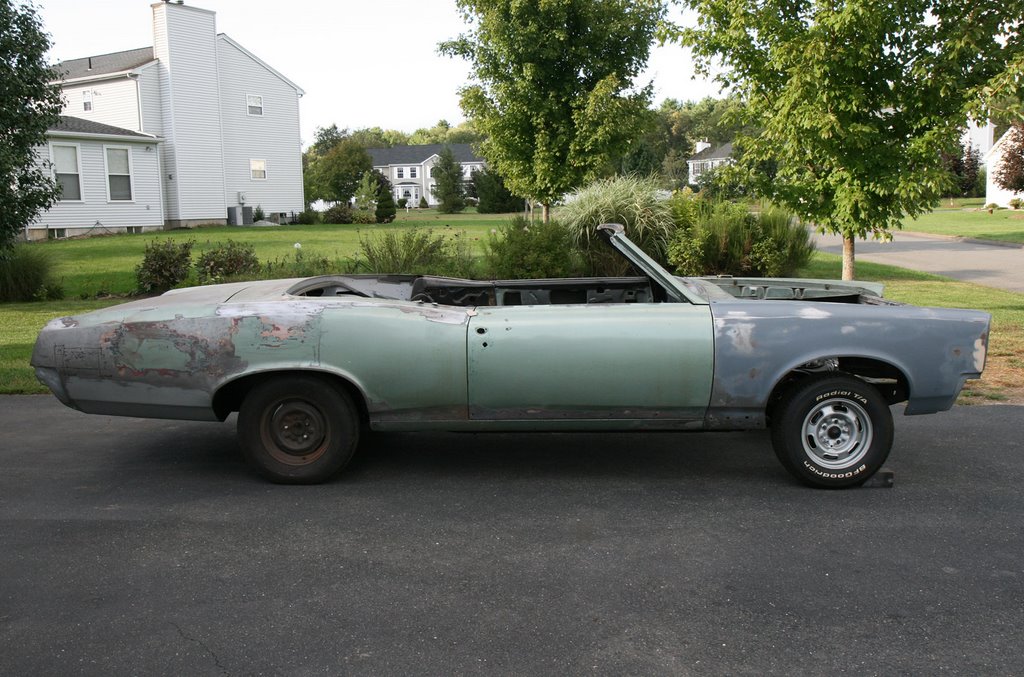
GTO Body work Part 3
This is the third page of the bodywork section of the GTO. This deals with finishing up the body "tub", fixing the front end sheet metal and doors, as well as the trim refurbishment.
To see the LATEST entry on this page, scroll down to bottom of page....
To see the first part of the bodywork section, go here.
To see the second part of the bodywork section, go here
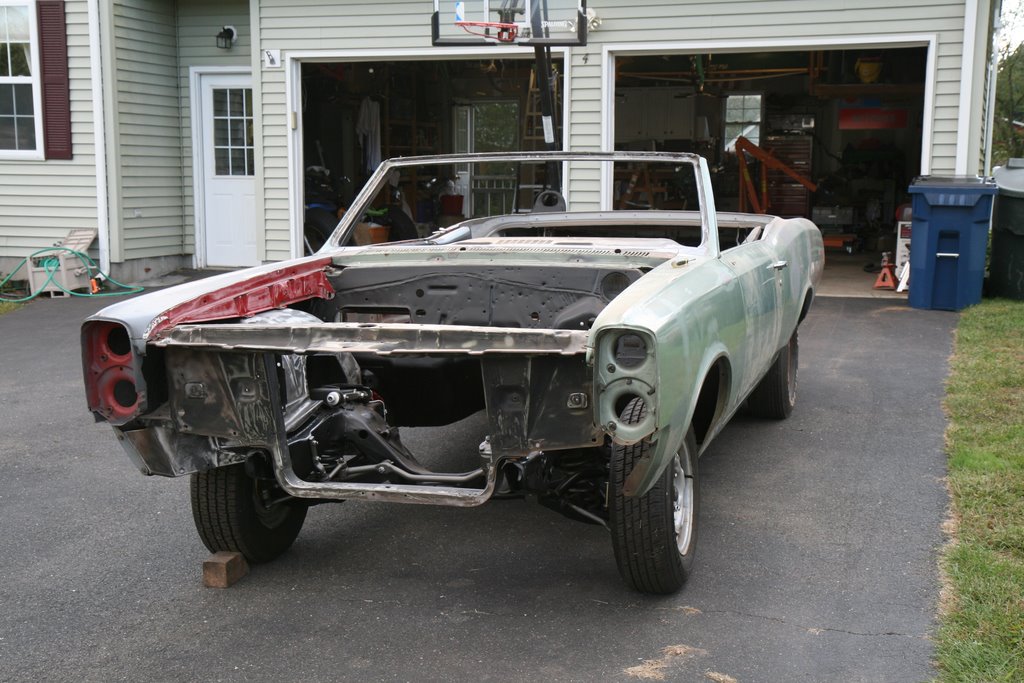
Body Back on Frame
June 12, 2011
With the major work on the quarter panels complete, and the frame completely refurbished, I was starting to run out of excuses to re-unite the GTO with its frame. So with the help of my neighbor I put the body back on one night last week.
I had an old Canon point and shoot and I discovered that I could "hack" it with a wicked cool download firmware that could turn it into a time lapse camera. So I set it up in the corner of the garage and made about 700 pictures of the process. I put it together with some more free software and made a video and tossed it up onto youtube. Click the picture to check it out.
Lower Windshield panel Repair
September 08, 2011
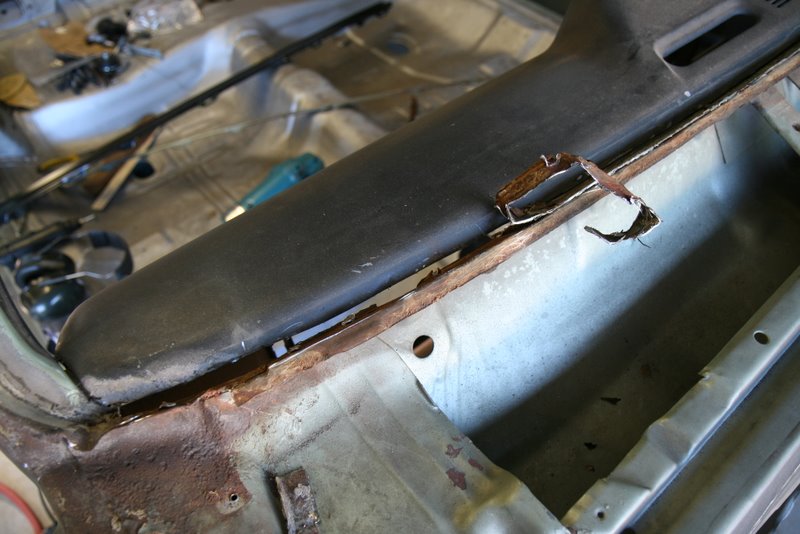
The GTO Bodywork Page 2 section of this webpage ended with the prediction of being done with all the "tub" metal work. Well, that was a bit premature. Upon removal of the windshield, some old filler was found on the lower windshield panel. I ground out the filler and found some holes. Here's an overhead view of the base of the windshield. The new panel is laying next to the old. Note the holes on the original panel...
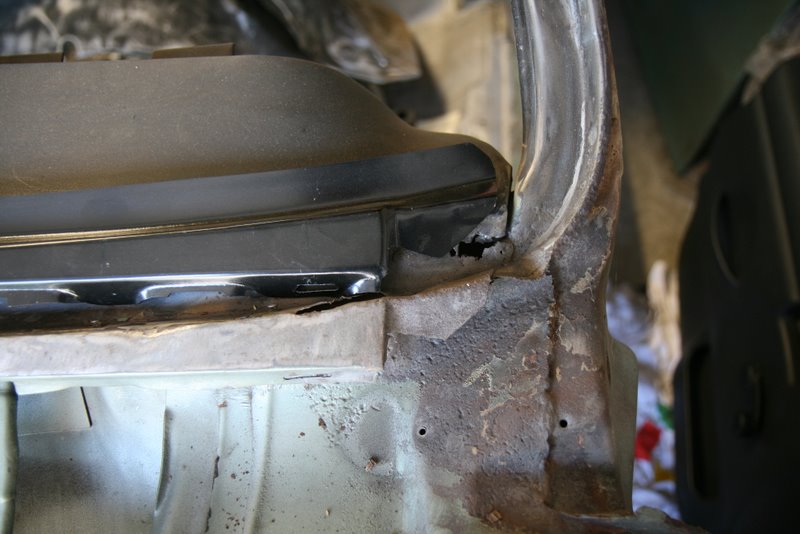
This piece bends down underneath the windshield and has trim clip studs for the windshield trim. The new patch panels have the studs welded on already. The panel I received was bent, so I sent it back. The replacement did not have studs, so instead of making more calls and consuming more time, and instead of using screws instead of studs, I decided to make my own clip studs.
The studs look like nail heads which gave me the idea of using some steel nails. I found none that had a matching head size, so I used roofing nails and turned down the head diameter to match the original size. The OD of the "nail" body is the same. The picture below also shows the alignment tool I made to hold the studs in place for welding.
I put dimples into the new panel to drill holes for welding in the "studs".
The holes were drilled, and the nail heads were placed over the alignment tool. The tool set the height as well as the position. The hole in the panel was oversized to let weld puddle envelope the stud. The stud was tacked on from the underside. The tack weld was somewhat sloppy since the extra length of the stud made it difficult to weld.
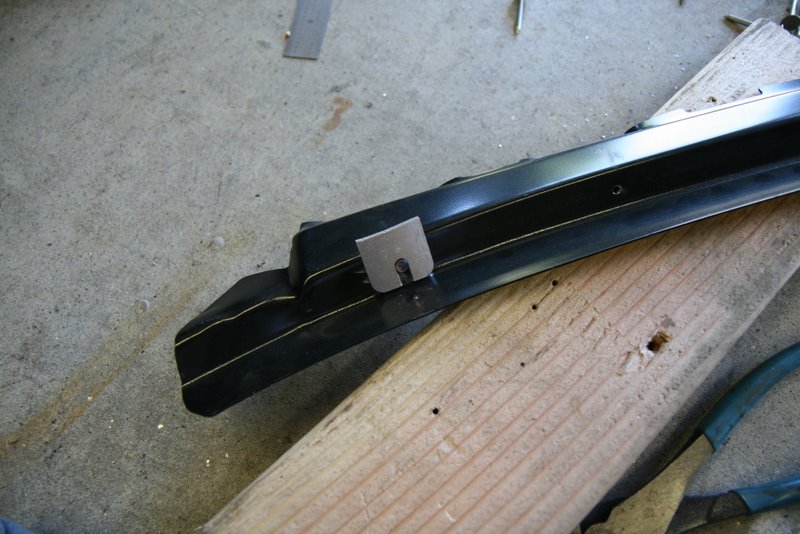
The extra stud length was cut off flush on the underside, and then welded again with a big puddle. The welder "heat" was turned up quite a bit to really penetrate. The bead was then ground down almost flush.

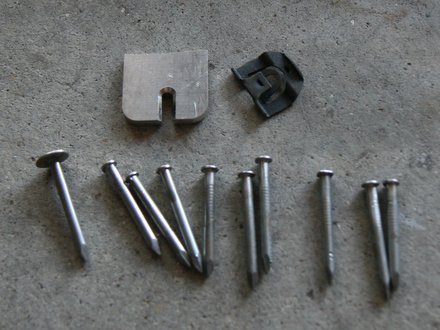
Here's the finished stud. The clips fit very nicely.
Tearing out the damaged windshield metal.
The windshield panel has alot of folds in it so the old one had to come out in sections. Firstly, I cut the panel on the top to remove the part that just hangs out over the cowl opening. The grungy stuff isn't rust, it's some kind of dried up sealer.
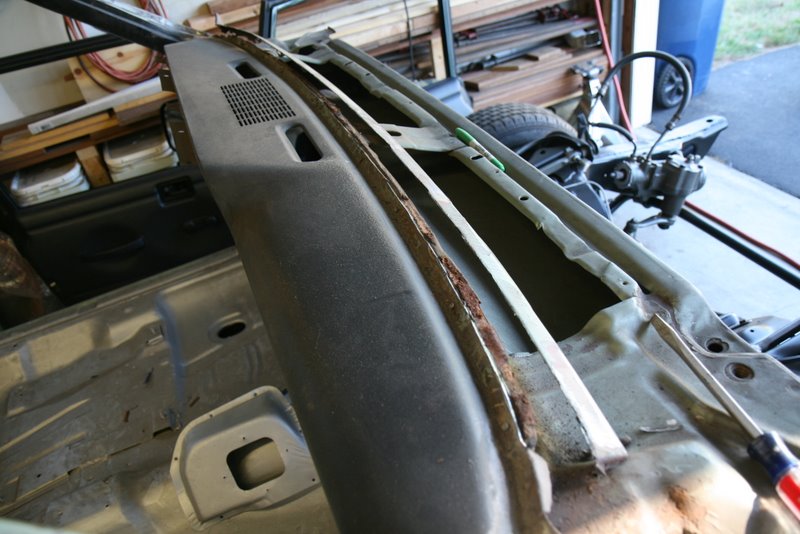
Next was cutting on the inside fold at the base of the dash panel. The screwdriver shows where this inside corner cut is.

I prefer peeling old metal away rather than drilling out tenacious spot welds.
The remaining spot weld lumps can be ground off with no holes left behind.
The thick firewall/cowl metal was in perfect shape only needing sandblasting to clean it up. The dash is quite floppy at this time.

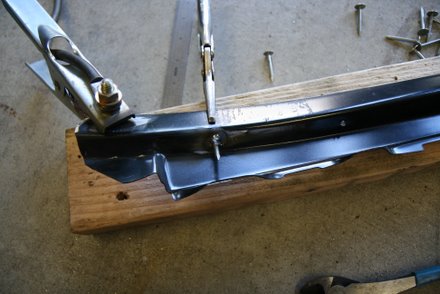
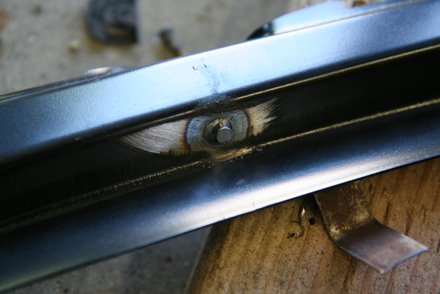
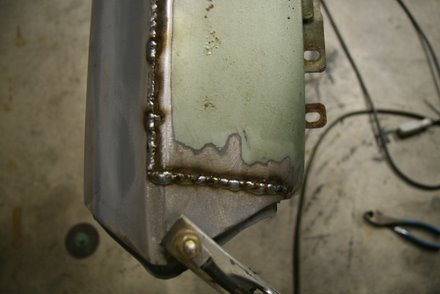
Holes were drilled in the new panel for plug welds, then it was clamped in and welded in.
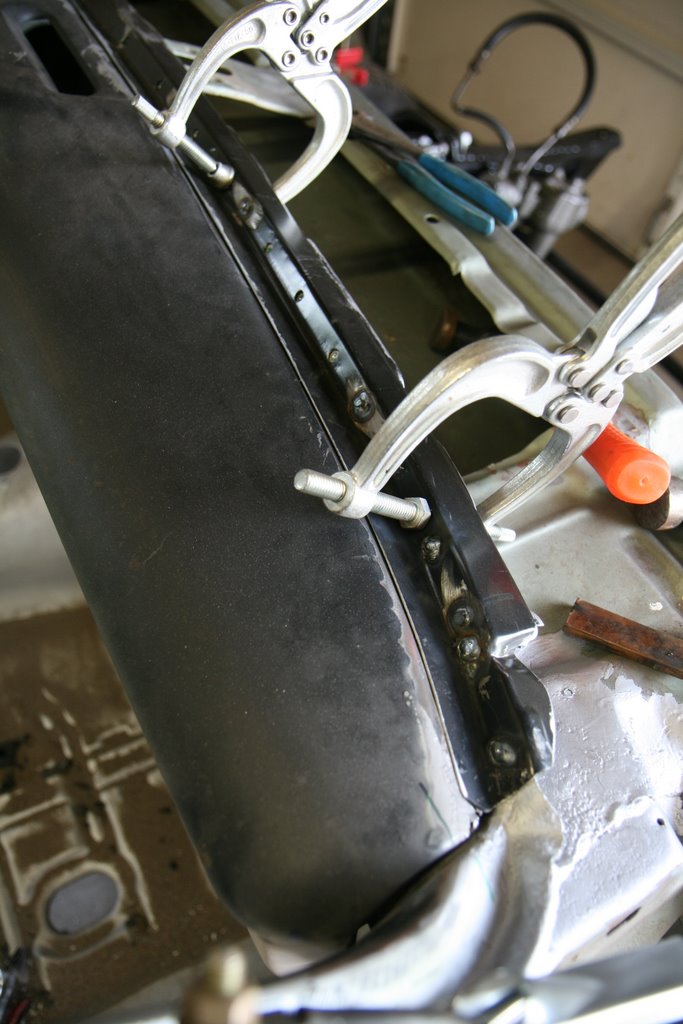
The flange of the new panel was aligned to the floppy dash and screwed down with a few screws . To create a butt weld joint, a cut was made on the flange/dash "sandwich". The resulting gap was ready for stitch welding.

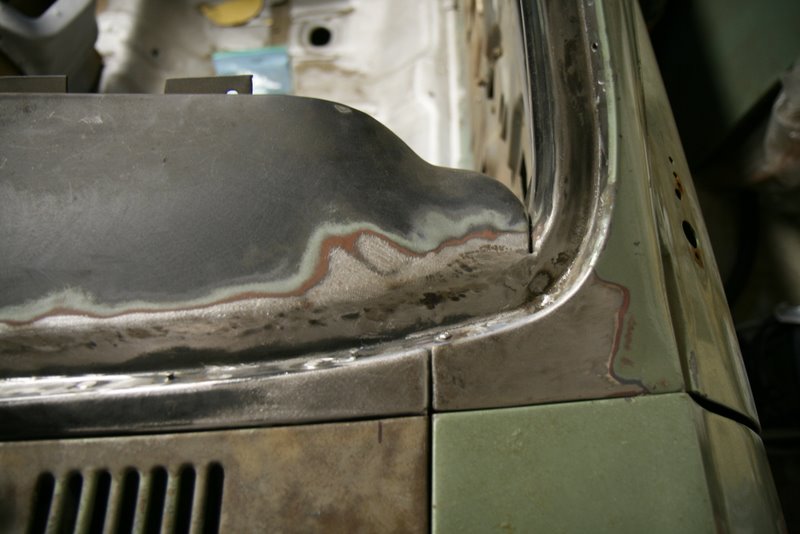
The driver side needed a wee bit of an extra "patch".

The welding was finished up and all the welds ground down. Grinding is not fun, but it looks good when done. The under side of the dash is accessable and this area was ground down and cleaned up as well.

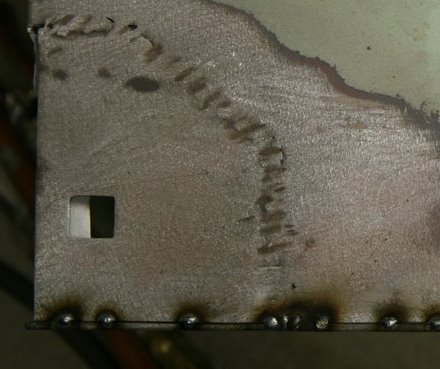
The driver side pillar cover had some rust damage and this was repaired. Here the damage is being removed...

And here is is all better.
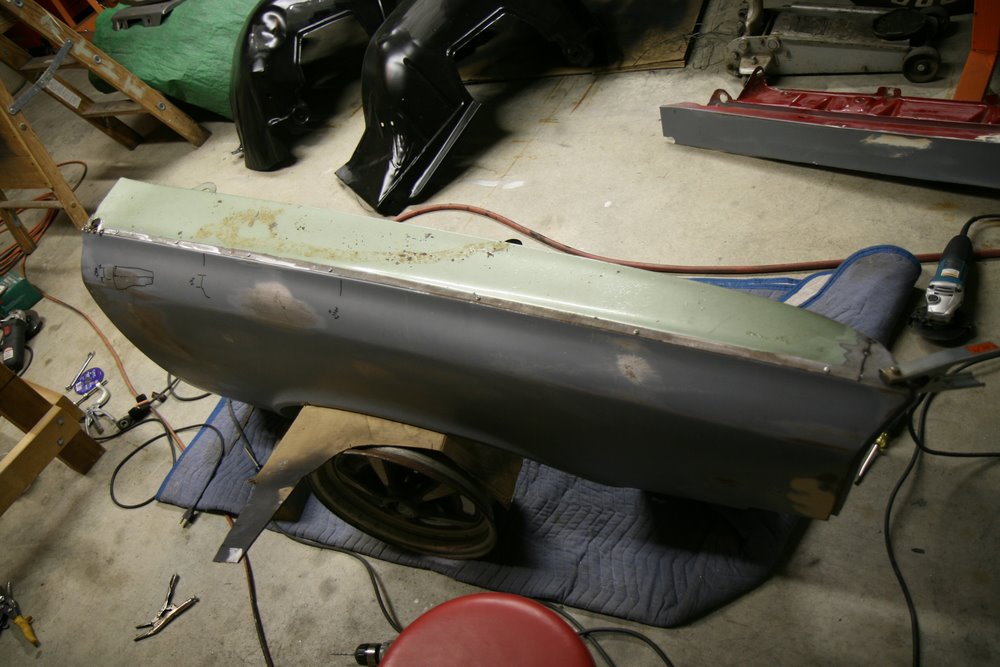
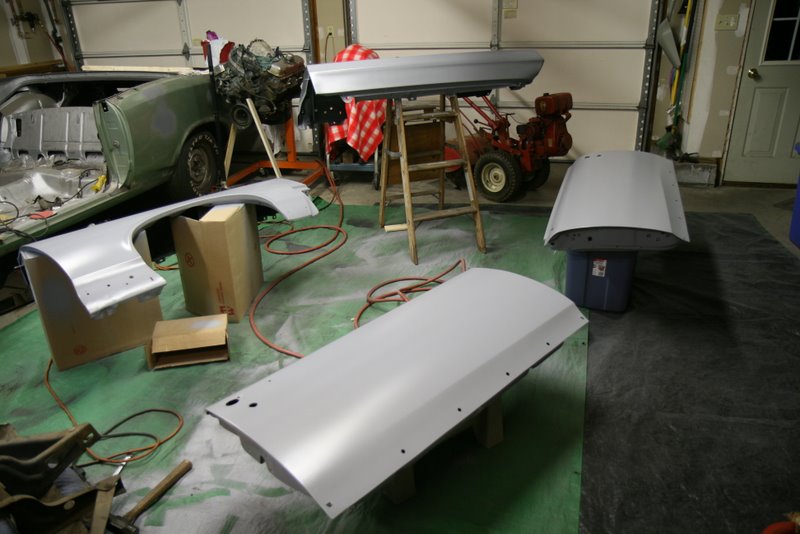
Doors and Fenders.
December 20, 2011
Metal work is drawing to a close on the GTO project. The front fenders and doors were the last pieces to attend to. Before starting the detail work on the doors and fenders, I put the car together to check fit. It all went together pretty nice, but I took it apart again to get patching and blasting.
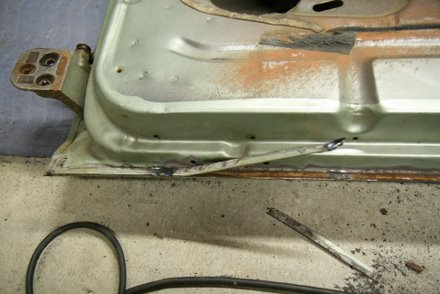
Doors
The doors were actually in pretty good shape but both needed the rear inside corners replaced. They have slots for the trim fasteners to pass through. The rusty stuff was cut away and new pieces fabbed up. The slots were drilled and shaped with files.
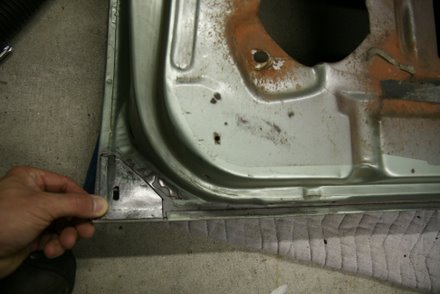
The passenger side needed a wee bit o' patch on the outside.
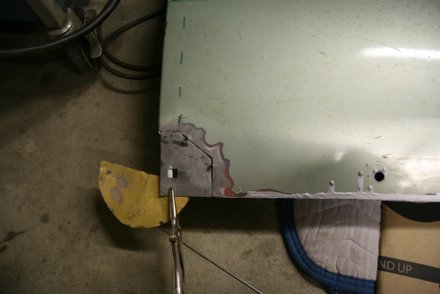
The passenger door also had some heavy pitting on the bottom edge flange that wraps to the inside. I decided to grind the edge off the door and remove the pitted flap/flange.
To make a new edge, I used stick-welding rods with the flux coating scraped off. The rod material was welded to the outer door skin first.
Next, I fabbed up a new sheet metal flange for the inside of the door. It will be stitch welded to the rod.
Here's the edge welded and smoothed.
I also patched a hole from a 70's speaker installation.
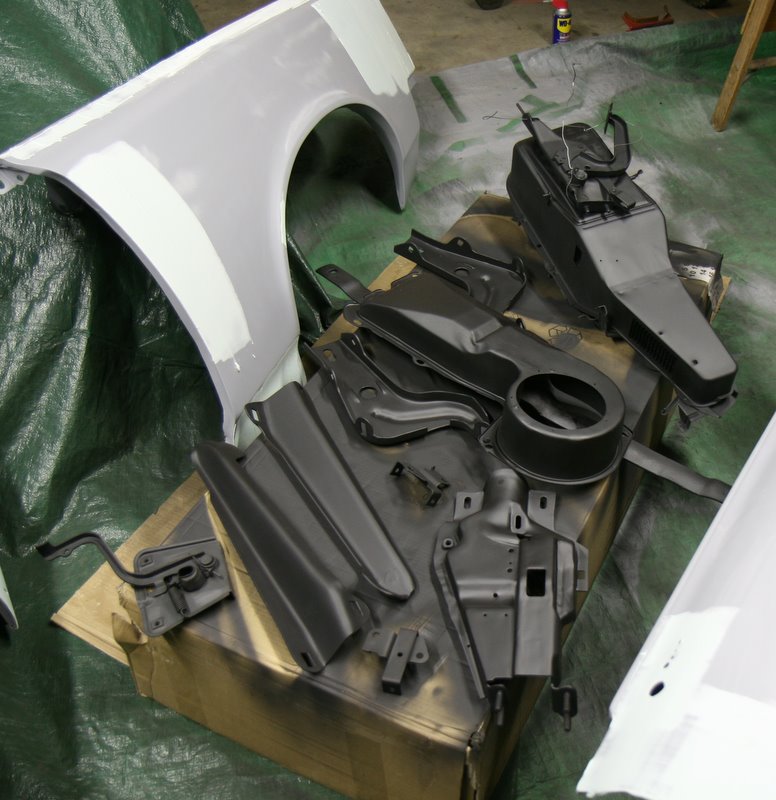
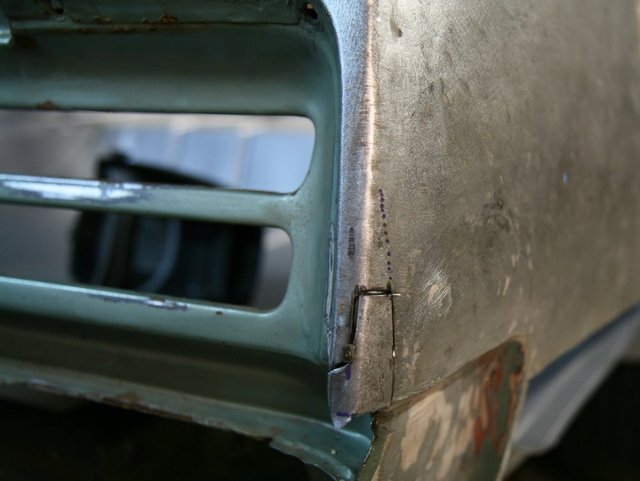
Fenders
Last year, I decided I needed a new passenger fender. The original had a bunch of holes from a slide hammer repair and wrinkles all over the place. The lower edge behind the wheel was rusted out too. The whole mess was too far gone.
I found and purchased what I thought to be a good used replacement, but while fitting it to the car, I found swiss cheese rot where the hood hinge bolts on. Too far gone to save. The original fender was fine here, so I frankensteined the two fenders together to make one good fender.
Here are the pieces put together with a few sheet metal screws. Note the original green top section mated to the "replacement" fender.
The two sections were sliced and then butt welded. Here's a close up of the front splice.
Here's the fender welded, ground down and smoothed
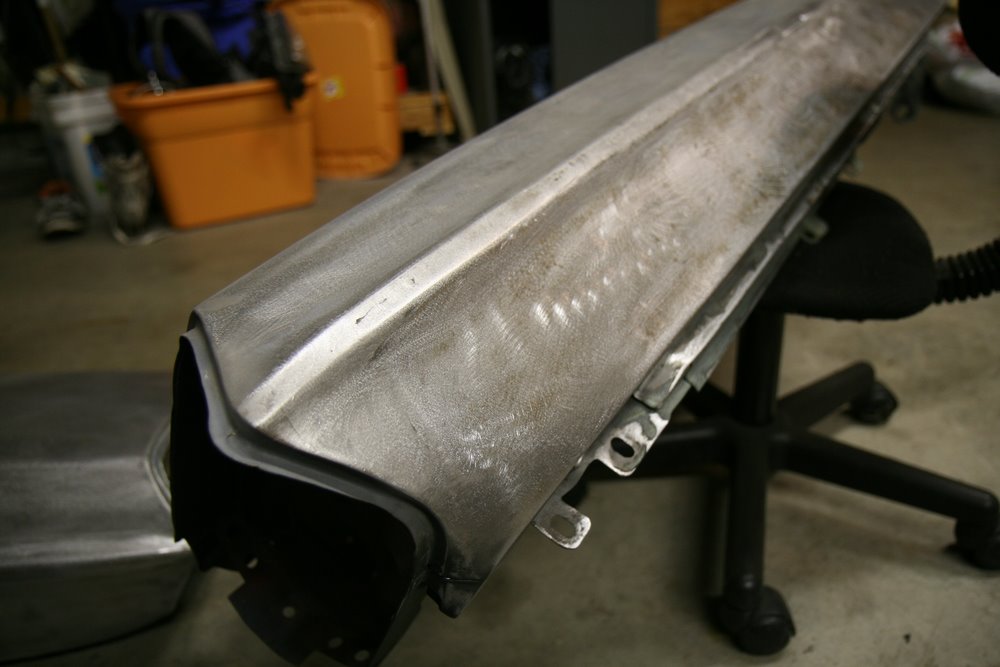
The driver's fender needed a wee patch down low.

After the major surgery, I put the car back together to test fit all the newly repaired sheet metal. The alignment and fit was pretty darn good.
The doors and fenders were stripped, cleaned up and coated with RM EP epoxy primer. This stuff sprays pretty nice.
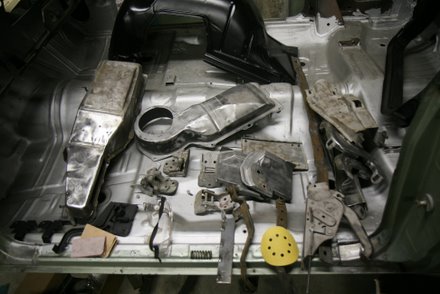
Bits and Pieces
Anyone who's taken a car completely apart can testify to the large quantities of stuff that accumulates. All this stuff had to be sanded, blasted, wirewheeled, cleaned, primed and painted. I found it easiest to do this in managable batches. Several batches have been completed, including the core support, the front wheel wells, bumper brackets, and on and on.
For all the underhood and chassis parts, I decided to go with Kirker epoxy primer and a gallon of their "Hot Rod Black" single stage paint.
The Last of the Metal Work
March 20, 2012
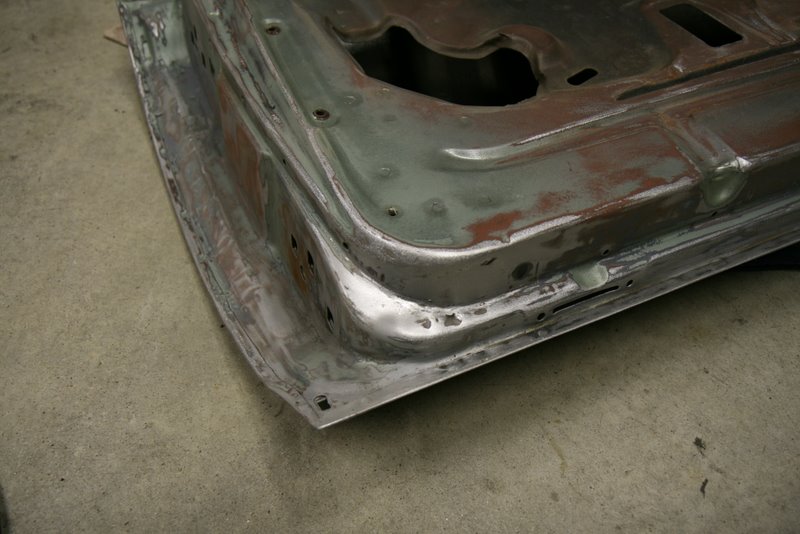
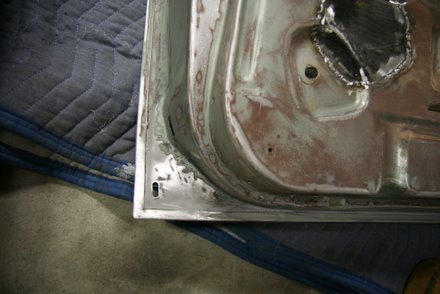
While stripping the old paint off in preparation for paint work, I found just a little more metal work was necessary. The rear corner of the quarter panel had been squashed at some time in the past, and it had been hammered out, but the metal was fatigued and needed help.

I cut out the damaged area...

The patch was made and fit with magnets...
It was welded up, ground down, and here it is all done...

Now, with the metal work done, it was time to strip the car. I broke out the 3 inch rolocs with 50 grit discs and went to town. This was followed up with 80 grit on an electric DA. I did this job outside in February.

All the door jambs, rear tail panel, and front cowl areas had to be sanded by hand because of the multitude of contours. Many quality hours were spent sanding away.
From this point on sandpaper, filler, and primer became a big part of my life.
Go to GTO Paint work to read all about it.
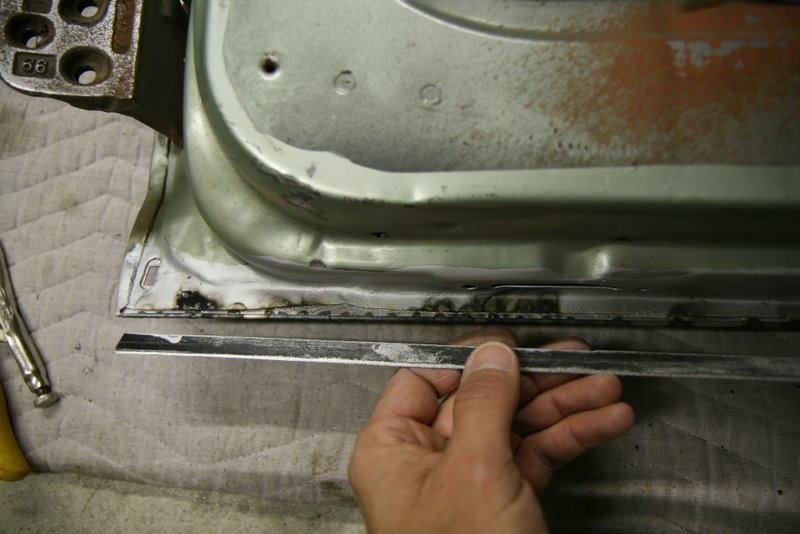
Stainless Steel Trim
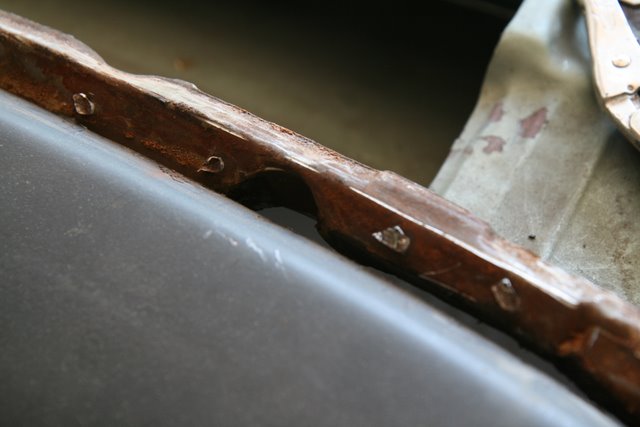
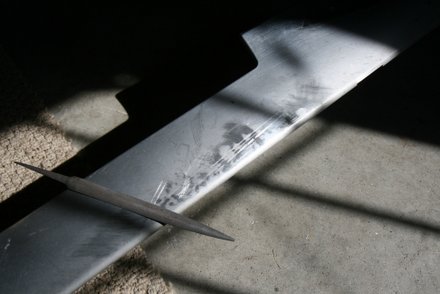
Many hours were spent polishing the loads of stainless steel trim. Some of the trim had to have pretty extensive dent removal. Here's a big dent in the passenger rocker. Also note how sand blasted the bottom is from long road use.

I had an array of picks, rods, worn screwdrivers and scrap metal along with hammers and dollys to get it all straight. It goes pretty quick after getting some practice.
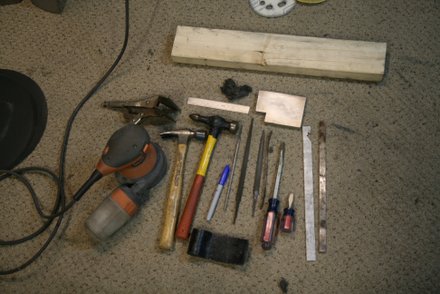
Some of the damaged pieces required starting with files, then on to sanding with 220, 400, 800 and then 1200 grit sandpaper, then onto the rouges and cotton buffing wheels on my old bench grinder.
Here's the rocker after smacking out all the dents with a hammer and dolly, and I'm starting to smooth it in a "blocking" fashion with a flat file. You can see the high spots are dark and the low spots are still dull. After a quick pass, I continue smoothing with a hammer and dolly. The metal is thin and I don't want to take off too much with the file.
The piece was then "DA'd" with 220 grit. The deep scratch was mostly removed, but I didn't completely remove it. It was deep, and I didn't want to remove too much metal. You can see the scratch in the lower left of the picture.
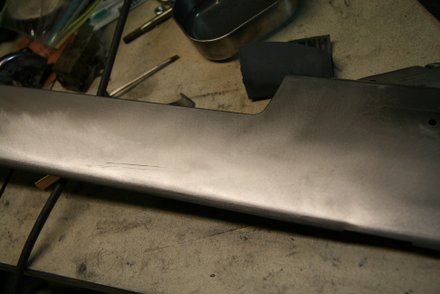
The buffing was done in two stages: black rouge with a sissel wheel, then green rouge with a loose cotton wheel. I used my ancient Taiwan bench grinder. It survived the hours of buffing and still lives on.
I found that it is nearly impossible to remove every fine scratch. This grade of stainless is actually pretty soft, and scratches very easily. But when the trim is installed on the car, especially the stuff down low, you just don't see those kind of flaws.
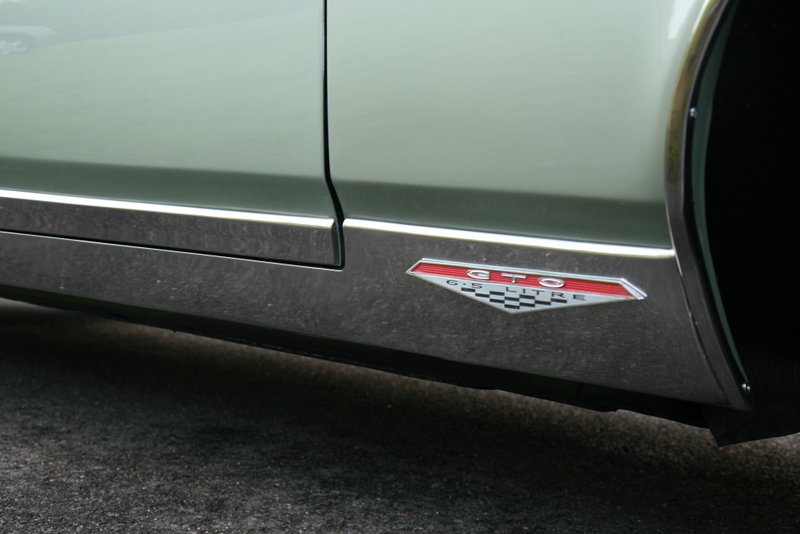
The 67 GTO has a TON of stainless trim. And convertibles used stainless for the side window reveals...(hardtops and coupes used aluminum). All the polish work took many many hours. It's not a fun job. It's also a risky business. I lost grip a couple times on some smaller pieces whilst buffing. Holy jeepers that wakes you up. Despite these high velocity mishaps, I still have all my fingers.
SFS
Links:
Willys Jeep CJ3A Forum
There exists a nice set of webpages for CJ3A's. It's got a forum too that caters to both '3A's and CJ3B's. It's a great resource, and frequented by very knowledgible folks.
1967 GTO Original Owner
These two videos feature an original owner GTO. This car was featured in Hemmings Muscle Cars magazine a couple years ago. Part 2 has inside and outside shots of the owner driving the car. Very nicely done.
Blues Maker
"Mississippi" Fred McDowell. One of the great Bluesman. This is a documentary made in 1969.
Pinstripes
Pinstriping the ol' fashioned way. Pretty nice.
MGB Racecar
I've always liked MG's. Watch this MGB lift it's inside tire a few inches off the tarmac when going "'round the bend". Awesome.
Pepsi Throwback
Pepsi has put out a "limited edition Throwback" version of Pepsi with REAL sugar, instead of high fructose corn syrup which has been used since the 80's. Holy cow there IS a difference; it's WAY better. Find some quick!