
Projects:
GTO
My
67 Pontiac GTO
Trunk Body Work
-Trunk pans
-Wheel wells
Body Work Part 1
-Rear Quarters
-Rear Door Jambs
-Window Reveals
Body Work Part 2
-Cowl
-Pillar
-Rocker
Body Work Part 3
-Windshield channel
-Doors
-Fenders
GTO Paint
-Filler work
-Priming
-Blocking
GTO Frame Work
GTO Convertible Top Pt 1
-Top Frame
GTO Convertible Top Pt 2
-Top Trim
GTO Drivetrain
-Engine
-Quadrajet Rebuild
-Exhaust
-Axle
Muncie
Rebuild
popular
Auto to Manual Swap
1967
Ram Air GTO
story
Wheelhouse Filler template PDF
Willys CJ3A
CJ3A Intro
Engine and REBUILD
Drivetrain
BodyWork 1
BodyWork 2
BodyWork 3
BodyWork 4
Paintwork 1
Paintwork 2
Final Assembly
Final Assembly 2
Electrical System
Other Rods
TJ Wrangler Rubicon
CJ7
CJ8
Decrepid Dakota
Powerdyne Minibike
Allis Chalmers B engine rebuild Part 1
Allis Chalmers B engine rebuild Part 2
Allis Chalmers Generator to Alternator conversion
Gizmos
Stereo camera
rig
Stereo mic preamp
About:

Feeds

Markup
GTO Convertible Top Installation Part 2
Part 2 of the convertible top installation deals with installing the top pads, top "trim" (fabric) and windlace.
Intro
There are many convertible top manufacturers, and there are loads of opinions on which are best. While quality is really important, cost is a big deal for me too. I selected a top kit manufactured by Kee Top Mfg because I thought it was a good balance between quality and cost.
The Kee top uses a 36 oz. pinpoint vinyl which is similar to the original factory top material. The window assembly is plastic and features a zipper that must be used to drop the window before the top is put down. I believe original tops did not have zippered windows, but the window will probably last longer if it's laid down into the well instead of being folded with the top.
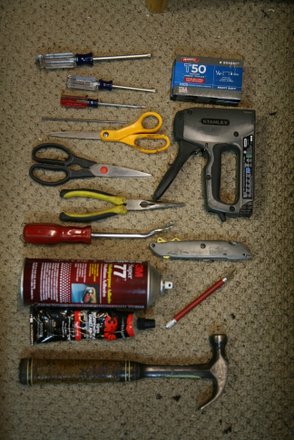
Tools
Tool-wise, nothing special is needed to perform this job. Some folks like to have a powered stapler, but I used a plain old Stanley hand staple gun with 1/4 and 3/8" stainless steel staples. So little time is actually spent using the staple gun, I didn't see the need to go buy a powered stapler.
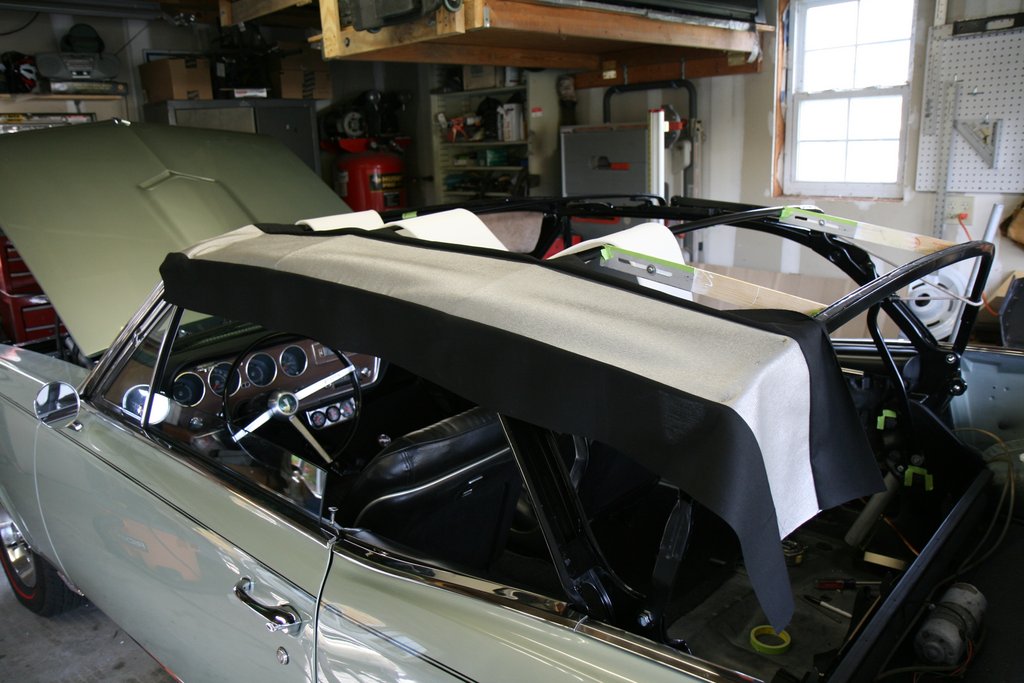
Top Pads
The first thing to be installed are the top pads. These come "unassembled" and need to be assembled in place on the top frame. Before starting, the top frame was put into the "up" position and the spacer sticks were installed as described in Part 1.
The top pads I used were universal, and are tapered in width from front to back. I saw no mention anywhere regarding pads having a taper, so I decided it looked best to have the wider end at the front.
The pad "shell" is simply a reinforced vinyl material with a nice looking black cloth wrapping. The first thing to do is tack down the empty pad with a few staples on the front header and rear bow. The pad edge is aligned to a recess in the rear bow at the back. The front placement is a bit more arbitrary, so I placed it so it won't stick out the side when the top itself is installed.The pad should be taut and smooth.
The inside of the "empty" pad is coated with spray adhesive (I used 3M "77") and the foam pad material is stuck down nice and smooth.
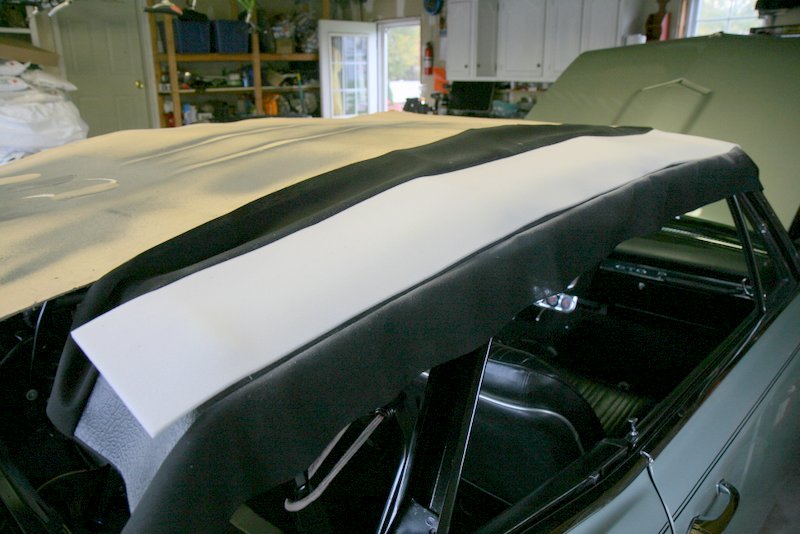
Before the cloth flaps are laid down, the pads were fastened down on the first bow (the first bow behind the header rail) and center bow. Staples were used on the first bow, and special low profile screws were installed into the threaded holes on the center bow. I re-used the screws from the old installation. When the flaps are placed over these fasteners, they help hide the screws and staples for a smoother look for the top.

Next, 3M 77 adhesive was sprayed on top of the pads, and the pad lining flaps were smoothly laid down on top. The pads were then stapled down on their ends: at the header and rear bow. Once it all looked good, the pad ends were trimmed to length.
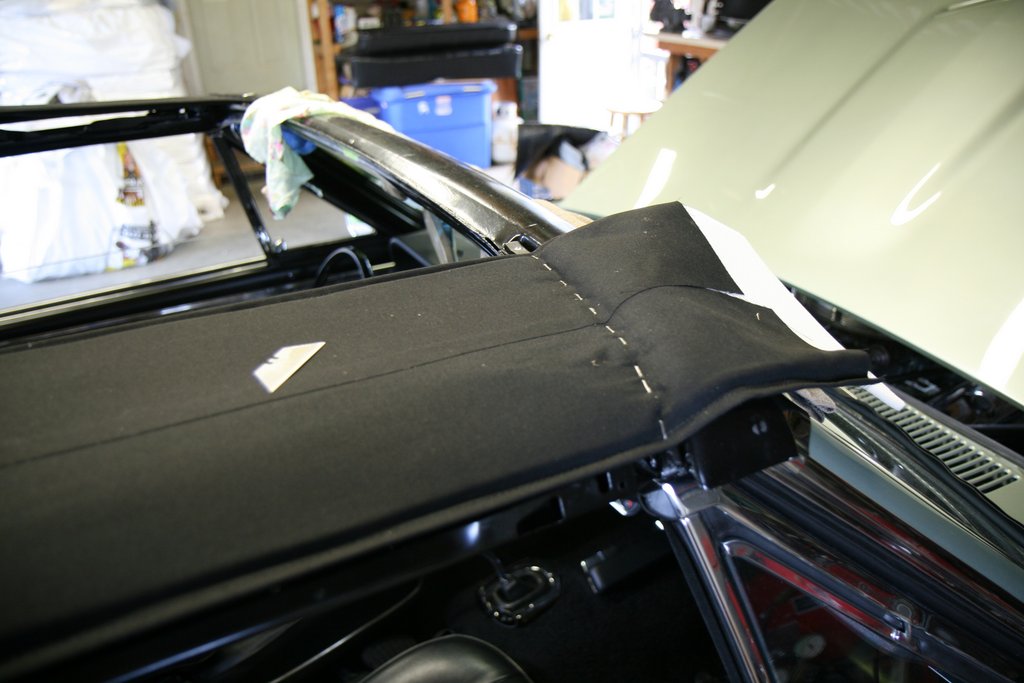

It seems to be common practice to lay some tape on the front edge of the pads onto the header bow. I bought gaffer tape for this because I think it will age better than duct tape. I was careful to lay the tape so there were no overlaps or gaps between tape edges. Gaps or overlaps would "telegraph" and show through the top.
Well Liner
Before the curtain gets installed, the well liner must be installed onto the trim sticks. The well liner is stapled to the trim sticks so that it wraps up and over the top of the trim stick when installed. The well liner then sags down to neatly cover up the big ugly well.
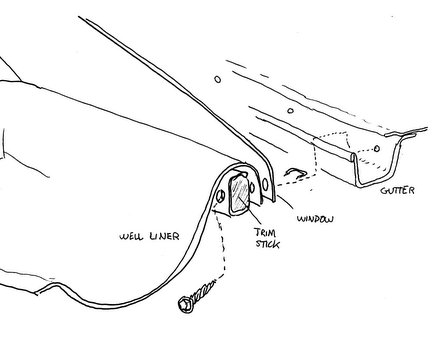
To begin, the well liner was placed upside down and the trim sticks were aligned to the pre-cut holes in the liner. It was then lightly stapled to the trim sticks. I only used a few staples on the liner since it will get pierced by many more staples when the curtain and top are installed.

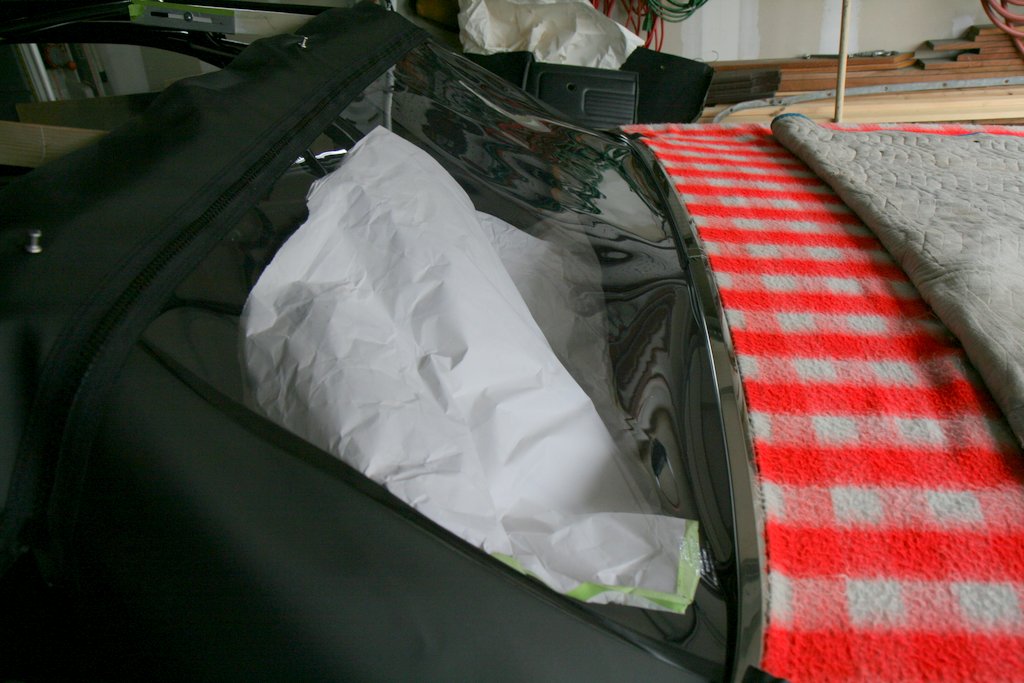
The well liner I'm using is from PUI, and it's got a good looking black cloth that faces the interior of the car. The vinyl side of the liner faces the trunk (the side which is showing in the photo above).
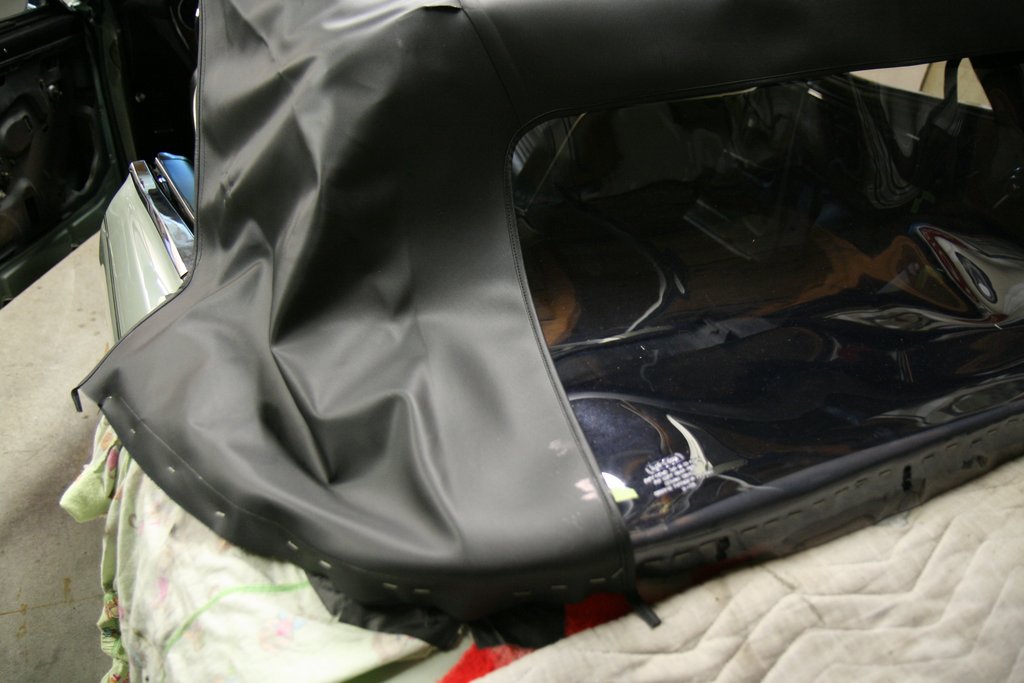
Rear Curtain
Now the liner and trim sticks were flipped around right side up and the bottom edge of the window and side curtains were stapled on top of the liner material into the trim sticks. The Kee curtain side has pre-cut holes and the window has light pencil marks to roughly indicate where to staple it to the trim sticks. It turns out these precut holes and lines weren't very close to optimum, but it was a start. The window plastic also has a notch to indicate the centerline, so of course lining that up to center was the first thing to do. Once the curtain was tacked to the trim sticks, holes were cut into the window and curtain for the screws to pass through. I used an x-acto knife. The curtain/liner and trim stick assembly was then screwed to the car for a first fit check.
With the bottom of the curtain screwed in, the curtain top was pulled up to the rear bow to see how smooth the window looked. I used a few push-pins to temporarily keep it in place.
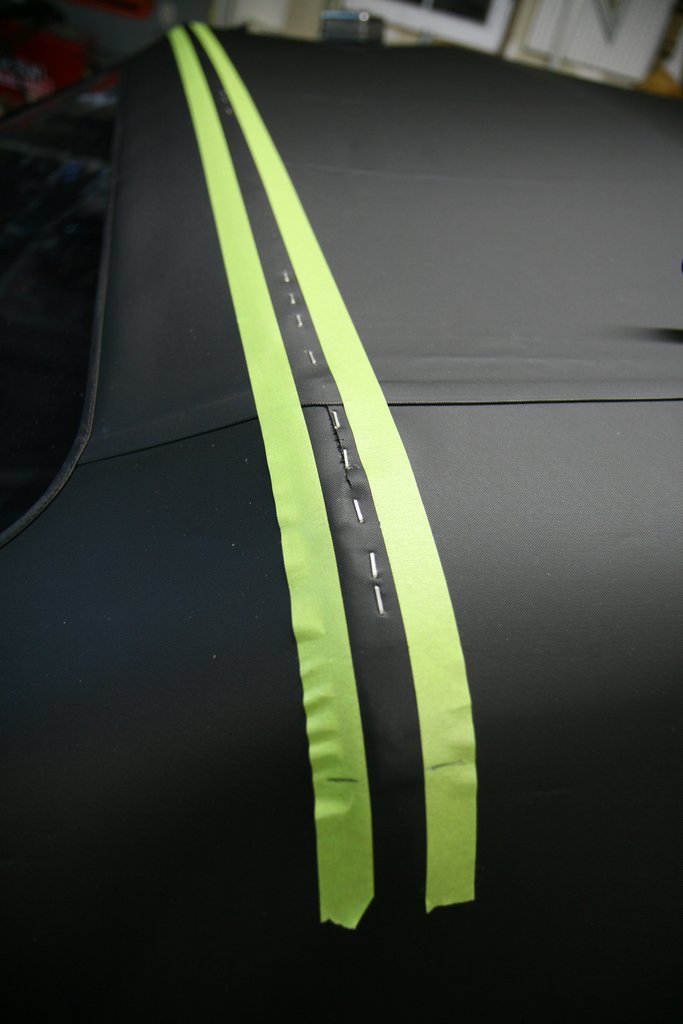
The first attempt showed that the window was loose in the center. The marks that Kee put on the window were pretty conservative and I had to pull out the trim sticks, remove the staples, adjust the window material down, re-staple, and reinstall the trim sticks several times. The picture below shows how the curtain migrated downward with each adjustment; the screw holes turned into oblong holes. But starting out conservative means the holes were migrating downward, which is no problem.
Once the major slack was taken out and it started to look good, the top of the window curtain was stapled to the rear bow.
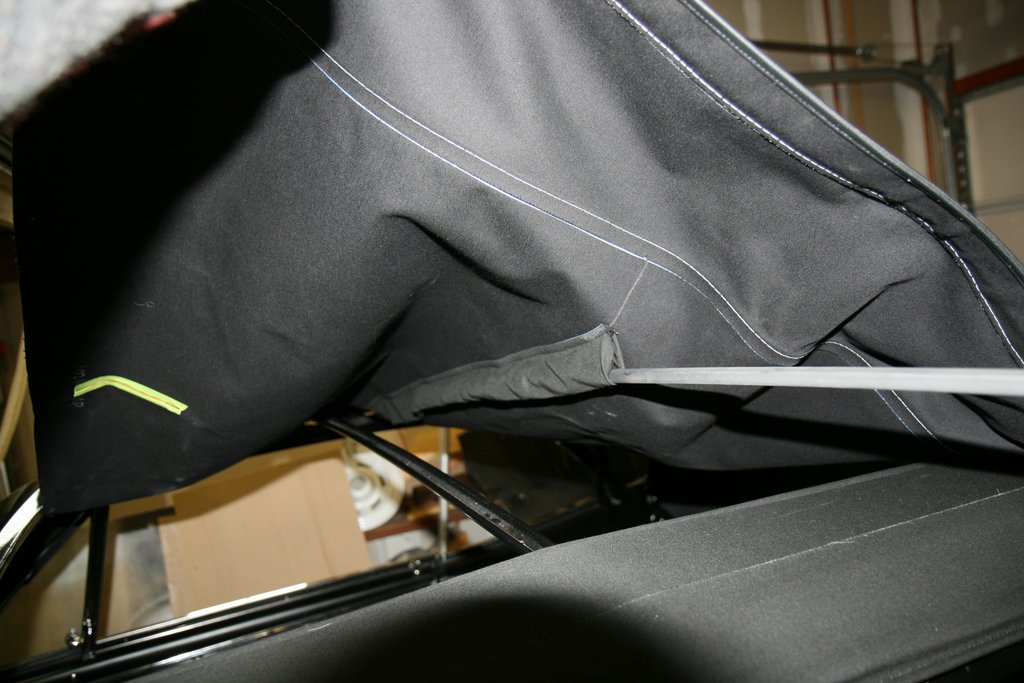
But, I still made some adjustments at the trim sticks which required more removing and installing of the trim sticks. Note how I added gaffer tape to get a little more adjustment range on the driver side rear curtain.

The excess curtain material was then cut off at the rear bow. The spacer sticks can be removed now too.
Top Fabric
Finally, the top fabric itself was ready for installation. First thing was to mark the top frame and the top fabric with centerline marks. I used masking tape and a magic marker. The top can then be laid over the frame and slid around to match the marks on the frame.
The fore/aft position was set by placing the "pucker" slits directly over the rear bow.
The top side cables were then installed. Kee Tops puts strings in the pockets so you can pull the cables through. Thanks Kee.

The Fisher Manual then has you put the listing pocket retainer into the top listing pocket, then screw the retainer into the first bow. Be careful, the retainer has tabs at the ends that slip over the top of the pad edges on each side a little bit (not shown).
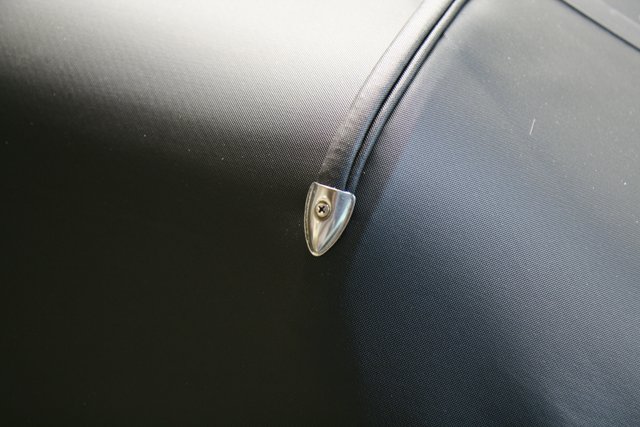
The cable ends were then attached to the frame front and back with the wide flange head screws.
Next step was to prepare the top to be stapled to the trim sticks. First, I aligned the top carefully and as smooth as possible over the curtain/window. I then used tape and chalk to put reference marks on both the top and curtain/window assembly. When the trim sticks are pulled out to staple the top, these marks will help for the first alignment attempt of the top to the trim sticks.
The trim sticks were unscrewed from the body and pulled out,
and the
top was aligned to the marks and stapled to the trim sticks. I
didn't use too many staples at this point.
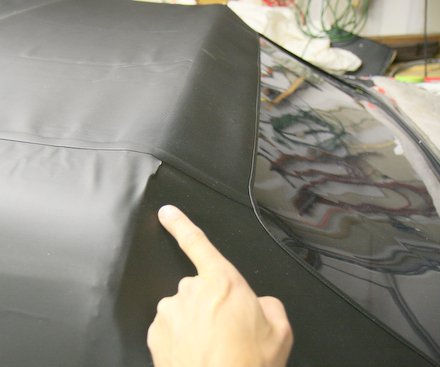
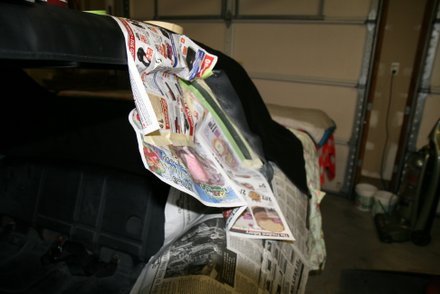
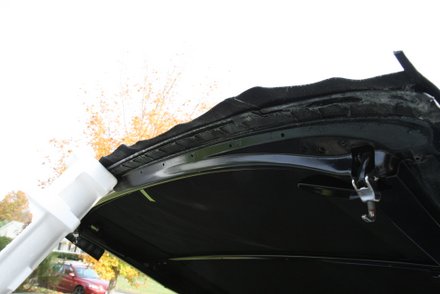
Before bolting the trim sticks back in, the "quarter flaps" needed to be prepared. Convertible tops have four flaps (two on each side) that get attached to the top frame to help pull the top tight, particularly from side to side. The two at the rear are called quarter flaps. The flaps and frame are coated with spray adhesive so the flap can be wrapped around and adhered to the frame.
The picture below is of the driver side rear quarter flap. The picture isn't great, but you can make out the masked off area of the top frame and the flap itself. The quarter flaps were then pulled and adjusted until the top was smooth, then the flap was adhered to the frame. The weatherstripping will eventually get installed over the flaps to really hold them down, but for now the adhesive holds pretty well by itself with a little help from the weatherstripping screws alone.
Of course the position of the flaps need to be adjusted up
or down, and pulled to an appropriate tightness to smooth the
top
as best as possible, and in my case this was done several times.
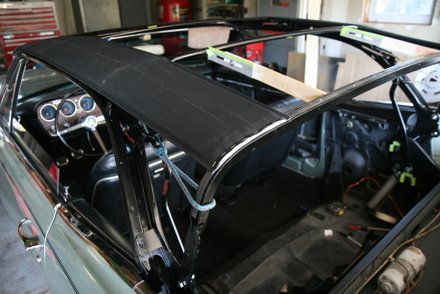
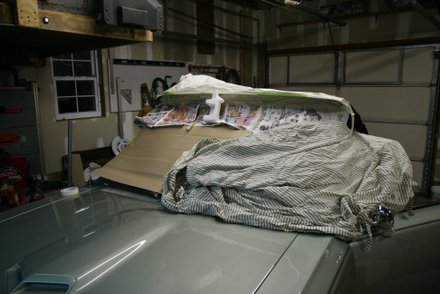
Here's how the top looked the first time the trim sticks and quarter flaps were installed. No, it wasn't that pretty.
I made a couple more adjustments after the initial installation and got most of the major wrinkles out, but I thought it should still be better. Subsequent attempts (removing trim sticks, moving top around, re-stapling top to trim sticks) yielded no improvements. This is the best I could manage:
The Fisher manual implies that the top fit should be acceptable at this stage, and goes on to instruct the installer to staple the top to the rear bow. But this step would lock me into a "fit" that I wasn't satisfied with, so I deviated from the Fisher manual by NOT stapling the top to the rear bow, and skipped ahead to where the front edge of the top is attached to the header bow.
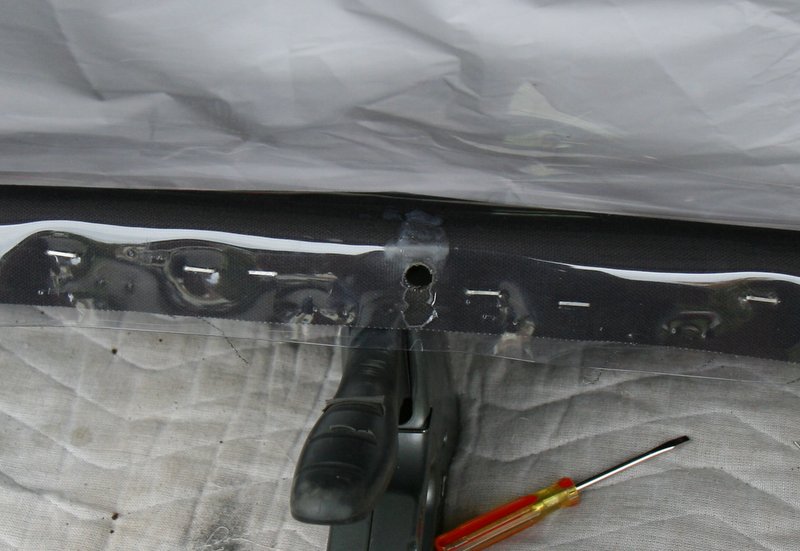
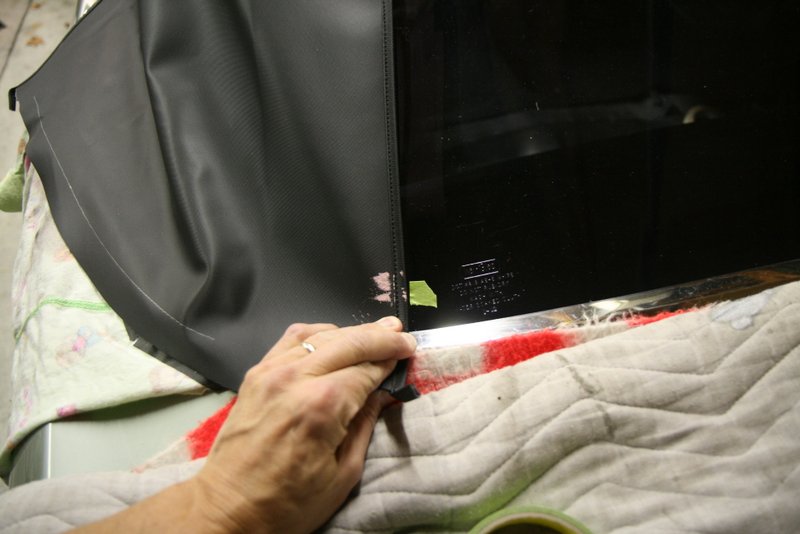
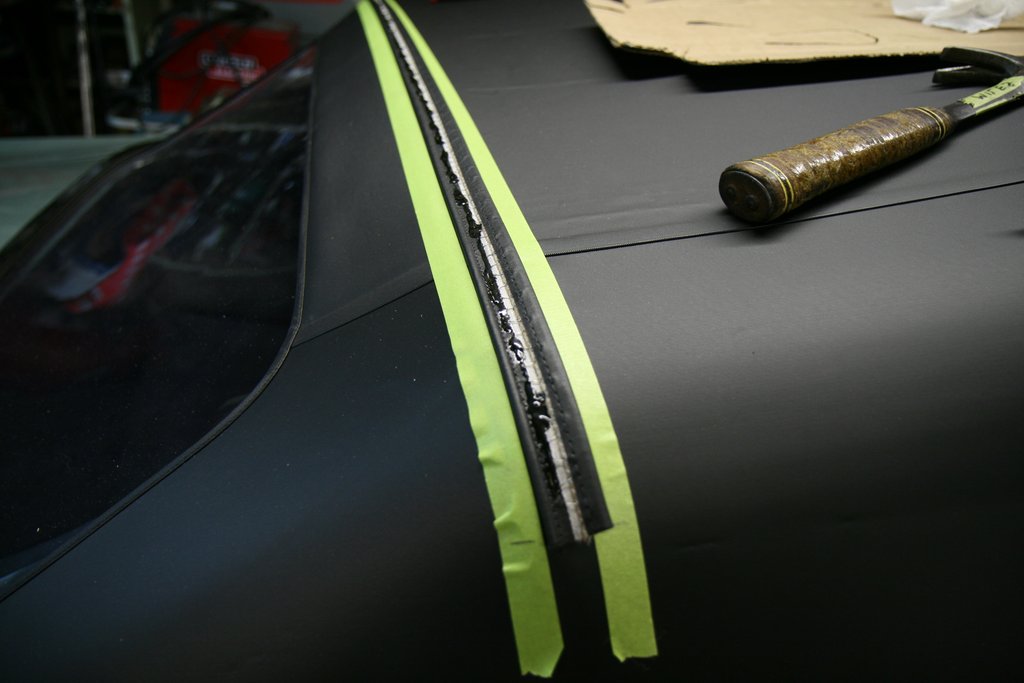
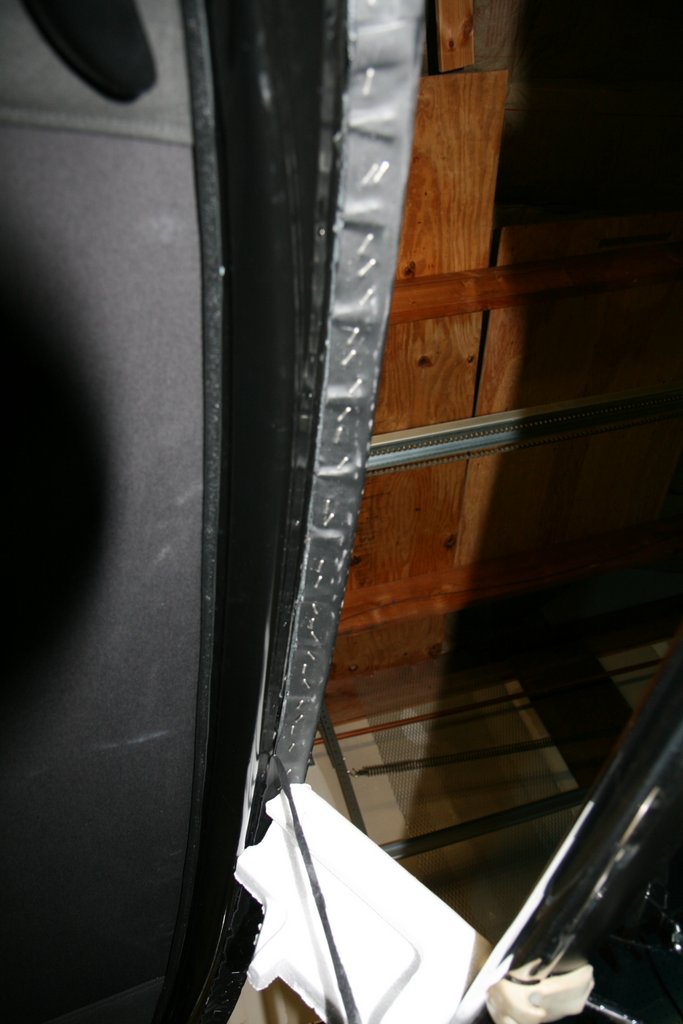
To attach the top fabric at the front, the header bow was unlatched and raised a few inches off the windshield with a foam block spacer (not shown). I also peeled the quarter flaps off to allow the top to more evenly stretch for this step. The top fabric was then pulled forward tight and marked with chalk where it wrapped around the header bow. Chalk marks shown below (also note the top front flap hanging down at the side):
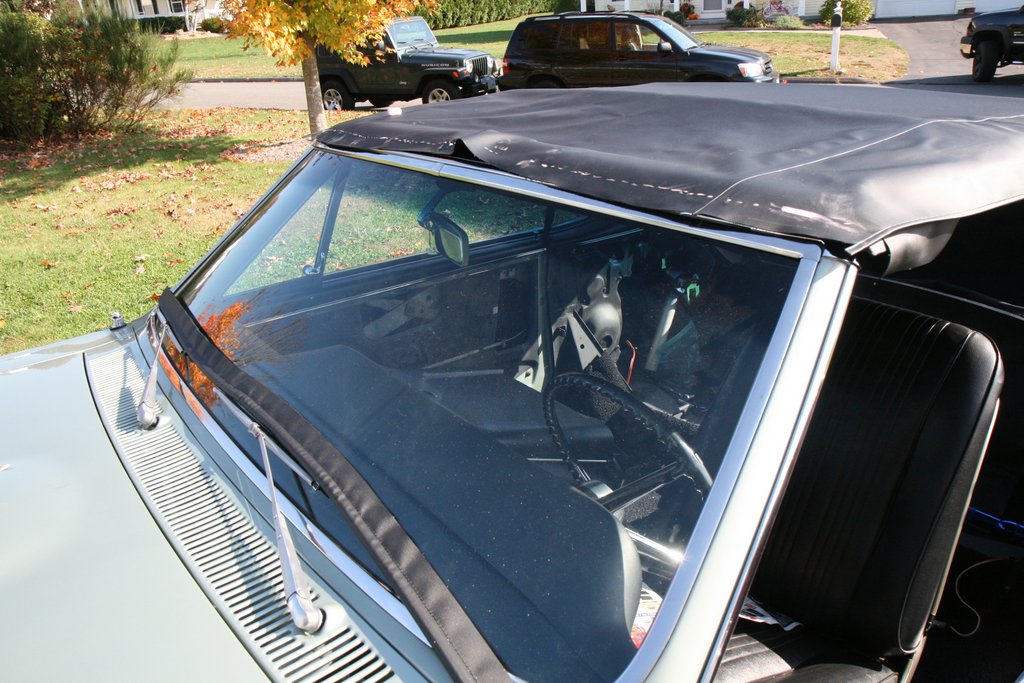
The top was folded back out of the way, and the header bow was then masked off so spray adhesive could be applied to the underside tack strip area.
The top was then pulled forward to the chalk marks, folded over and adhered to the tack strip. Kee does NOT give you much extra to pull on! Since the odds of getting it right the first time were slim, I only put in a few staples, latched the top down and checked the fit.
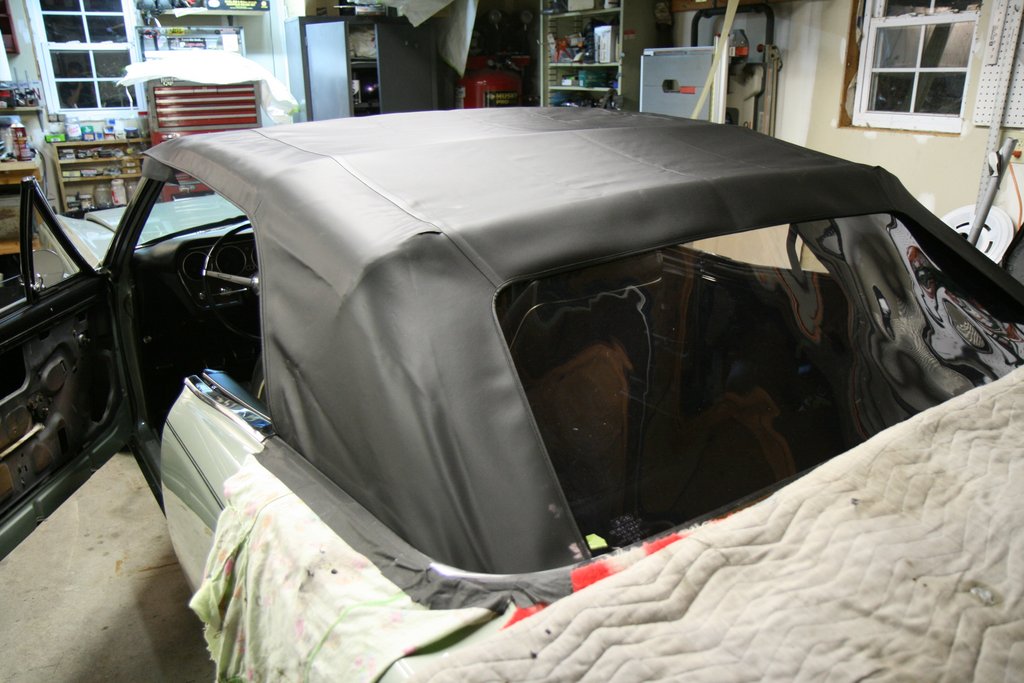
It was still a bit loose, so I did one more adjustment which required removing the few staples, peeling the top away from the header and pulling it tighter by about a quarter inch. When the top was put down and latched, the top looked much better.
At this time I put some spray adhesive on the front flaps and pulled them tight and adhered them to the top frame. Just like the rear flaps, the adhesive holds it fine for the initial alignment work.
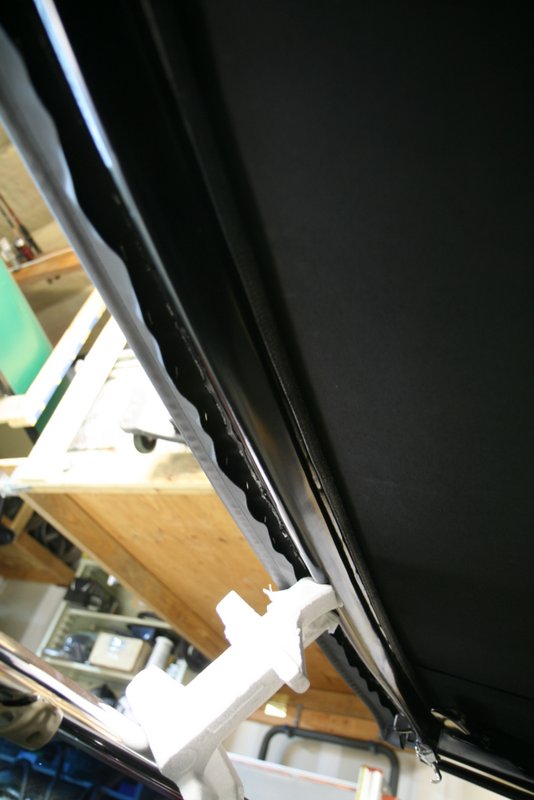
Even without attaching the quarter flaps, the top looked much better:
So skipping the rear bow stapling step in the Fisher manual and attaching the forward edge to the header bow was a huge help to smoothing out the top as a whole.
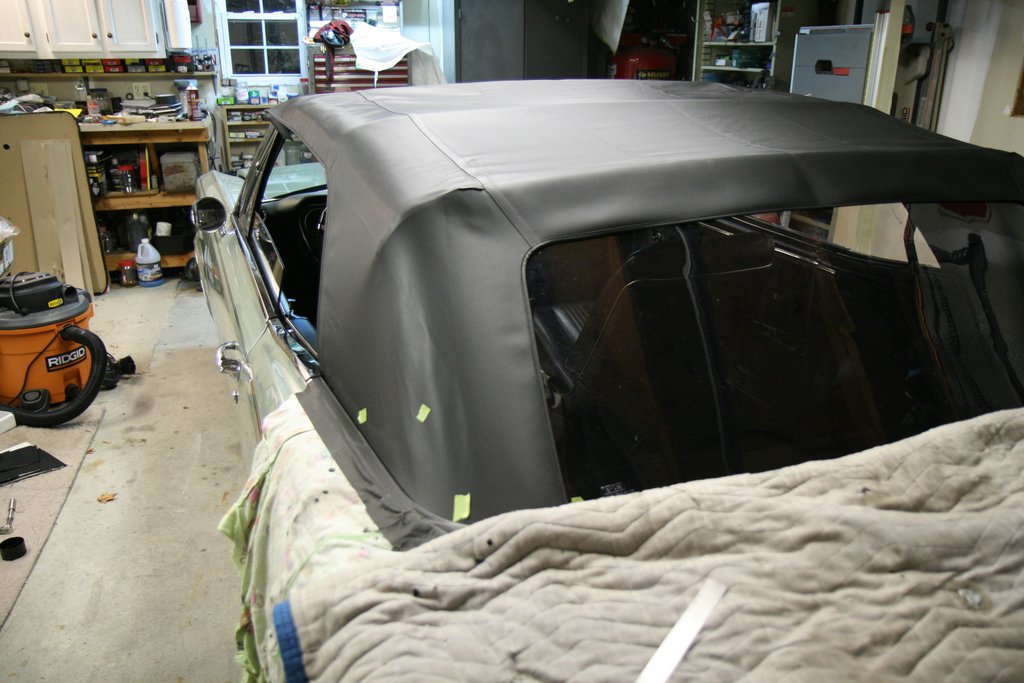
The quarter flaps were then pulled tight and attached which
took out a majority of
the remaining ripples on the sides.

I did this top installation in 55 degrees F weather, so this may have made it harder to pull out wrinkles, but things still came out okay.
The top trim sticks were unscrewed for one last time and the top was pulled out so I could put in a proper quantity of staples for permanent holding power. By the way, anytime the trim sticks were unscrewed from the body, I popped the top and spaced it away from the windshield with a foam block to make trim stick removal easier.
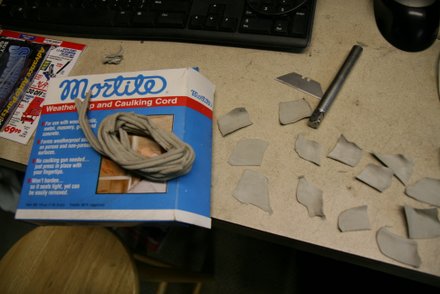
Before putting the trim sticks and top back into the car for the last time, you must seal the top around the screw holes (where it gets pressed up against the gutter.) I made up some "mastic" with Mortite caulking cord and squashed it down into thin gaskets. Incidentally, this is the stuff I used all over the car for sealing trim and fasteners. It's very similar to the original stuff I found when disassembling the car.
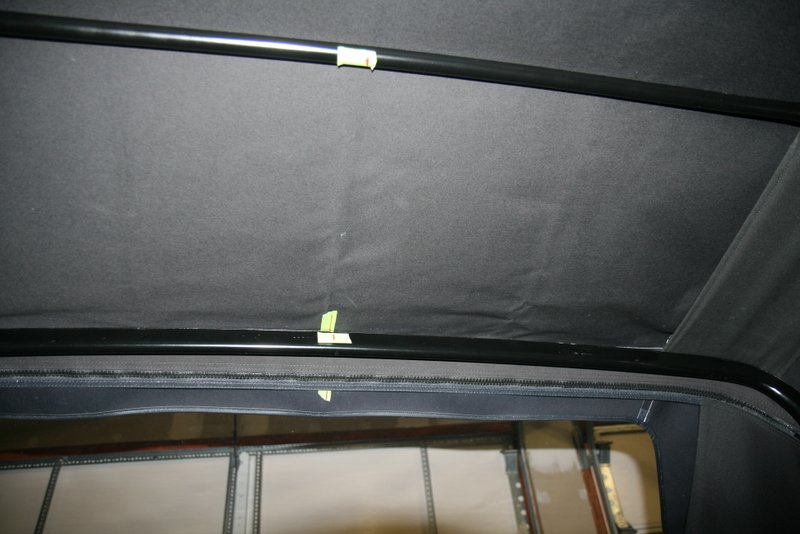
Next the top was stapled down to the rear bow. I used masking tape to help in keeping a straight line. Note how the "pucker" slit is stapled down too.
Here the wire-on is stapled on, but not yet folded over. I used 3M black weatherstip adhesive between the top and wire-on to help seal the staples going into the rear bow. More sealer was added to the wire-on itself before the wire-on was folded over.
I had my old wire-on caps stashed away so I re-used them. Not sure if they're original issue, but they're much heavier-duty than the lousy replacements that came with the new top.
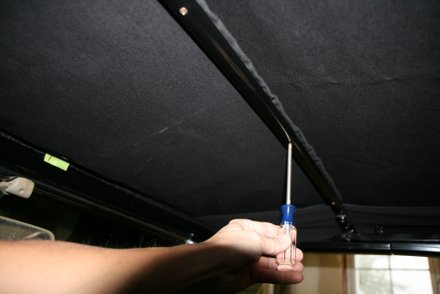
The front header bow was raised up a bit and a proper amount of staples were added here too. Note how you can see the metal tabs that retain the tack strip under the top fabric.
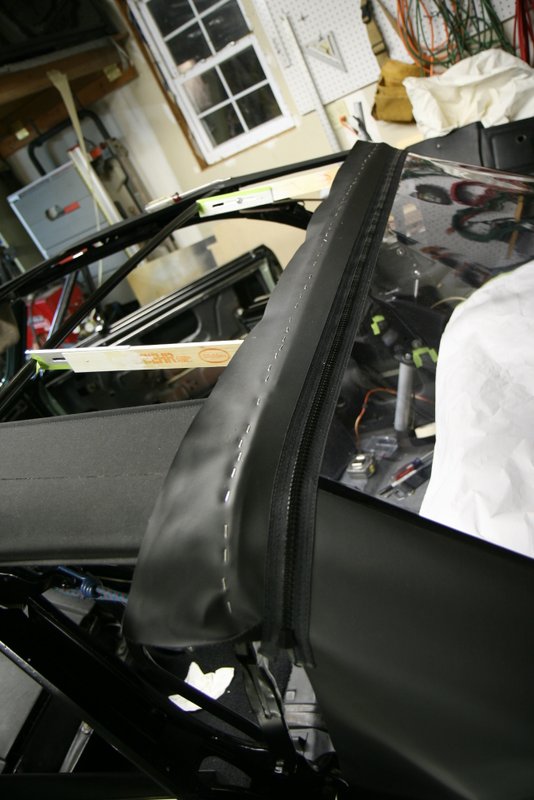
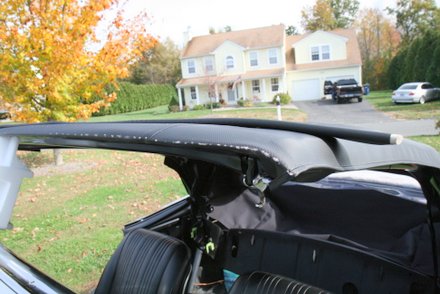
Finally the header windlace was attached. This windlace is simply a sponge rubber cord with a vinyl wrapping. The windlace must be cut to length and the covering must be cut and folded to wrap the ends. The flaps of the material can be spread apart which allows the first flap to be stapled to the underside of the header, and the remaining flap is glued over the stapled flap for a finished look.

In addition to staples, I also applied spray adhesive to the underside of the header to bond the windlace flap into position. The header bow had to be masked off carefully to avoid getting the spray adhesive all over the place.
Here's a picture showing the first flap stapled to the header, and the second flap is ready to be bonded to cover up the first flap. I used 3M weatherstip adhesive to bond the second flap over the first flap.
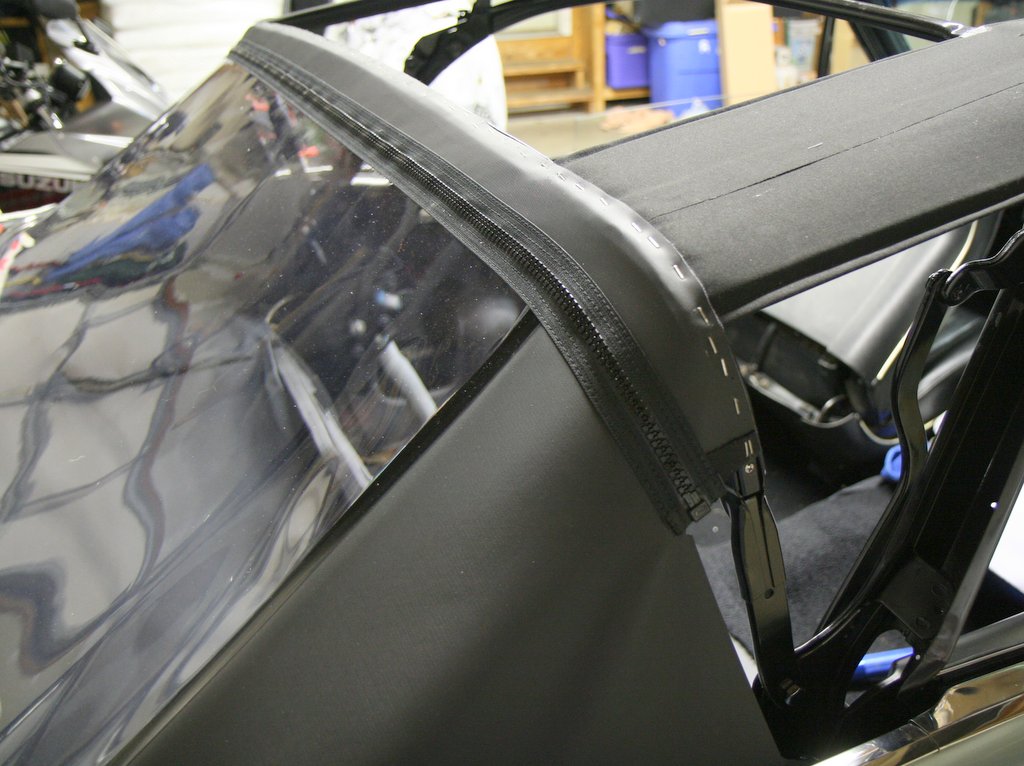
Here's a shot of the windlace installed. As well as being decorative, it does help seal the top from wind noise. The header weatherstrip can now be installed.

I used a Metro convertible top weatherstripping kit to finish it off, and I found the quality to be good. The header seal clips fit in the header bow perfectly. The frame rail rubber seem a little hard, but they do fit well.

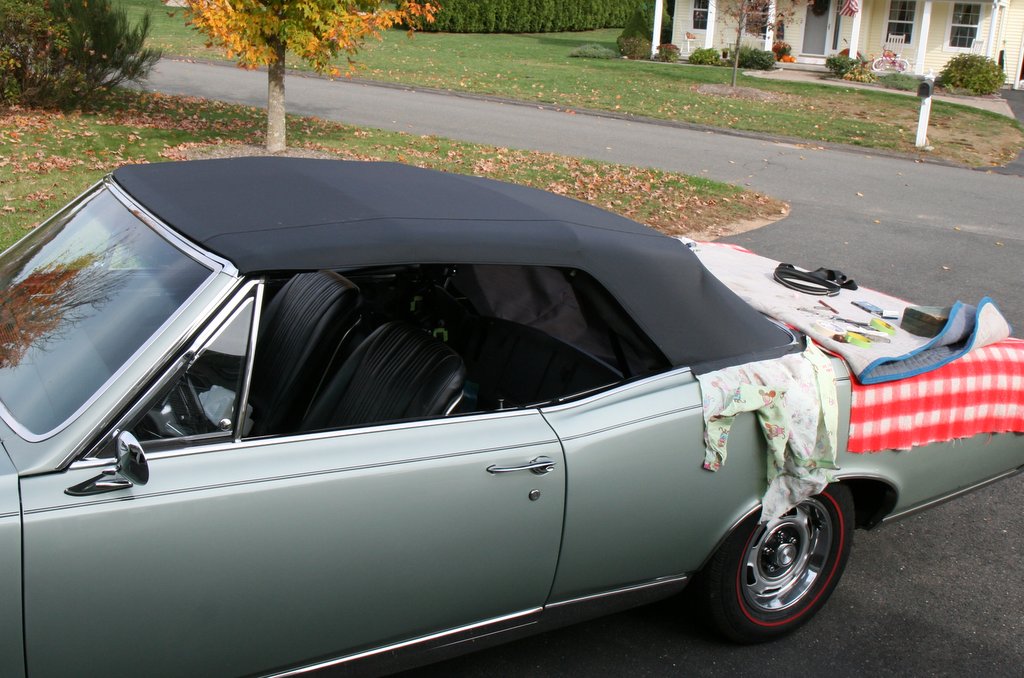
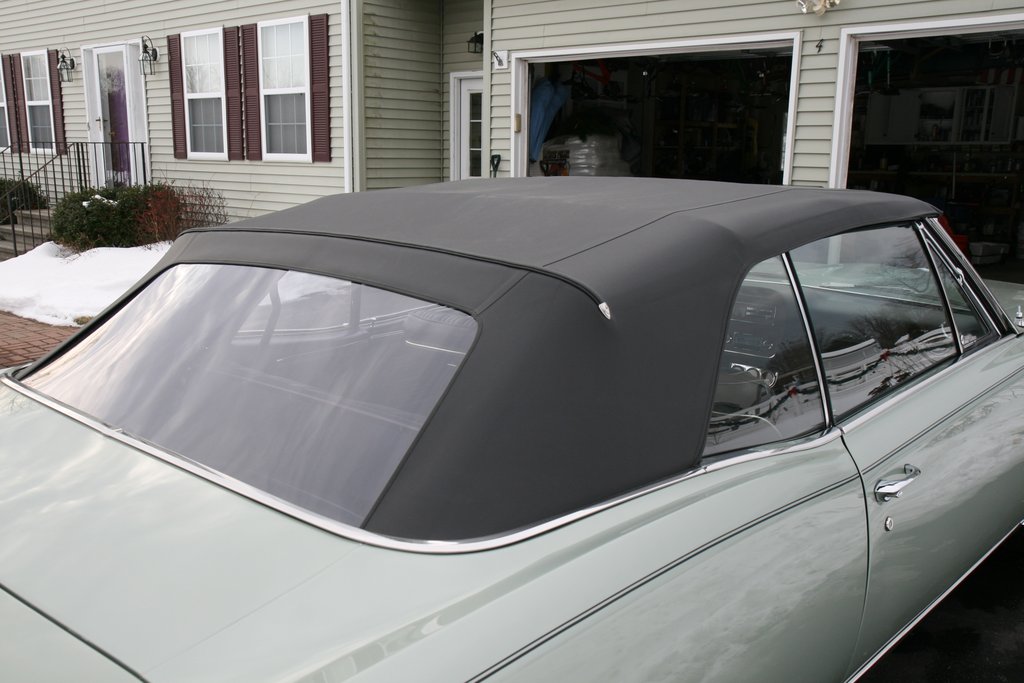
Lousy weather prevents some nice sunny shots, but here's a good shot:
Top Boot
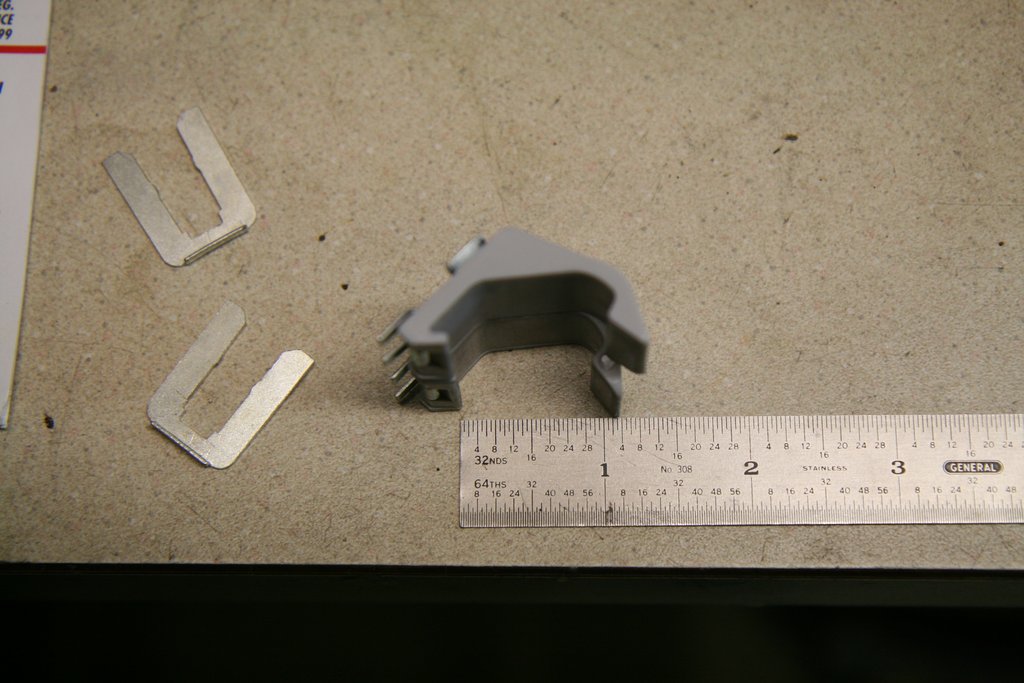
It should be mandatory that all convertibles have a top boot, but I confess I never had one in the the early driving years, so I purchased a PUI boot from AMES. It appears to be a very nice quality piece. I tried installing it before I installed the top, and it fit very nicely. However the top boot clips were useless. I had heard things about the infamous 66-67 boot clips, and sure enough, the clips would just slip right off when clipped on.
Inspection of the clips revealed that they are plastic with a metal spring clip reinforcement, but they are obviously too wide for the hooks to grab the well trim. So, I took the clips off the boot and clamped down on them with a vise so the open "C" was pinched down in width. Here's a shot of a modified "pinched" clip (on bottom) compared to the clip as supplied:
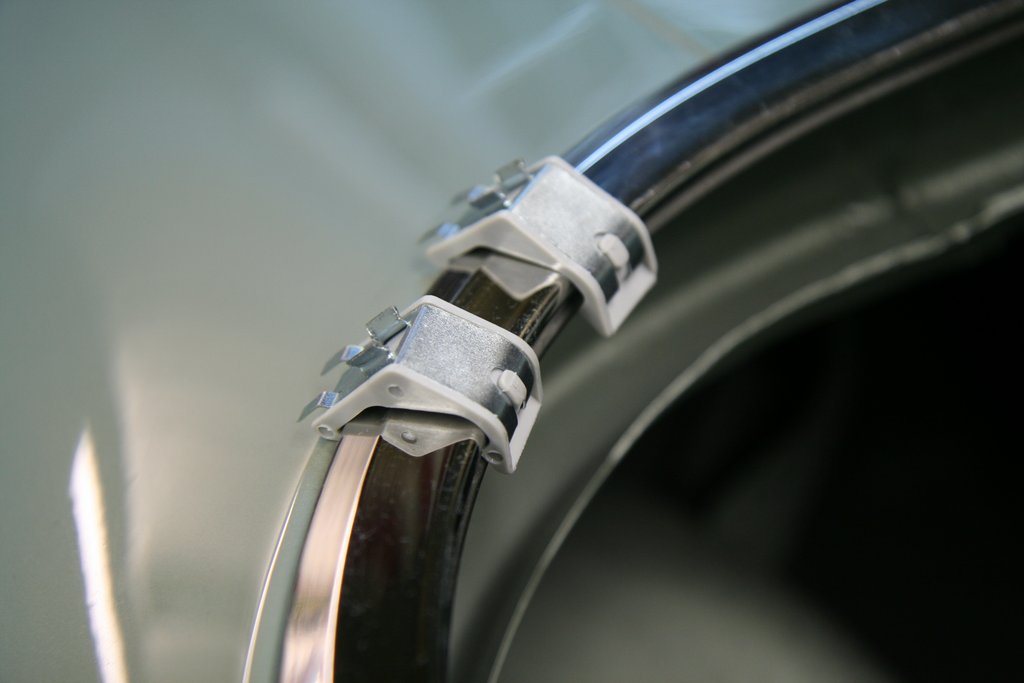
The clip opening was closed down from about 1" to 7/8". This worked perfectly. The clips grab the well trim very firmly, but are not difficult to use. Here's pic of a modified clip installed, and the clip in the rear is not modified yet. Note how the unmodified clip hook doesn't even contact the trim.
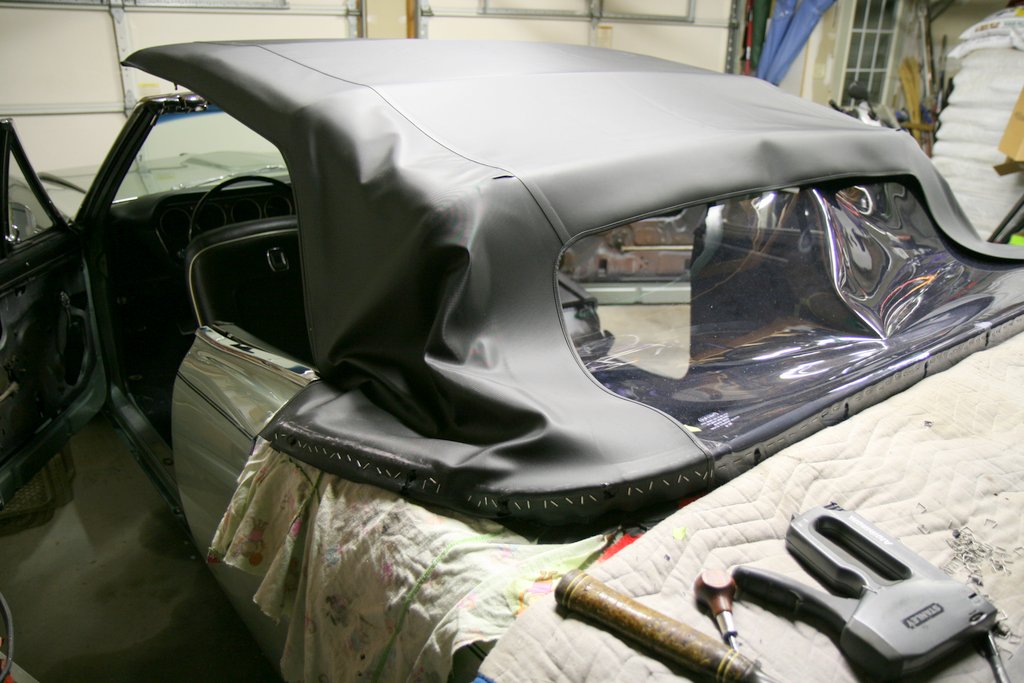
Finished Top
I'm very pleased with the top installation. There are a few subtle wrinkles, but I think they'll come out when I get it out in the sun for a while. I'm amazed at how quiet the car rides with the new top. The top frame used to rattle and shake when I hit bumps, the fabric flapped and made a racket, and the weatherstripping had gaps all over the place. I imagine that what I'm experiencing now is more like how the car was when new.
If I ever get my hands on a GoPro, I'll take some video and post it.
Links
Ames Performance. I purchased the top, pads and boot from these guys.
Kee Auto Top. Supplier of the convertible top and pads
Metro Rubber. Supplier of the weatherstripping
I purchased some of the weatherstripping and stainless staples from Amazon. Watch the prices every day to keep up with Amazon's dynamic pricing. The prices change almost daily, and if you catch it right, you can save some bucks!
SFS
Links:
Willys Jeep CJ3A Forum
There exists a nice set of webpages for CJ3A's. It's got a forum too that caters to both '3A's and CJ3B's. It's a great resource, and frequented by very knowledgible folks.
1967 GTO Original Owner
These two videos feature an original owner GTO. This car was featured in Hemmings Muscle Cars magazine a couple years ago. Part 2 has inside and outside shots of the owner driving the car. Very nicely done.
Blues Maker
"Mississippi" Fred McDowell. One of the great Bluesman. This is a documentary made in 1969.
Pinstripes
Pinstriping the ol' fashioned way. Pretty nice.
MGB Racecar
I've always liked MG's. Watch this MGB lift it's inside tire a few inches off the tarmac when going "'round the bend". Awesome.
Pepsi Throwback
Pepsi has put out a "limited edition Throwback" version of Pepsi with REAL sugar, instead of high fructose corn syrup which has been used since the 80's. Holy cow there IS a difference; it's WAY better. Find some quick!