
Projects:
GTO
My
67 Pontiac GTO
Trunk Body Work
-Trunk pans
-Wheel wells
Body Work Part 1
-Rear Quarters
-Rear Door Jambs
-Window Reveals
Body Work Part 2
-Cowl
-Pillar
-Rocker
Body Work Part 3
-Windshield channel
-Doors
-Fenders
GTO Paint
-Filler work
-Priming
-Blocking
GTO Frame Work
GTO Convertible Top Pt 1
-Top Frame
GTO Convertible Top Pt 2
-Top Trim
GTO Drivetrain
-Engine
-Quadrajet Rebuild
-Exhaust
-Axle
Muncie
Rebuild
popular
Auto to Manual Swap
1967
Ram Air GTO
story
Wheelhouse Filler template PDF
Willys CJ3A
CJ3A Intro
Engine and REBUILD
Drivetrain
BodyWork 1
BodyWork 2
BodyWork 3
BodyWork 4
Paintwork 1
Paintwork 2
Final Assembly
Final Assembly 2
Electrical System
Other Rods
TJ Wrangler Rubicon
CJ7
CJ8
Decrepid Dakota
Powerdyne Minibike
Allis Chalmers B engine rebuild Part 1
Allis Chalmers B engine rebuild Part 2
Allis Chalmers Generator to Alternator conversion
Gizmos
Stereo camera
rig
Stereo mic preamp
About:

Feeds

Markup
CJ3A Bodywork Part 3
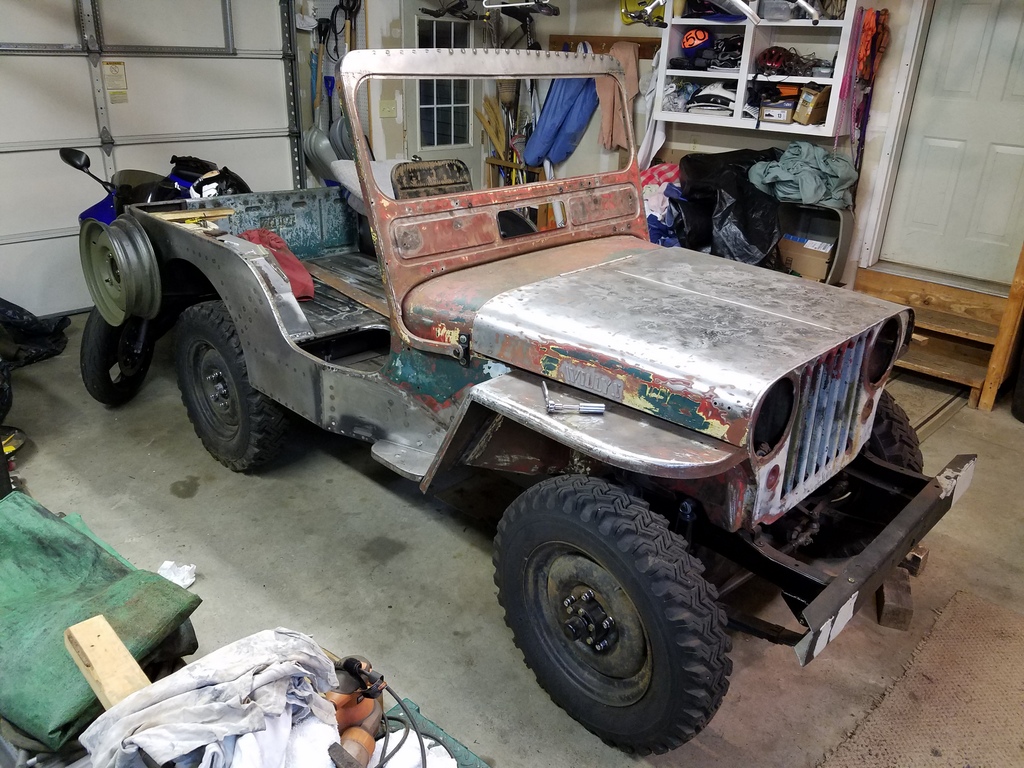
This is part 3 of a rebuild and refurbishment of a 1950 Willys Jeep CJ3A body tub. Scoll down for latest updates.
Winter 2016-2017
In the Previous Installment of the Willys Jeep body tub rebuild, the front and rear tub sides were replaced, the new tool compartment was tweaked and fitted, and the tail gate area was completed. The remaining major tasks include finishing the front fenders, repairing the hood and also doing some metal surgery to the windshield frame.
Front Fenders
Despite some initial repairs to stabilize the front fenders, there was still a large amount of rust in all the overlap flanges and hat channel areas. They needed to be completely rebuilt. Both driver and passenger fenders needed the same repairs, so the following photos switch back and forth between the two.
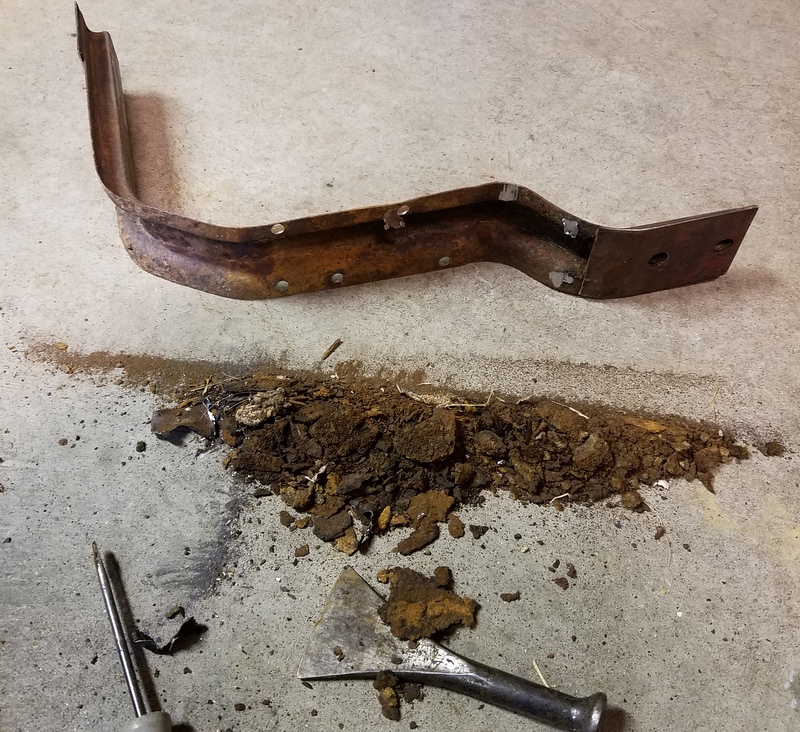
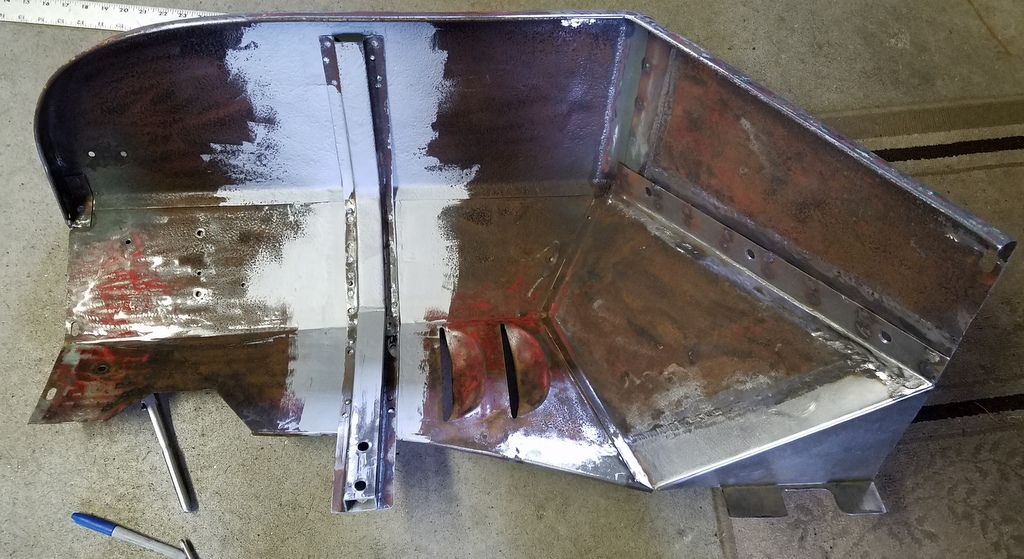
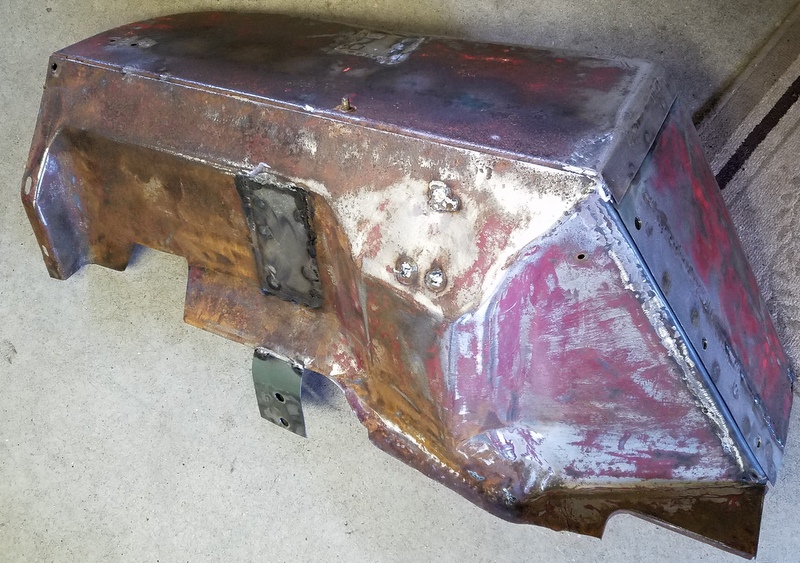
To be as thorough as possible, the fender hat channels (passenger side shown below) were removed so all the crud and rust could be blasted away. Repairs were easier to do with these out of the way too. The flap of metal on the right (picture below) still had remnants of wood behind it that Willys put in there for anti-crush purposes. It was removed so steel spacers could be substituted for the wood.
The driver side lower rear apron was mangled and rusted so it was cut off and new metal was pieced in. On early CJ3A's, the two tabs (not drilled yet) on the lower apron are bolted to the frame. The "stripe" of new metal on the right was where the hat channel rust had been.

The corners of each fender's wheel opening were rusted and cracked so these were cut out for piecing in new stuff.
This new section is for the driver side. The curved corner was a combination of shaping, slitting and welding to get the corner shape needed. Not the prettiest, but ultimately functional. The pieces were primed, then welded together in preparation for grafting onto each fender.
The passenger side top corner patch was a little smaller:
Lots of welding, but it feels good to be saving the original fenders.

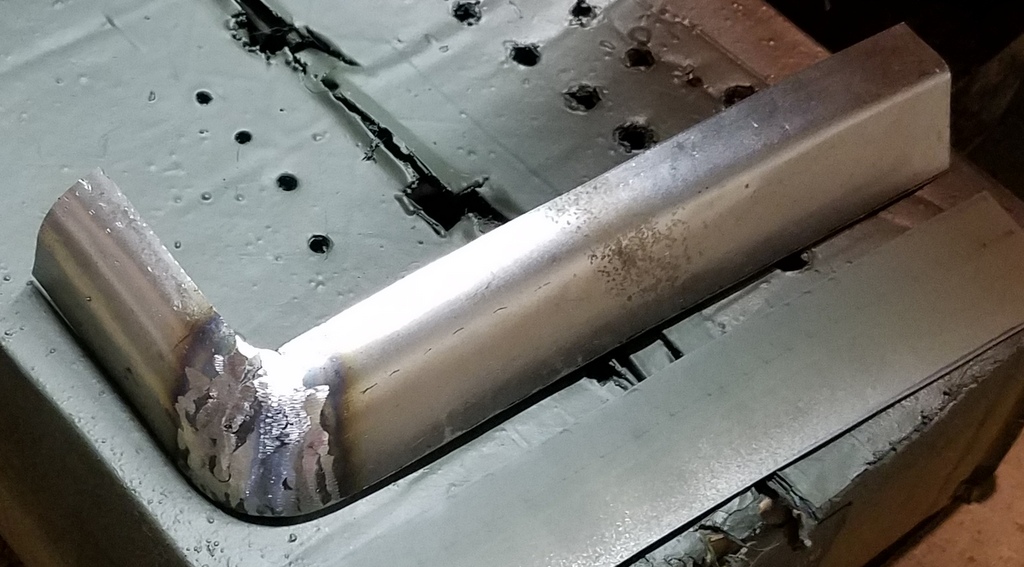
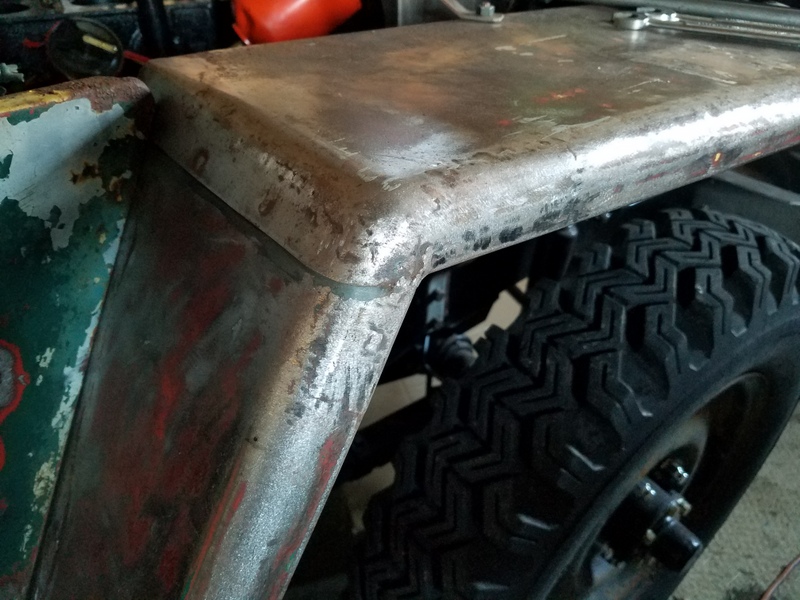
The original exposed edges of the fender wheel openings were wrapped around a heavy wire to make a smooth beaded edge. I made patch pieces of these edges by crimping sheet metal around some welding rod, cutting them to shape and then tacking them in.
Patching for this corner is complete, but it has not been dressed with a grinder yet.
Ground down. Mostly.
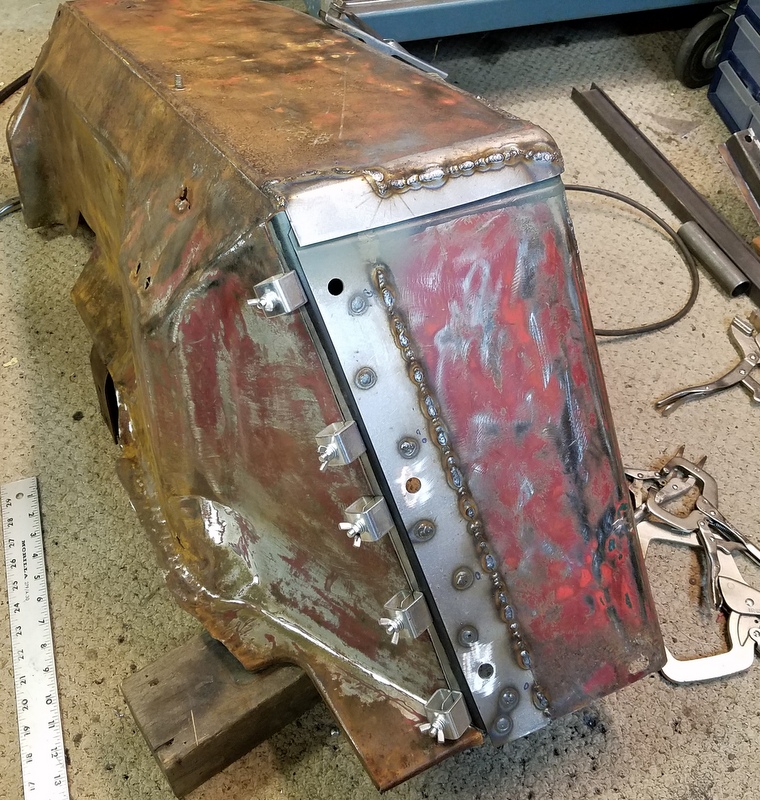
The rear outer fender/inside apron sections share a long, wide overlap flange (with three mounting holes) and this needed replacement too. The flange was cut out, and a duplicated flange grafted in.
The driver side also needed a new patch by the front edge where it bolts into the grille.
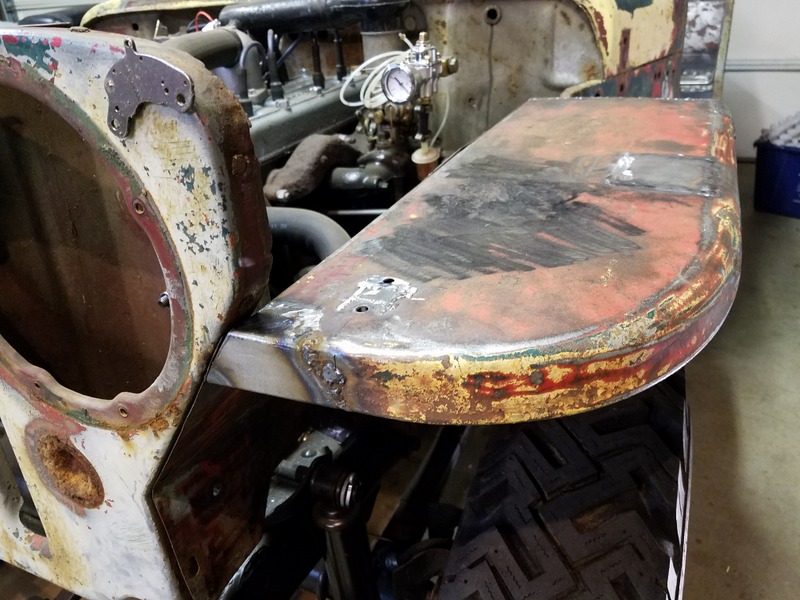
The tops of the fenders were "oil canned" from abuse over the years and after patching, the condition was worse. They needed shrinking to tighten them up, but I don't have an oxy-acetylene torch which seems to be the preferred method to shrink. I tried propane and it worked quite well for me. Here's a video of how I did it:
Once all repairs were complete the hat channels were reinstalled with plug welds.
When bolted on they are quite solid.

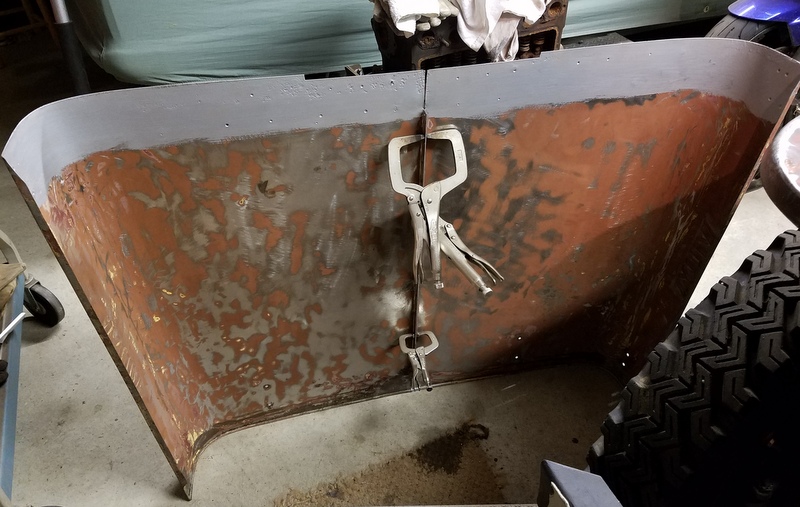
Hood
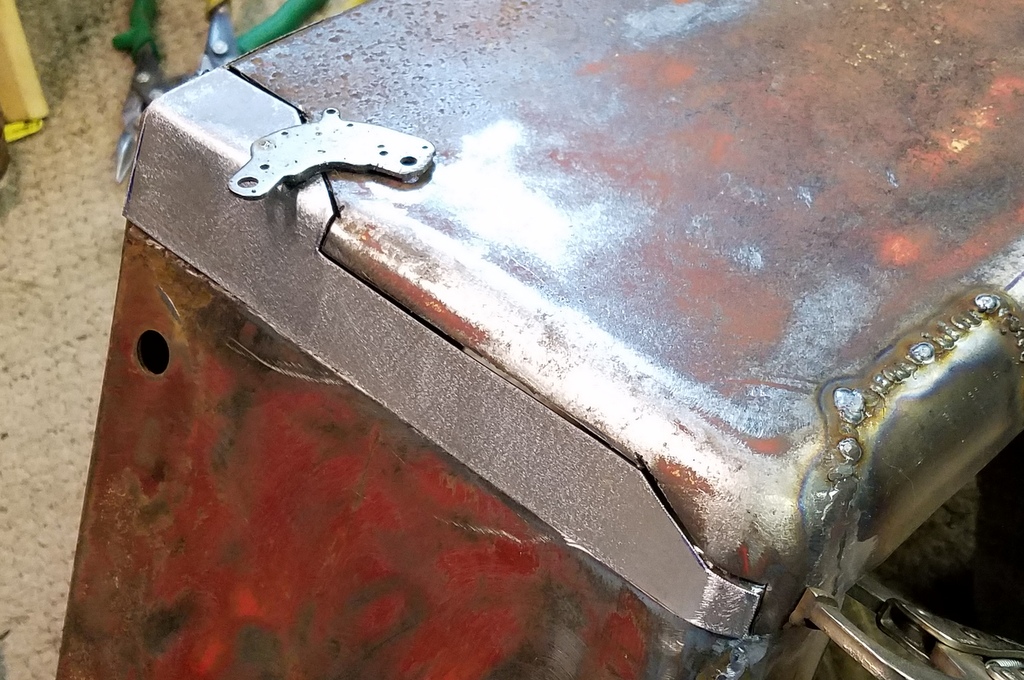
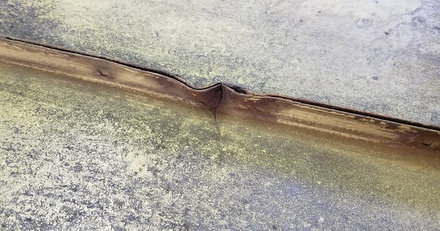
The hood had been caved in a few times and the center "T" flange was stretched and cracked.
About half the spot welds in the "T" flange were popped also, so it was easy to take the hood completely apart, including the rear brace. Here's one half of the hood (looking from the inside) with the crack welded and flange replaced.
The rear brace was sandblasted and primed.
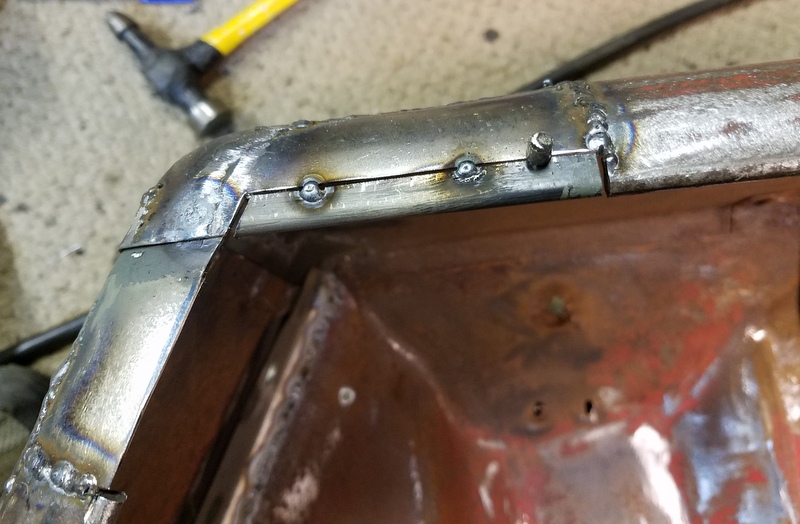
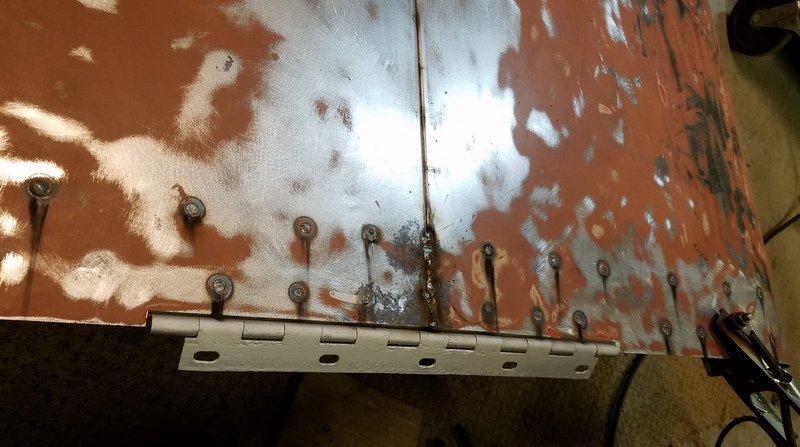
For reassembly, the two halves of the hood were plug welded together first.
The rear brace was plug welded back in place. The hood halves are fully welded for an inch or two in the seams front and back.
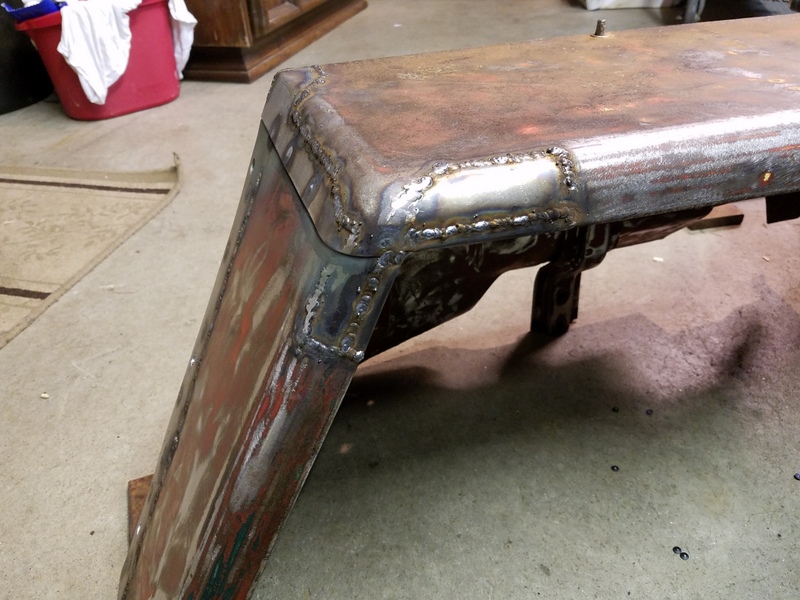
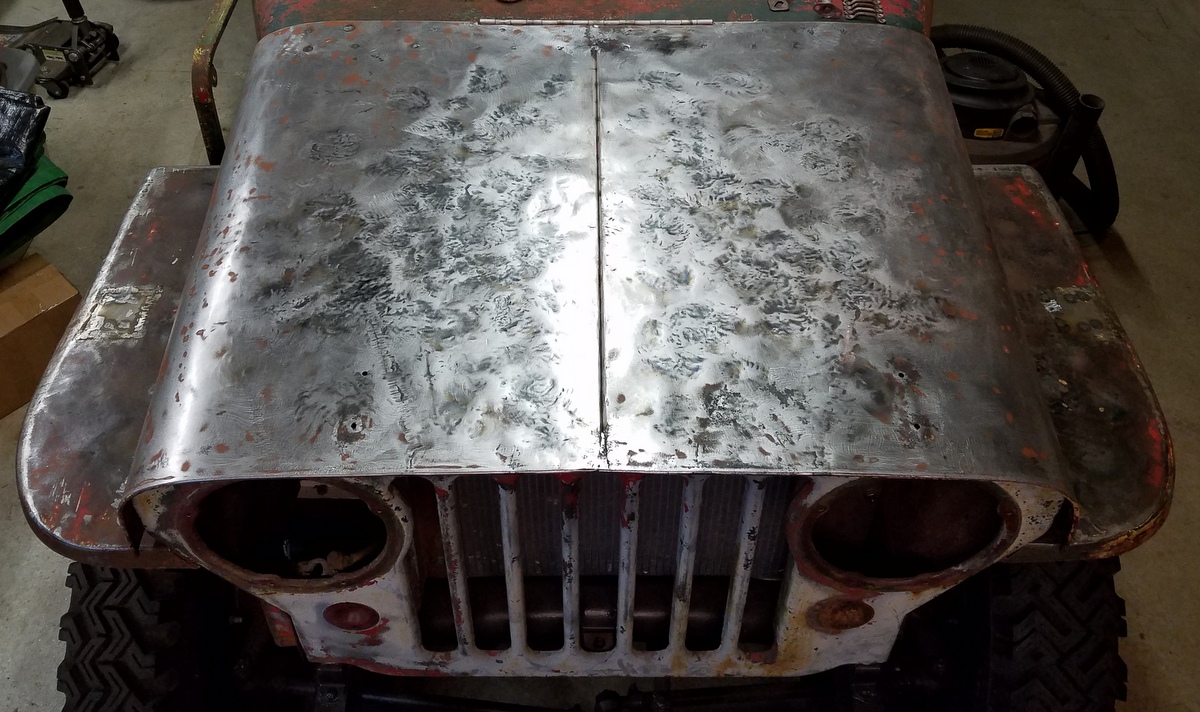
The sheet metal was still quite distorted after the repairs and I struggled to get it flat. I did some "shrinking" as described earlier (the gun-metal colored spots), but I couldn't get all the stretch out. I thought the hood was a goner, and decided it was time for desperate measures. It is not unheard of to make slices and weld them up to take out huge bulges, so I made four slices with my cut-off wheel and the bulges de-bulged. With the stress "de-sprung", I re-cut the slices to make a weldable gap.

After welding and grinding, it didn't look so bad. Elegantly done? Nope. Beautiful in a badge-of-honor way? Yup. Considering most would not have bothered with this hood, I'm happy. It's still got some "texture" but with some additional hammer and dolly work it passes for me.
These hoods are flimsy. If a rotund cat jumped up on the hood I'd worry it would buckle again. I intend to put some half inch square tubing alongside the flange inside to beef it up. I'll post an update when I do this.
Windshield
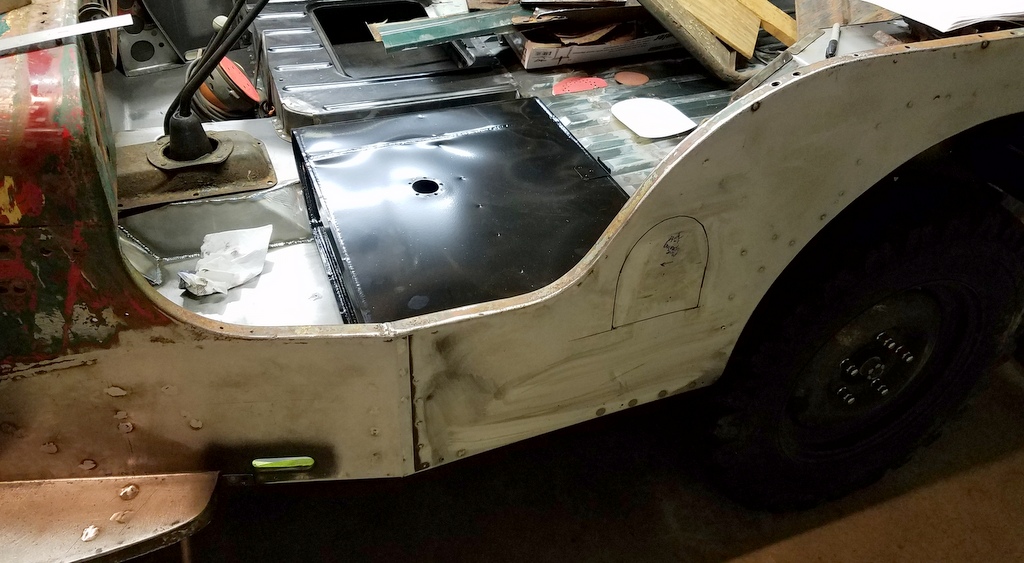
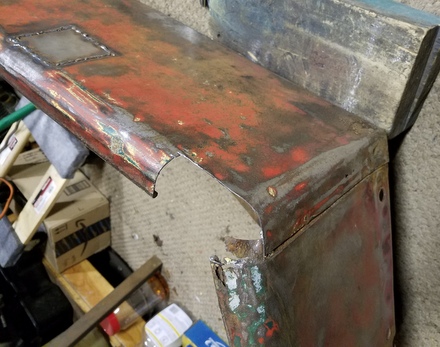
The windshield had a pretty good life up to now. Sure, it's got a zillion holes from the hard top, as well as more holes from various accoutrements over the years, but it was never folded down, mangled or bent. Indeed, there is a nice patch of original Luzon Red on the cowl where the windshield gasket shielded it from the harsh world...
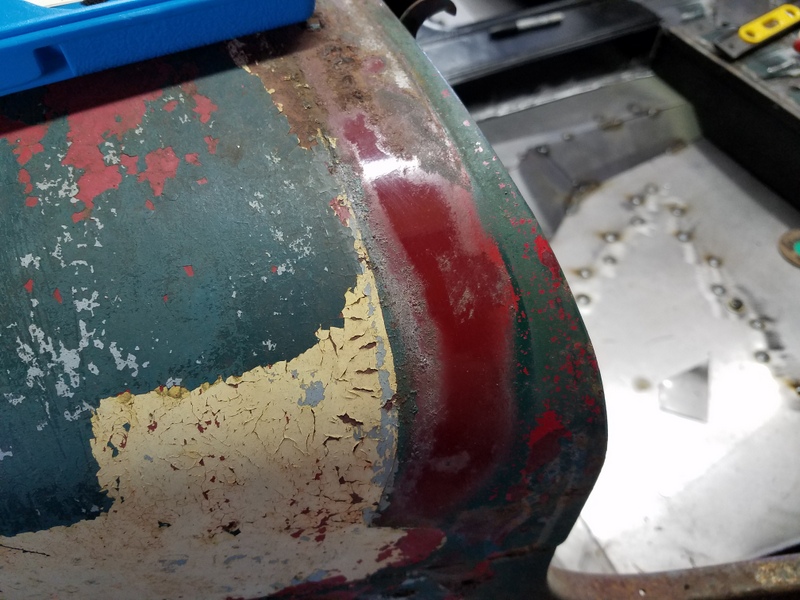
By contrast, look at the Luzon Red (under the yellow) that was exposed to the elements over the decades. Sort of a rotten banana brown hue.
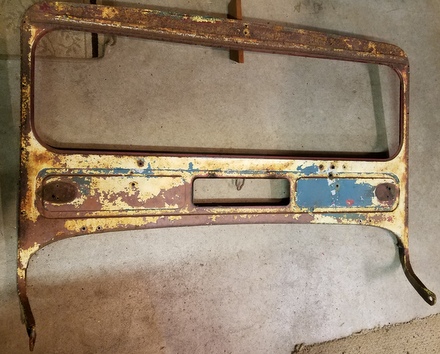
The sheet metal above the glass had rotted out where the hard top overlapped it. I cut it off.
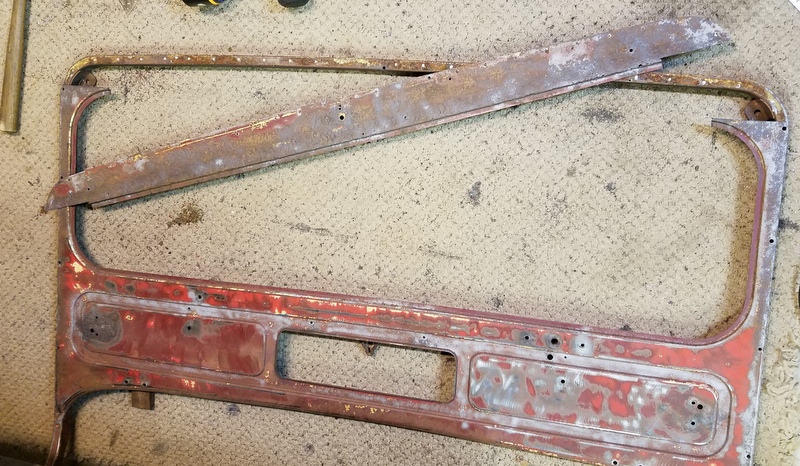
The patch will need a "Z" shape on the lower edge (a flange for the glass gasket). I cut up some wood to serve as hammer forms to fold the metal.
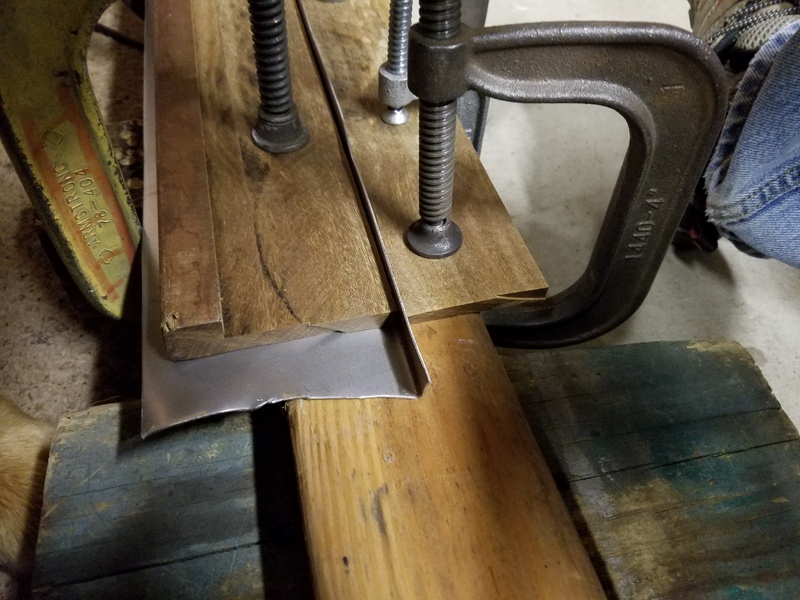
I didn't have a long enough piece of scrap left to make one long patch, so I made two and welded them together.
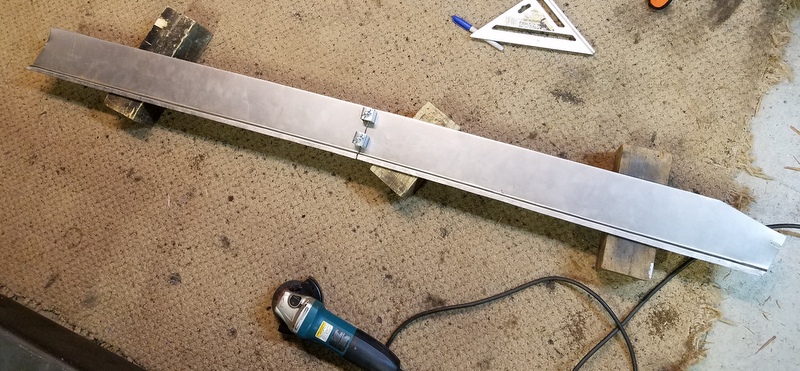
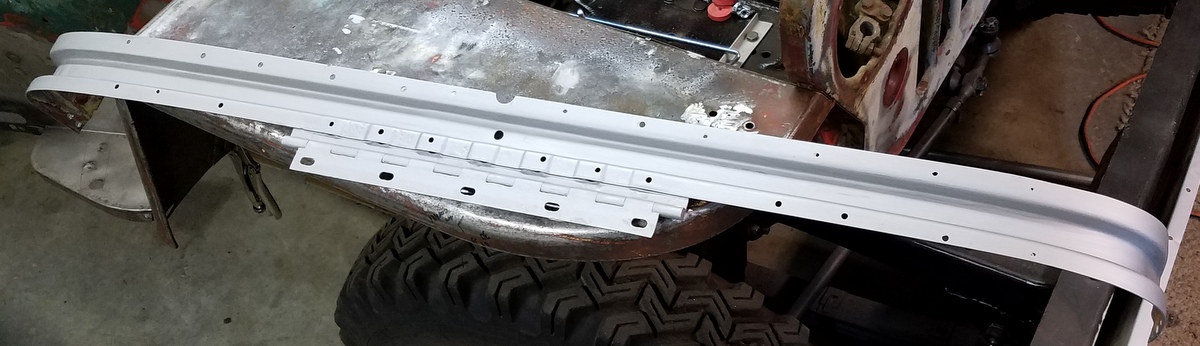
The patch was trimmed to match the upper curve and test fit.

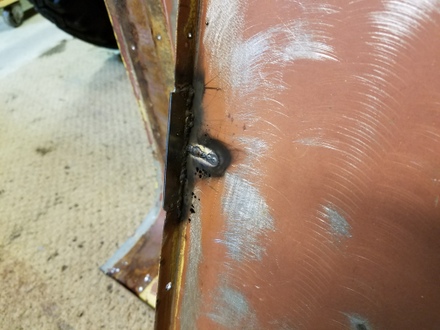
Holes were drilled for plug welds, and the piece was welded to the original metal on the sides.

It felt good to finally see it all together for the first time:
Other Smaller Stuff
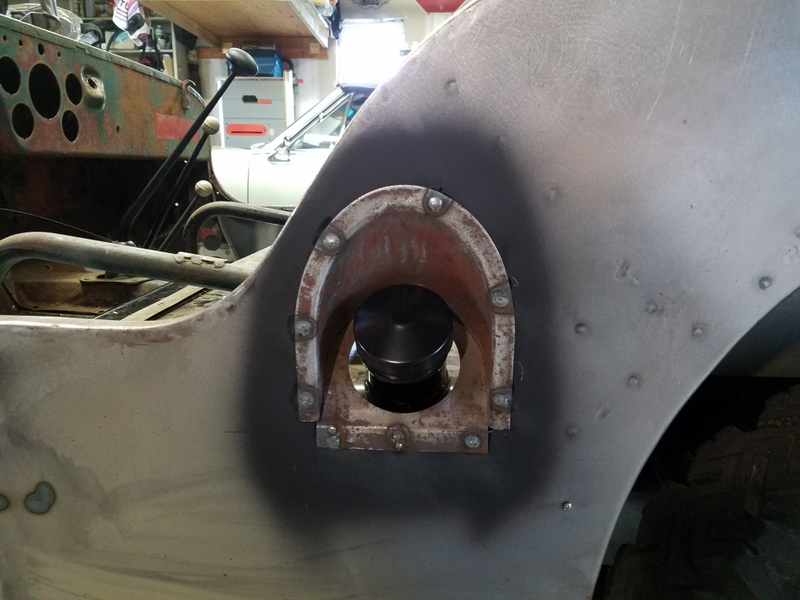
I finally installed the ol' gas filler flange. I used an ancient cheapo Skil jigsaw to cut out the opening. I used a metal cutting blade, but ground the front-to-back width of the blade smaller in order to make sharper curved cuts. After cutting, I coated parts with epoxy primer, then plug welded the flange into place using the original spot weld locations.
Getting It Legal
Now that most of the metal work is done, I thought it prudent to try and get the Jeep registered in my name. Since the Jeep has been "off-grid" for decades, it was going to need a DMV VIN verification in person, and it would be best if it was a complete working vehicle:
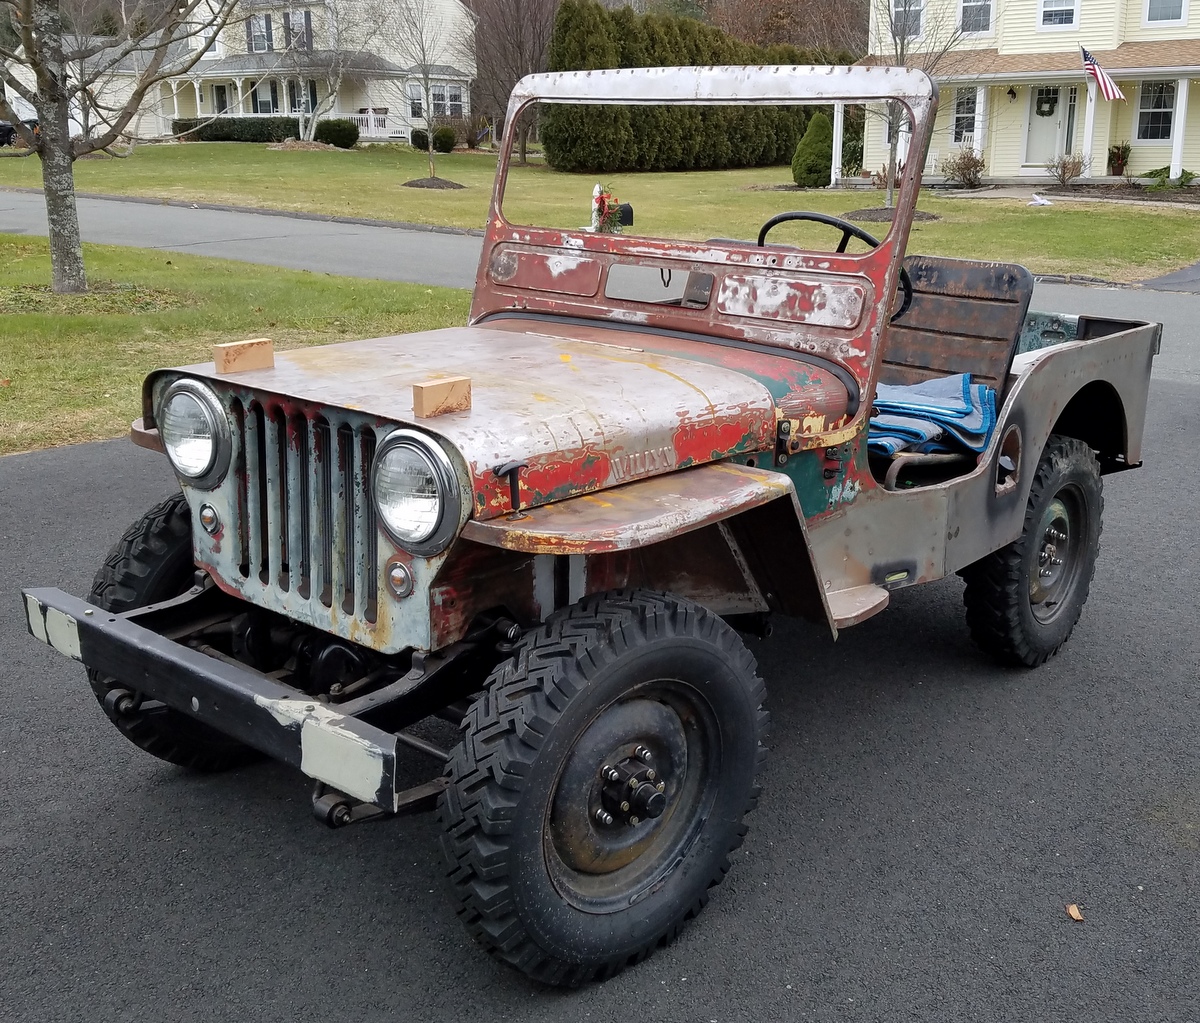
I did a complete 12V re-wiring with relays and fuses, refurbishment of the gauges, repair and installation of the seat frames, installation of the fuel system and even the exhaust tailpipe was put in. I got my registration, and then took the Jeep apart again to finish the bodywork. CLICK HERE to see page 4 of the CJ3A bodywork!
Click here to go to the HOME page.
Email squid:
SFS
Links:
Willys Jeep CJ3A Forum
There exists a nice set of webpages for CJ3A's. It's got a forum too that caters to both '3A's and CJ3B's. It's a great resource, and frequented by very knowledgible folks.
1967 GTO Original Owner
These two videos feature an original owner GTO. This car was featured in Hemmings Muscle Cars magazine a couple years ago. Part 2 has inside and outside shots of the owner driving the car. Very nicely done.
Blues Maker
"Mississippi" Fred McDowell. One of the great Bluesman. This is a documentary made in 1969.
Pinstripes
Pinstriping the ol' fashioned way. Pretty nice.
MGB Racecar
I've always liked MG's. Watch this MGB lift it's inside tire a few inches off the tarmac when going "'round the bend". Awesome.
Pepsi Throwback
Pepsi has put out a "limited edition Throwback" version of Pepsi with REAL sugar, instead of high fructose corn syrup which has been used since the 80's. Holy cow there IS a difference; it's WAY better. Find some quick!