
Projects:
GTO
My
67 Pontiac GTO
Trunk Body Work
-Trunk pans
-Wheel wells
Body Work Part 1
-Rear Quarters
-Rear Door Jambs
-Window Reveals
Body Work Part 2
-Cowl
-Pillar
-Rocker
Body Work Part 3
-Windshield channel
-Doors
-Fenders
GTO Paint
-Filler work
-Priming
-Blocking
GTO Frame Work
GTO Convertible Top Pt 1
-Top Frame
GTO Convertible Top Pt 2
-Top Trim
GTO Drivetrain
-Engine
-Quadrajet Rebuild
-Exhaust
-Axle
Muncie
Rebuild
popular
Auto to Manual Swap
1967
Ram Air GTO
story
Wheelhouse Filler template PDF
Willys CJ3A
CJ3A Intro
Engine and REBUILD
Drivetrain
BodyWork 1
BodyWork 2
BodyWork 3
BodyWork 4
Paintwork 1
Paintwork 2
Final Assembly
Final Assembly 2
Electrical System
Other Rods
TJ Wrangler Rubicon
CJ7
CJ8
Triumph TR4
Decrepid Dakota
Powerdyne Minibike
Allis Chalmers B engine rebuild Part 1
Allis Chalmers B engine rebuild Part 2
Allis Chalmers Generator to Alternator conversion
Gizmos
Stereo camera
rig
Stereo mic preamp
About:

Feeds

Markup
GTO Body work Part 1
This page deals with the bodywork performed on a 1967 GTO convertible. Part 1 deals with the rear sheet metal work.
Introduction
Like many thousands of other GM cars from the 60's, this GTO has developed some rust over the years. It's first "refurbishment" was done in the late 70's by the previous owner. Some of the work was very nicely done, but some was not so nice.
The tailpanel replacement was done well, but the driver side quarter panel was crudely repaired with some bent up sheet metal grafted on with a huge lap weld. The body accent contour behind the rear wheel was way off and the wheel well trim did not fit well. Inside the trunk you could see a huge ugly joint with a sharp sheet metal edge. But still, when I bought it in '87, the car looked pretty good and the paint was in good shape.
In the first decade or so of my ownership, the car had to stay outside. The trunk rusted from the inside out from all the years of a leaky top. Fixing the trunk was the first job I tackled. This work is highlighted elsewhere on this site on the trunk page.
Starting with the trunk work first gave me valuable experience with metal work. I was able to learn how to cut out old metal with minimal collateral damage, form metal patches, set proper gaps for butt welds, and perfect my butt-welding stitching technique.
While doing the trunk repair, I also removed all the damaged quarter panel sections. This made it much easier to do the trunk work. Now that the trunk is done, I'm starting in on the exterior metal repair.
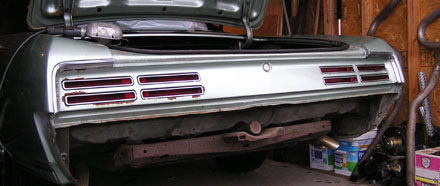
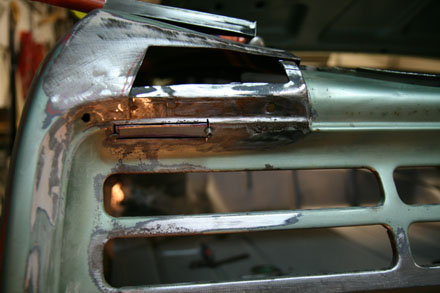
Tail panel
The tail panel has suffered from rust probably like the first one did. In particular, some of the edges of the light cutouts have gotten very thin and pin-holey. This damage seems typical from the way the tail-light design collects moisture between the seals
I cut out the damaged lip and made a long "L" piece of metal to replace it. Here it is tacked in.
Here's the opening to the right with some slightly different shapes. This piece hasn't been tacked yet and it held on with some magnets.

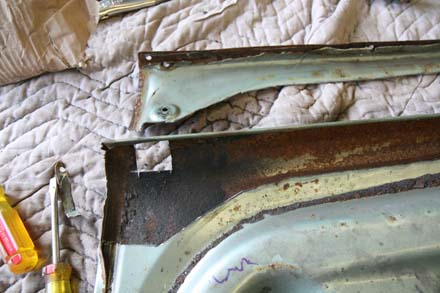
Rear Quarter End
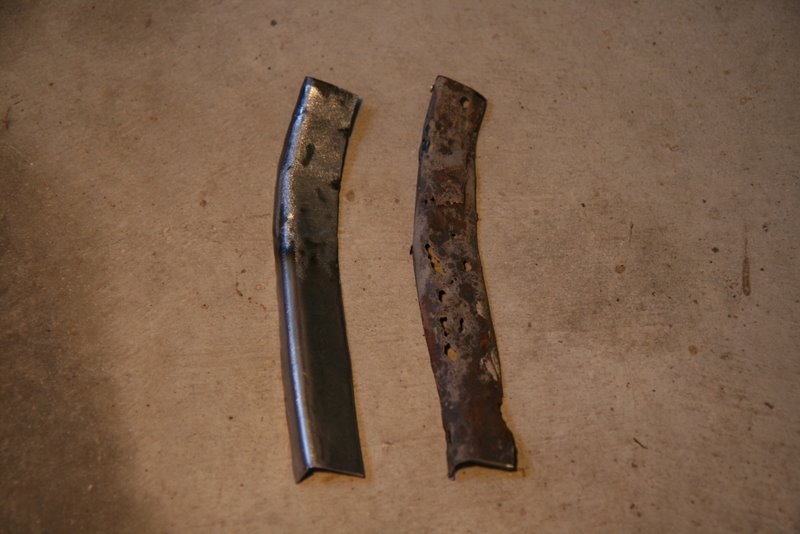
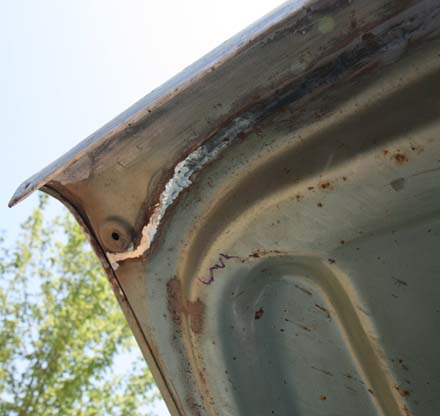
Next up was the "vestigial" tail fin of the driver side quarter. For whatever reason, the driver side rusted out. The passenger side is rust free. The previous repair involved pressing in the swiss cheese and filling it with body filler. Well, while that method happened to work well for over 20 years, I just had to grind away the filler and put in some good metal.
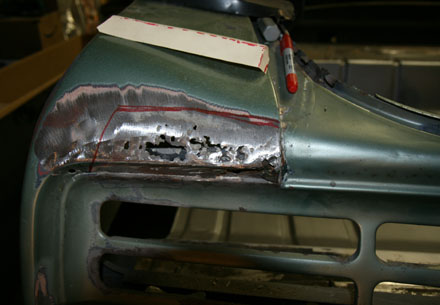
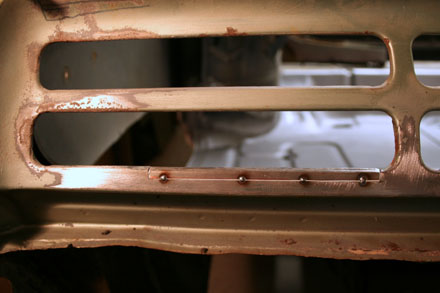
Below, the quarter panel rot was cut out. Also note the small patch I made to fix a small area on the tail panel. There were a few pinholes here, so I cut this out too and the patch is ready to be welded in. Note too the finished tail light opening in the lower right.
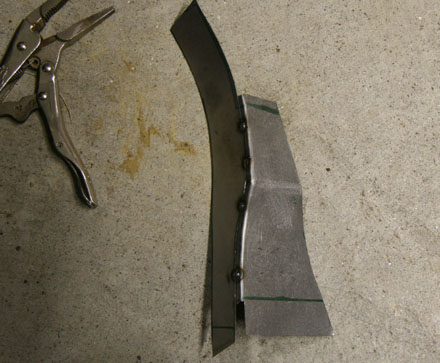
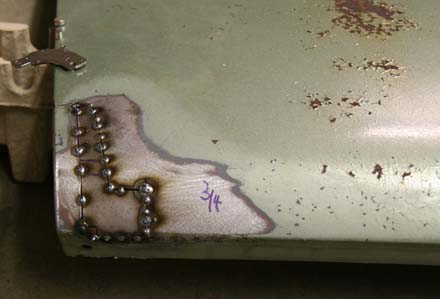
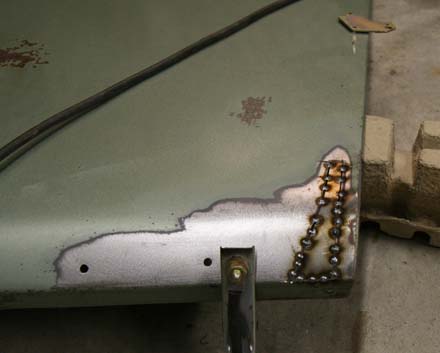
This quarter area has a complex set of curves and was tricky to make. I tired to hammer out a single piece with all the folds, but it couldn't be done. So I made a few slices, bent it all to shape, and then welded up the slices. I was very happy with the final piece.
Here's the final piece massaged into shape and the slices welded up.
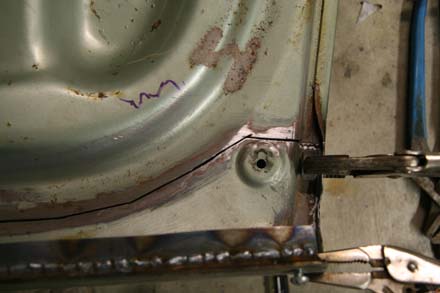
Here's the piece held into place with some magnets to test fit. I was pretty careful about checking fit-up so I made sure to install the trunk lid and check all clearances as well as the trim fit. The extra holes are for plug welding to the tail panel piece underneath. Two holes are all the way through and will remain for the hockey stick trim clips.
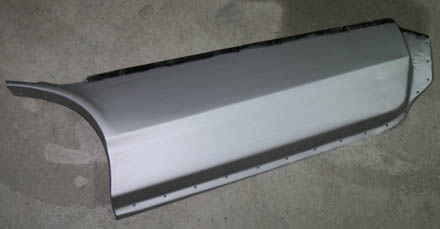
And finally here's the patch fully welded and ground down. There are some subtle bumps and ripples, but these will be addressed with a skim of filler. Click for a bigger picture.
Convertible Gutter
Now moving on to the convertible "gutter". This small area was rusted out when I bought the car. I didn't notice it when I bought the car because this area is normally hidden by the top well cover. This rust was also odd in that the driver side rusted out, but the passenger side is completely solid. Here it is with a donor gutter section from an A-body Oldsmobile.
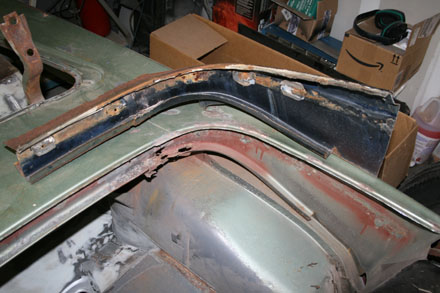
This area is where two pieces shaped like a "gutter" overlap and were spot welded together and covered with seam sealer. Underneath there is a very thick gauge piece on the left. Thankfully all that is in perfect shape. So I only ended up cutting out the "U" shape gutter part.
I carefully cut away at the donor piece until it fit nicely into the void. The donor part itself needs sandblasting to get the old paint and residue seam sealer off. So welding this in will have to wait until sandblasting-friendly warmer weather comes.

March 2010
Work was stopped for some home repair, but that's done. The weather has cooperated, and I managed to sandblast the gutter and weld it in. Ahhh, nice. Still need to weld the two holes in the bottom of the gutter on the left to simulate spot welds.
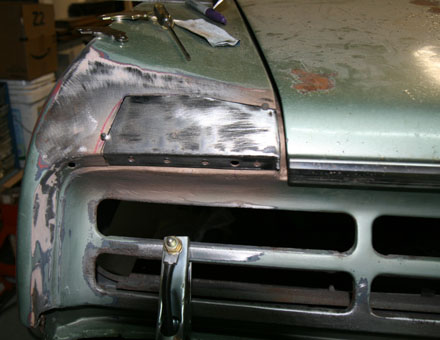
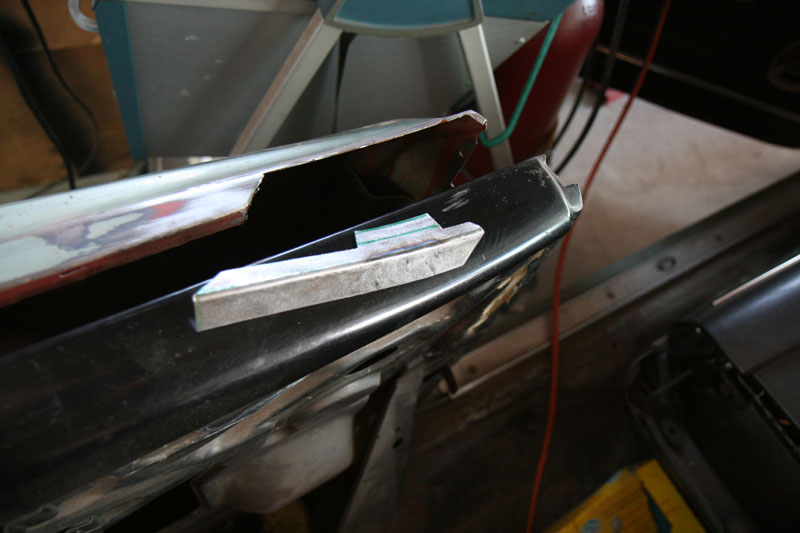
Quarter window ledge reveals
The sections of the quarter panel underneath the stainless quarter reveal trim by the quarter windows is rotted. On convertibles, there is a "L" shape welded underneath for strength but moisture collects between the sandwich and rusts. The repair from long ago involved fiberglass and again, the job was good, but I cut it out to repair with metal.
Starting to cut it off:

Here's the start of the patch, an "L" shape, but it's still got no "swoop":
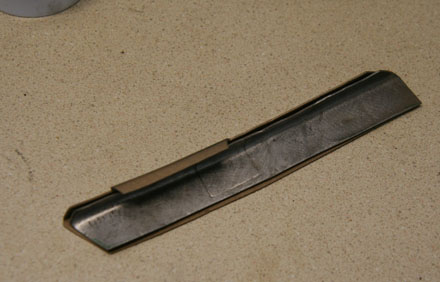
Instead of mangling the metal to put in the swoop at the forward end, I decided to use the same tactic used earlier, the slice and weld technique. I made some slices and bent the swoop into the patch. The slices then had a nice gap on the ends, but toward the top they closed to a point. I used my snips to cut the gap all the way to the top for a good weld.
Next to weld up the slices:
Next up grind the welds down and smooth 'em:
April 25, 2010
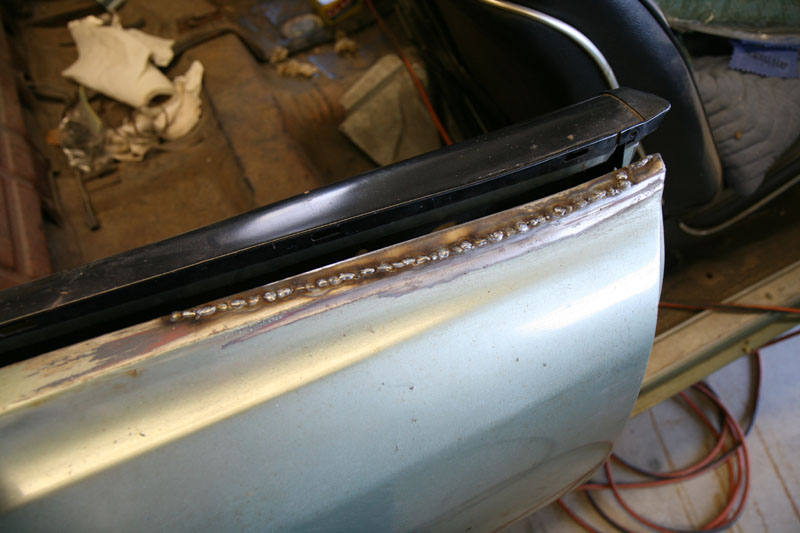
April has been the most productive month ever spent on the GTO. I got alot of metal work done. But first, here's the completion of the quarter window reveals that were started in March:
The driver side piece shown above was trimmed and the outer side was bent up to fit. I also added the inside "L" shape strengthening piece. Here is it ready to be welded up.
Here it's shown held on with magnets for a test fit.

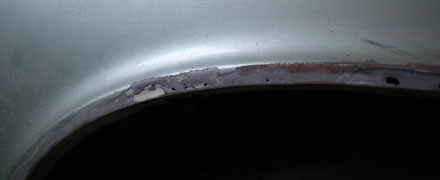
Shown next is the passenger side which was a bit bigger. It's welded in but not ground down yet.
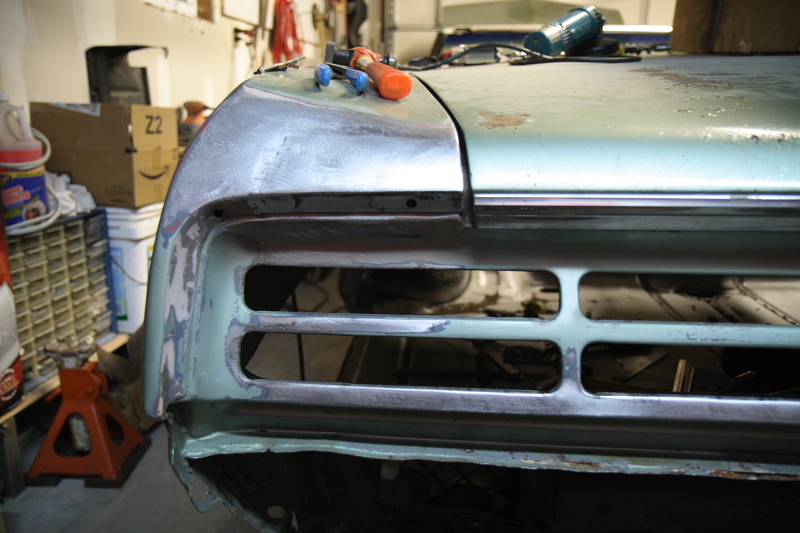
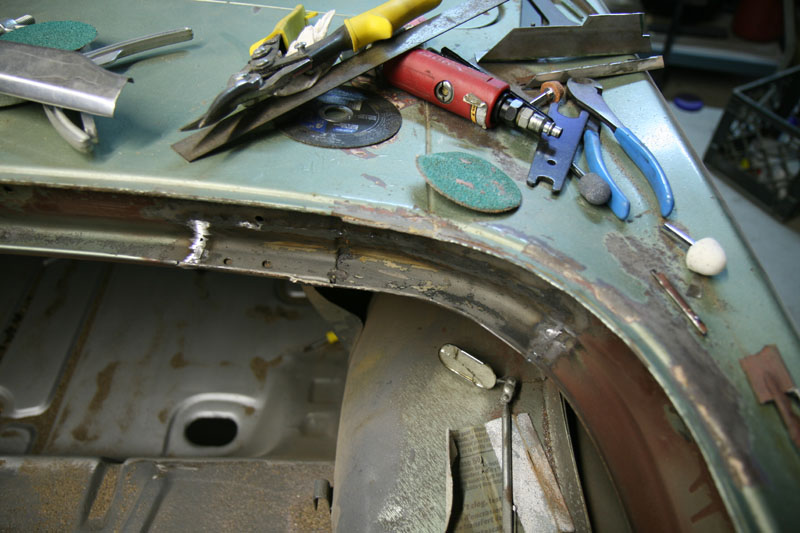
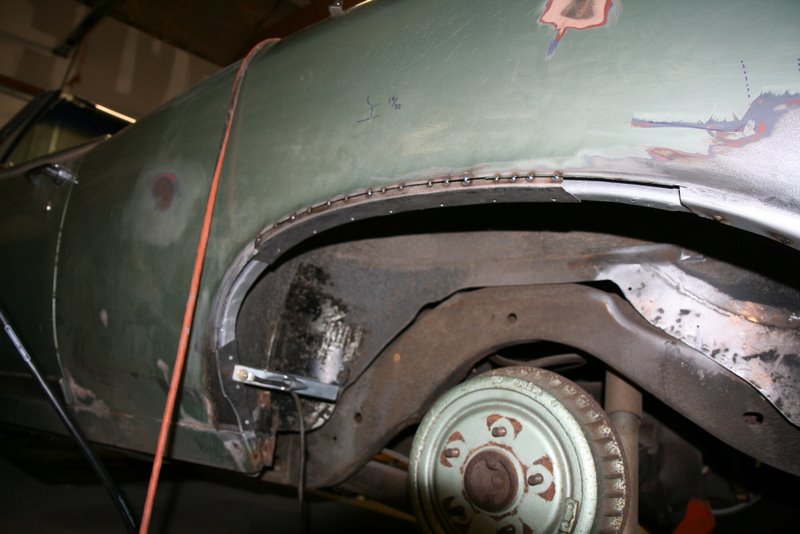
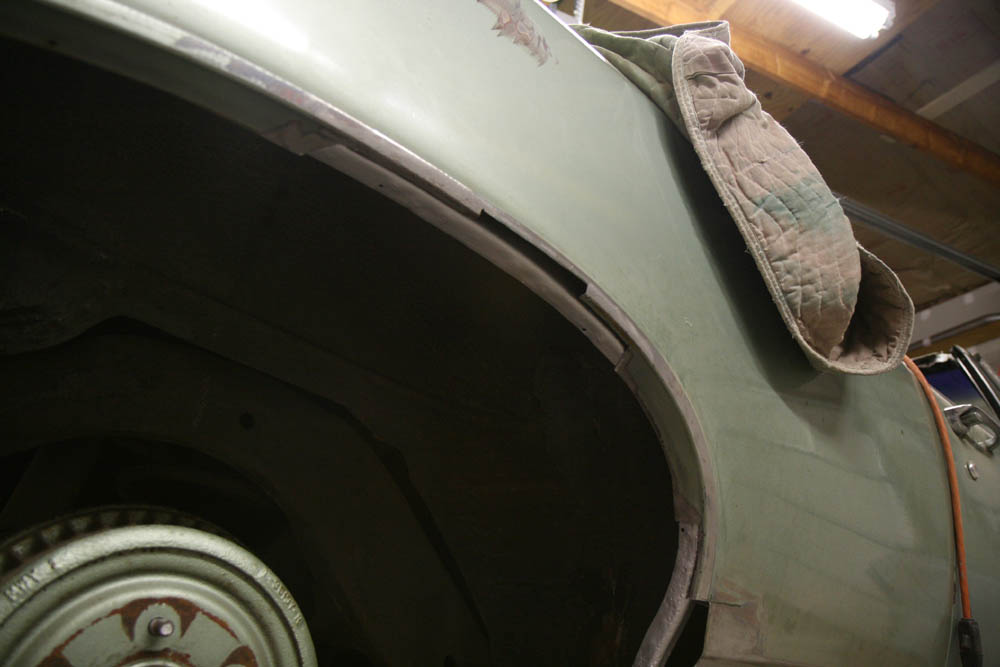
Rear Quarter Wheel Openings
June 5, 2010
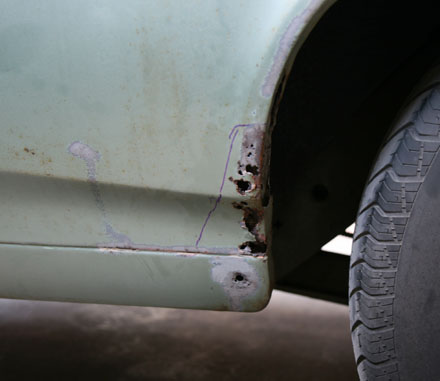
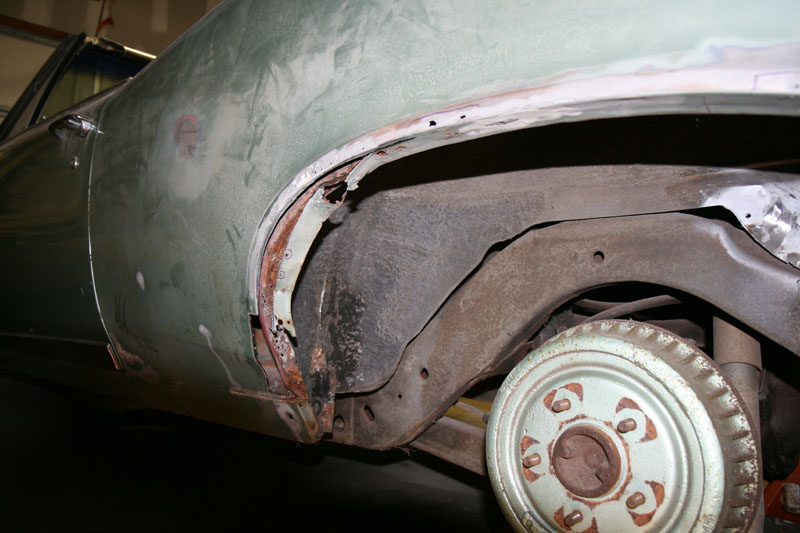
With the quarter reveals done, it was time to move onto the quarter panel wheel openings. During the body survey I did 6 years ago, I thought that the wheel lips on both sides of the car were in good shape and salvagable. But after poking here and there, and sandblasting here and there, I found that things were actually worse than I thought. The worst side is the driver side with pin-holes pretty much all along the edge.
Thankfully, the pits and holes don't get near the top part of the flare.
The front edge of the opening was pretty damaged however. This area was covered with a skim of filler from the 70's resto.
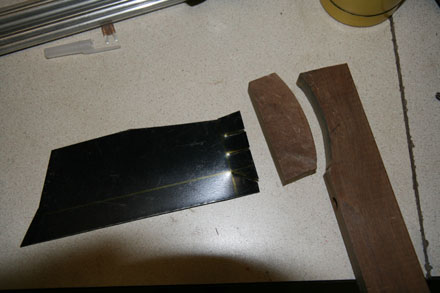
When I first started all this work in 2004, suppliers said that complete quarter panels were only months from being released, but 6 years later no quarter panels. So, since forming sheet metal is kinda fun after all, I fired up my jigsaw, made some wood forms and fabbed up some patches myself.
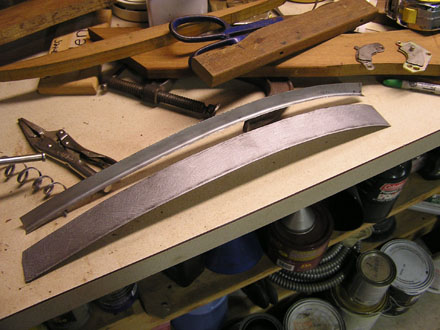
For the most part, the cheesy areas and pinholes confined themselves to very small regions, so patches small and managable. But still, it turns out the complete drivers wheel lip had to be replaced. I started at the front.
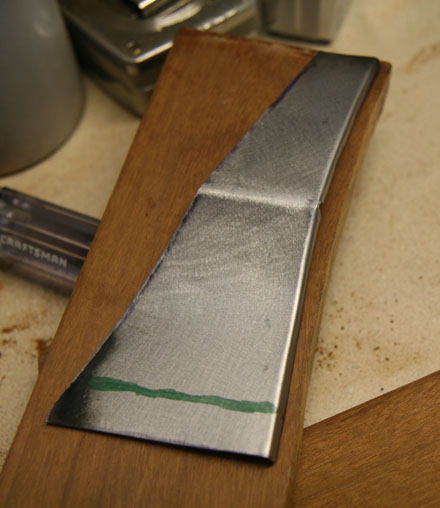
First, I made a cardboard template, then formed a 2 dimensional wood form to follow the front wheel opening. I cut out a piece of flat sheet metal to the approximate size shown with the purple marker above, then put it onto my 2D form and beat over a lip about 1/4 inch. I snipped a small "V" into the lip where the accent was to go, then bent the accent. With such a small lip, I could then form the concave curve below the accent and the convex curve above.
The next thing was to snug it onto the surface of the quarter panel and then fab up the rest of the inside lip flange. Here's the passenger side shown being done. (Both sides needed the same work)
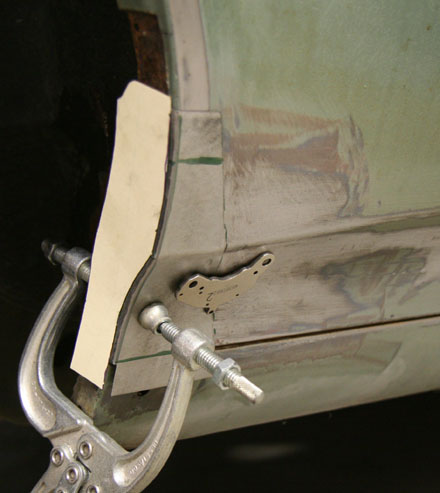
The steel was cut out and clamped into place so it could be tacked onto the main patch.
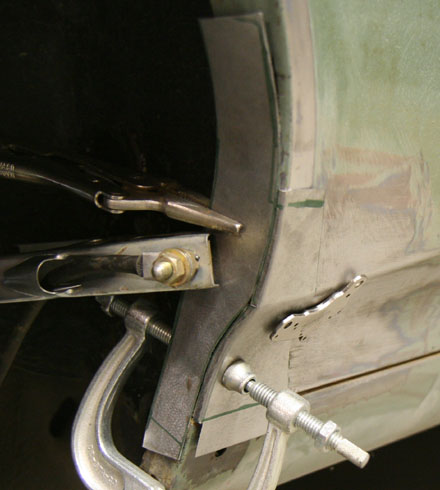
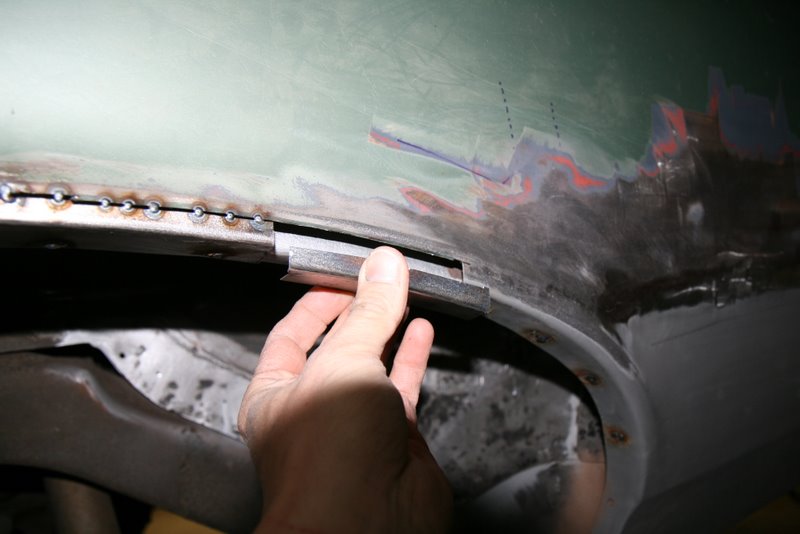
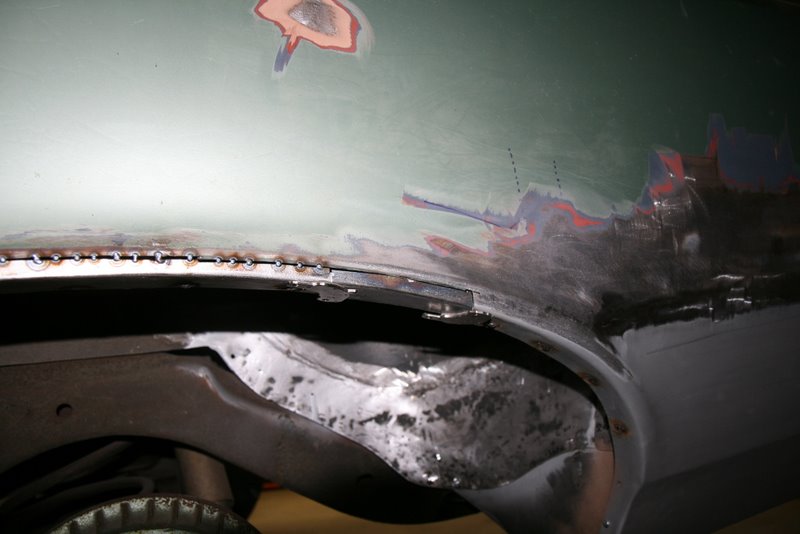
The piece was then finished welded and ground down. Here's the driver side being fit.

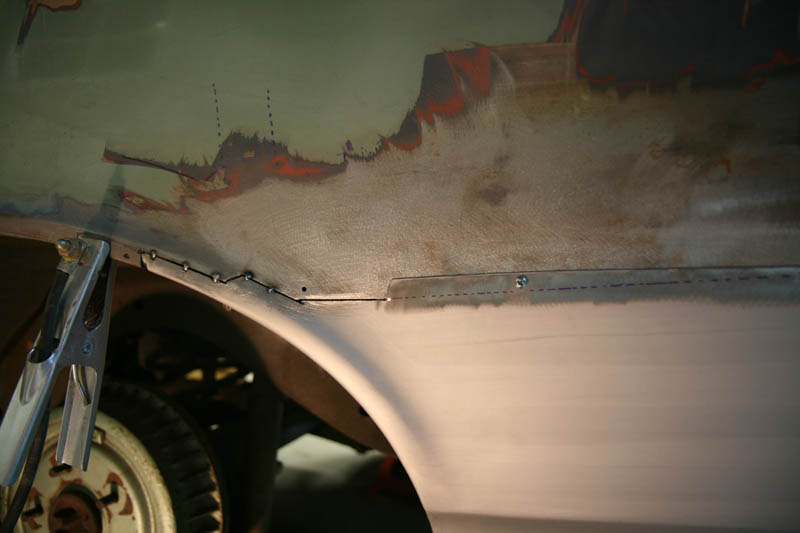
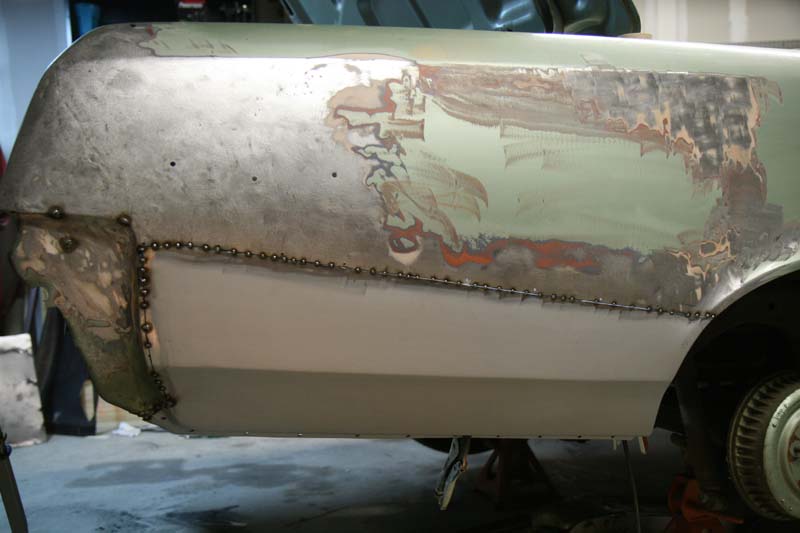
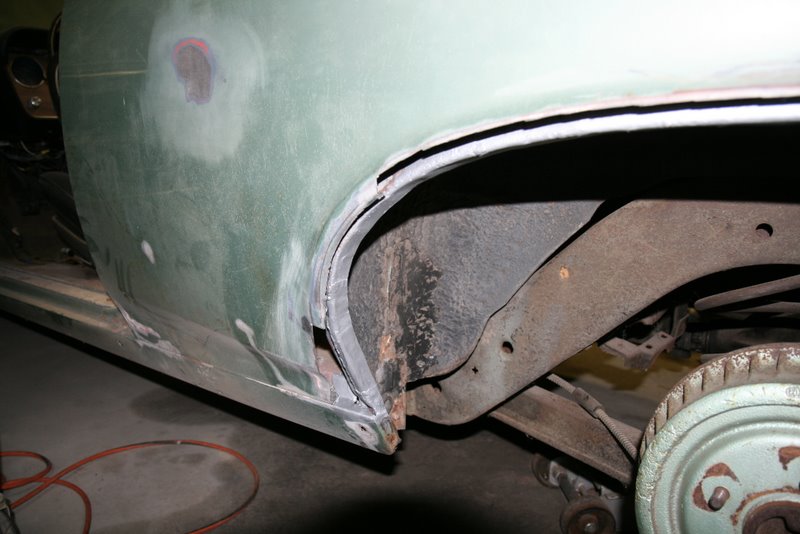
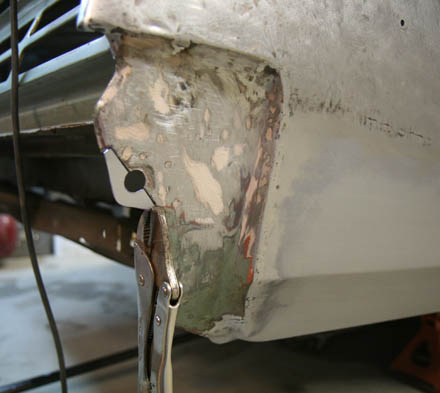
Rear quarter panel patches
Since the driver side quarter panel lip would have to be cut out, there was danger the quarter would get too floppy from being separated from the inside wheel well flange. So I decided to finally install the large rear patch panel to tie the quarter to the wheel well opening in the back.
The large panel was sheet-metal-screwed to the quarter with about a 3/4 inch overlap. I then began slicing through the sheet metal sandwich at the wheel opening joint. This was tacked at the front and then I proceeded to slice and tack toward the back in about 6" increments. I peeled away the waste metal as I went. I cut off a few inches of the patch at the top as I didn't need to go up that high for repair. These rear patches are pretty accurate, although the wheel lip edge is a little "soft" compared to the sharper original edge.
This next shot below is of the passenger side. Same deal here too...I started at the front and cut through the patch and original metal with my 4" grinder with 0.040" cutoff blade. Then made sure the panels to be joined were flush with each other and tacked it.
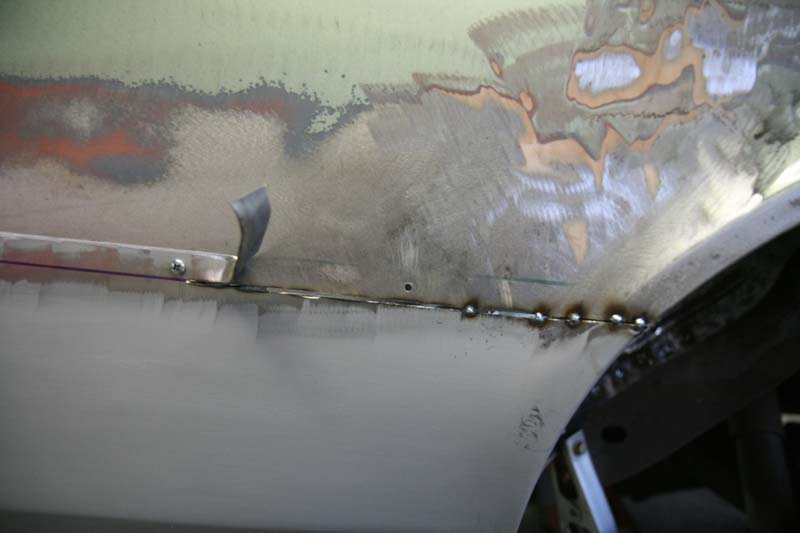
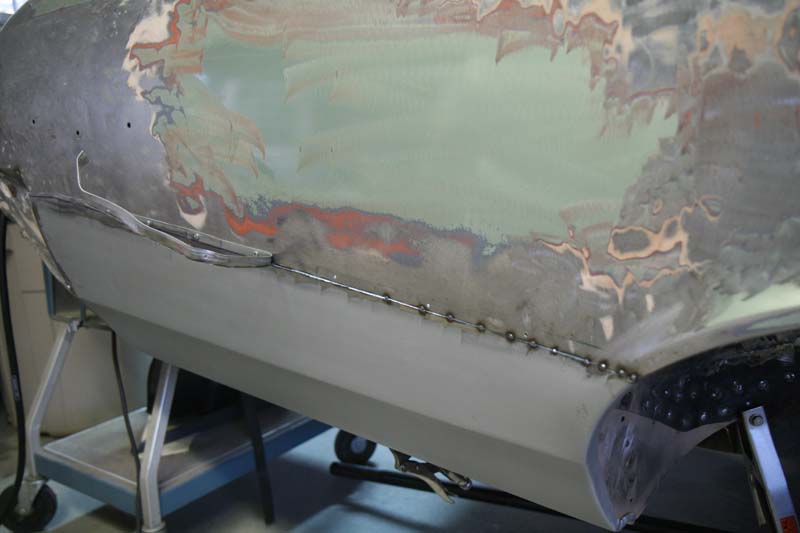

The panel is now completely tacked in, although I still need to weld the bottom edge. Also note that the rear of the panel over the bumper cutout has been smoothed with a hammer and dolly. This area was very wrinkled so I spent a while slowly teaching myself how to use these tools. I'm very pleased how it came out. It will require much less filler than before.
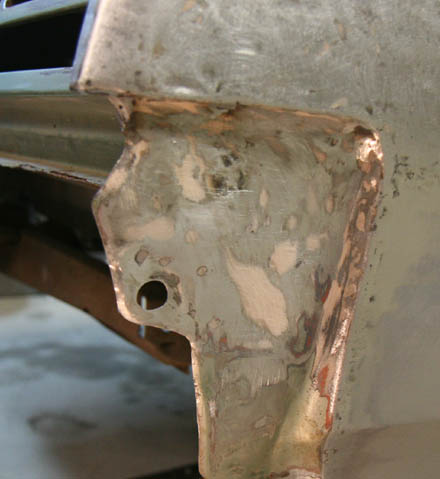
Driver side wheel lip
As mentioned before, the wheel lips ended up having pinholes which weren't noticed until sandblasting revealed them. The pinholes were sprinkled all over the driver side arch, but thankfully the holes were found in the flat area below the accent flare. This allowed a repair without needing Italian maestro coach maker metal skills.
First, I cut out the bad metal with various tools, mostly the angle grinder with cutoff wheel. I didn't drill out any spot welds; I just cut the sheet metal between them, then chiseled and twisted the old metal off.
The inner wheel well was remarkably in good shape, except for the front edge. So I cut it off as shown.

I made a piece and replaced it.
Here's the inner wheel well coated with Masterseries paint. This pic also shows how much edge I ended up replacing. There is a 6" section of the arch on the forward end that stayed, but even that needed the inside flange cut off where it is joined to the wheel well.
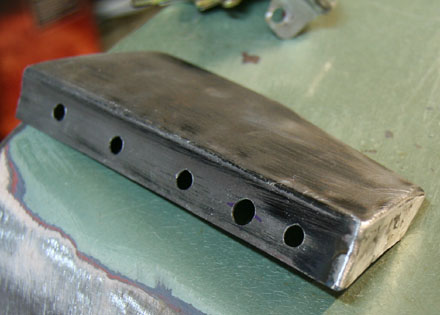
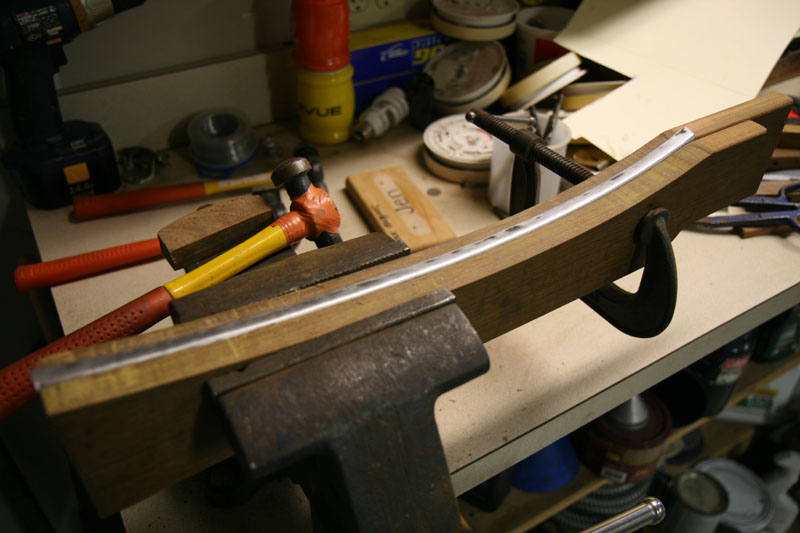
So I made more templates to trace the wheel opening shape, then made some more wood forms. I made two pieces with the same curve so the metal could be sandwiched between the wood. The lip is then easy to hammer over the edge of the wood when the "sandwich" is clamped in a vise.

The metal was put in between the wood forms, and the lip folded over to one side:
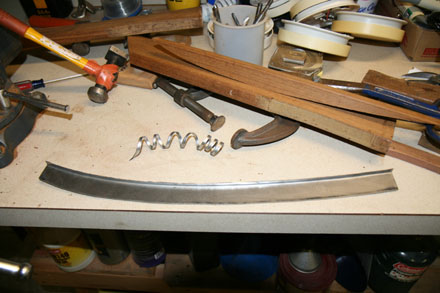
The piece was then fit to the car and the very slight curve on the ends toward the center of the car were put in by hand. I then fabbed up the large flange that gets welded to the inner wheel well flange.
The two were then stuck onto the car and tacked together, removed, finish welded, ground down, and then coated with the masterseries primer.

The newly tacked patch pieces were removed and fully welded, ground down and primed. The side of the patch was intentionally oversized and now ready for trimming to fit the missing metal. Nothing special about this; just careful trimming and checking until it fit nicely.
Before installation, large holes were drilled on the flange for plug welds to the wheel well flange. Here it is tacked onto the car.
I thought I could save a section of the lip between the large patch and the rear quarter panel patch, but it didn't cut the mustard. So I made a small patch to fill this void.
Here's what I ultimately had to remove on the passenger side wheel lip (in green marker also)
And in a case of OCD, I fixed the odd little feature that is hidden behind the bumper when installed. I would guess this tang was here for the factory to use when putting the car together. It was damaged at sometime in its life, so I repaired it.
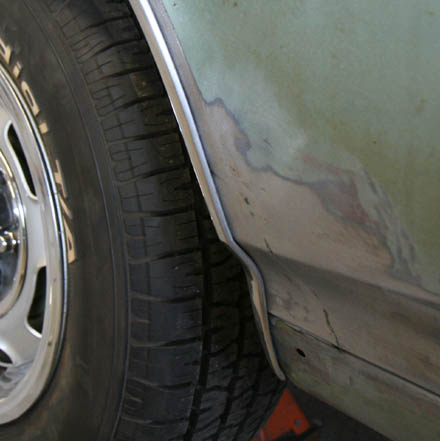
Once all the bits were tacked on, it was all stitch welded together. The welds were ground down and the wheel well trim was fit, and it fits like a glove....ahhhhhhhh.

As seen below, the trim sticks out a bit near the rocker. This was how the original quarter was as built in Baltimore in '67; the quarter hangs over the rocker slightly, so the trim sticks out a bit too. I duplicated it when patching because if I didn't, the patch would not have matched the lower part of the quarter as it goes toward the door. These cars were built somewhat sloppy.
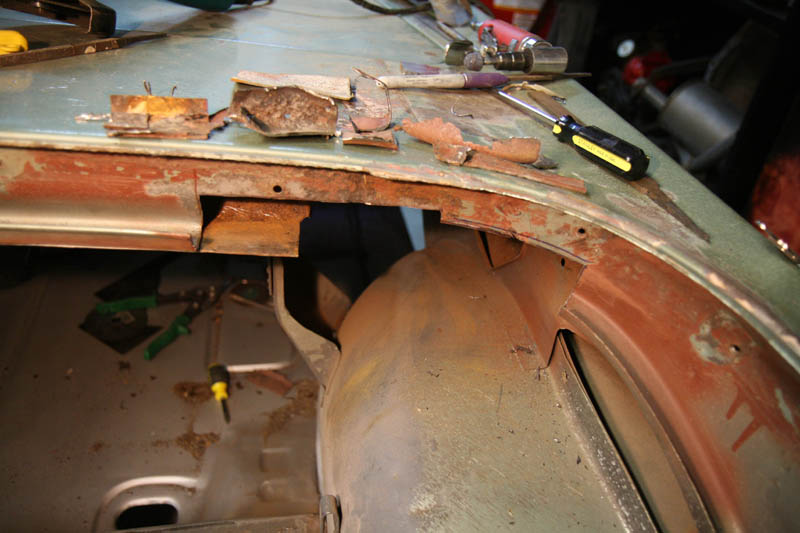
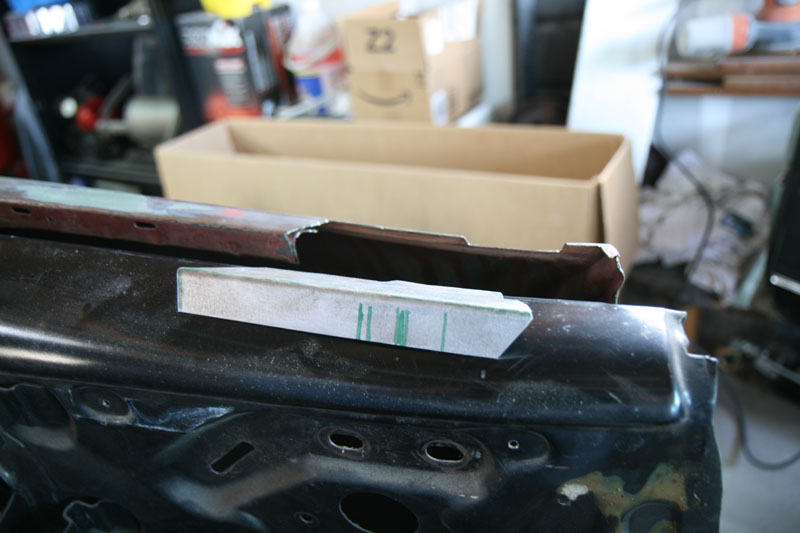
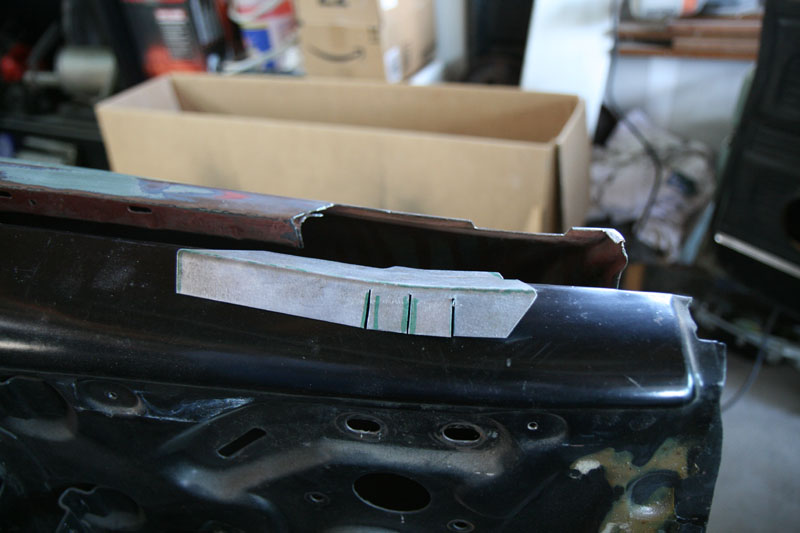
Trunk Lid Repair
June 30, 2010
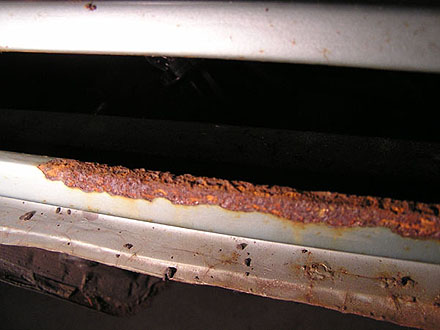
The 1967 GTO trunk lids are infamous for rusting at the corners. No wonder, since there isn't any paint or coatings on the insides where the skin and brace metal are sandwiched together. To tackle this problem, I went to the extreme of cutting the lid up.
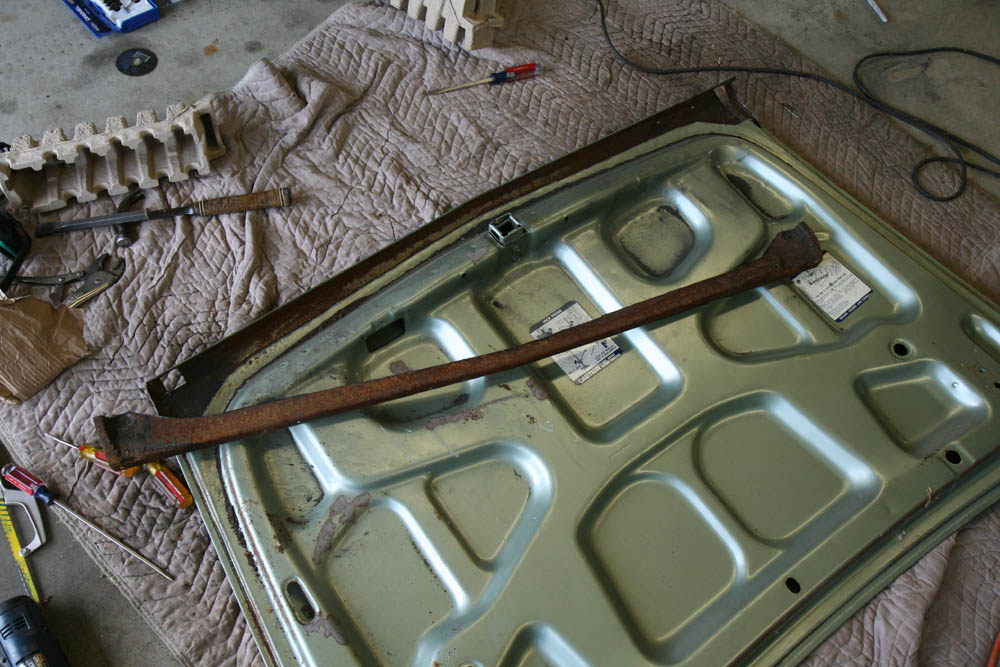
First I peeled the skin open at the back side edges. I then cut along the flat area that the trunk weatherstrip bears against. This would allow easier smoothing when welded back on.
When I removed the brace section, I noticed among the heavy rust pits there was still some bright bare steel showing. Geez if GM had just put some kind of coating on these areas....
I sandblasted everything and cut out the thin areas. Patches were fabbed and welded into place.
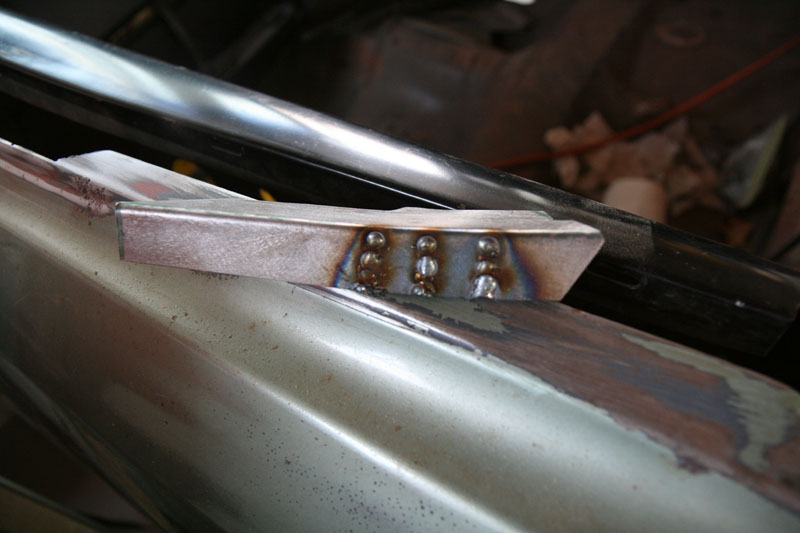
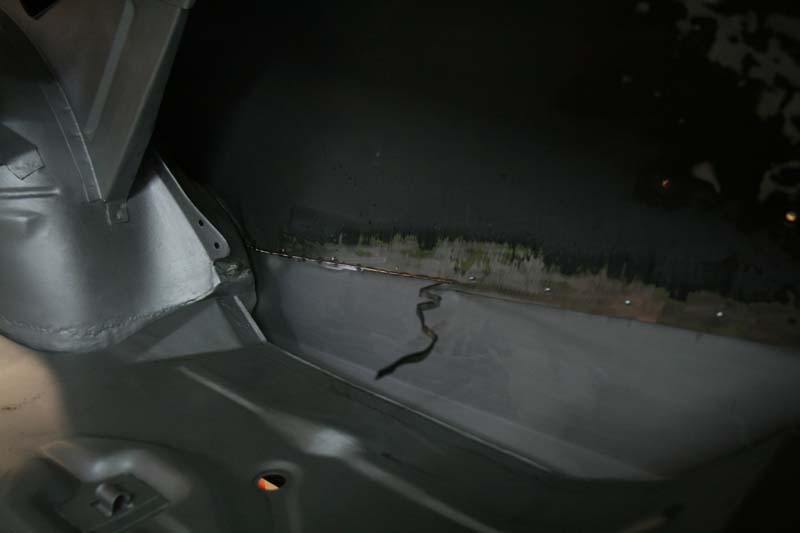
Everything was coated with the primer and I put the brace back on in preparation for welding it up. The skin was bent back down when the brace was welded in, but it cracked along the edges. I simply welded that up and ground it down. In the picture below, near the bottom, that's a new flap welded on ready to be folded over the brace.
Here it is all welded and ground down. Some more smoothing will be done and then some fine filler work and finishing.
To see more, please go to the next page: GTO Body Work Page 2
Or, go back to Home Page
SFS
Links:
Willys Jeep CJ3A Forum
There exists a nice set of webpages for CJ3A's. It's got a forum too that caters to both '3A's and CJ3B's. It's a great resource, and frequented by very knowledgible folks.
1967 GTO Original Owner
These two videos feature an original owner GTO. This car was featured in Hemmings Muscle Cars magazine a couple years ago. Part 2 has inside and outside shots of the owner driving the car. Very nicely done.
Blues Maker
"Mississippi" Fred McDowell. One of the great Bluesman. This is a documentary made in 1969.
Pinstripes
Pinstriping the ol' fashioned way. Pretty nice.
MGB Racecar
I've always liked MG's. Watch this MGB lift it's inside tire a few inches off the tarmac when going "'round the bend". Awesome.
Pepsi Throwback

Pepsi has put out a "limited edition Throwback" version of Pepsi with REAL sugar, instead of high fructose corn syrup which has been used since the 80's. Holy cow there IS a difference; it's WAY better. Find some quick!